To send an email newsletter, click the ‘+ Start’ button on the home screen (right side).

A pop-up will appear with the following options:
- Create a newsletter in a new campaign
- Start new selection
- Start selection based on template
- Continue with an existing campaign
Choose: ‘Create a newsletter in a new campaign’.

After clicking, you’ll see the following screen:

Enter the name and description of the newsletter and select a campaign. Optionally, you can add an external reference.
Once the newsletter is saved, the Newsletter Builder will open.
There are two options for designing a newsletter:
- Use an existing newsletter template
- Create your own newsletter

Create newsletter
Drag the Newsletter Block to the canvas. Double-click the block to open it.

Select your recipients, a template, and sender information.
-
Select recipients
In this step, you choose the target audience to send the newsletter to.
Note: You can only select audience lists created under General Settings > Ezines.
-
Select a template
Choose a template and apply the corresponding branding. Alternatively, you can skip the template and build your email using snippets.
Available templates can be found under ‘Select template’ > Template. You can search by typing the template name.
Under Branding, choose a style. These are pulled from General Settings > System > Brandings.
-
Sender information
Here, select the sender. Then, enter the subject line and optionally a preheader. Both the subject and preheader can be generated using the AI assistant. Click the AI icon next to the subject or preheader.
After completing these steps, click ‘Create Newsletter’.
You can also skip or change these steps later by clicking ‘Create Newsletter’ right away.
Newsletter editor
After clicking ‘Create Newsletter’, the newsletter will appear on the left. On the right, you’ll see the settings.
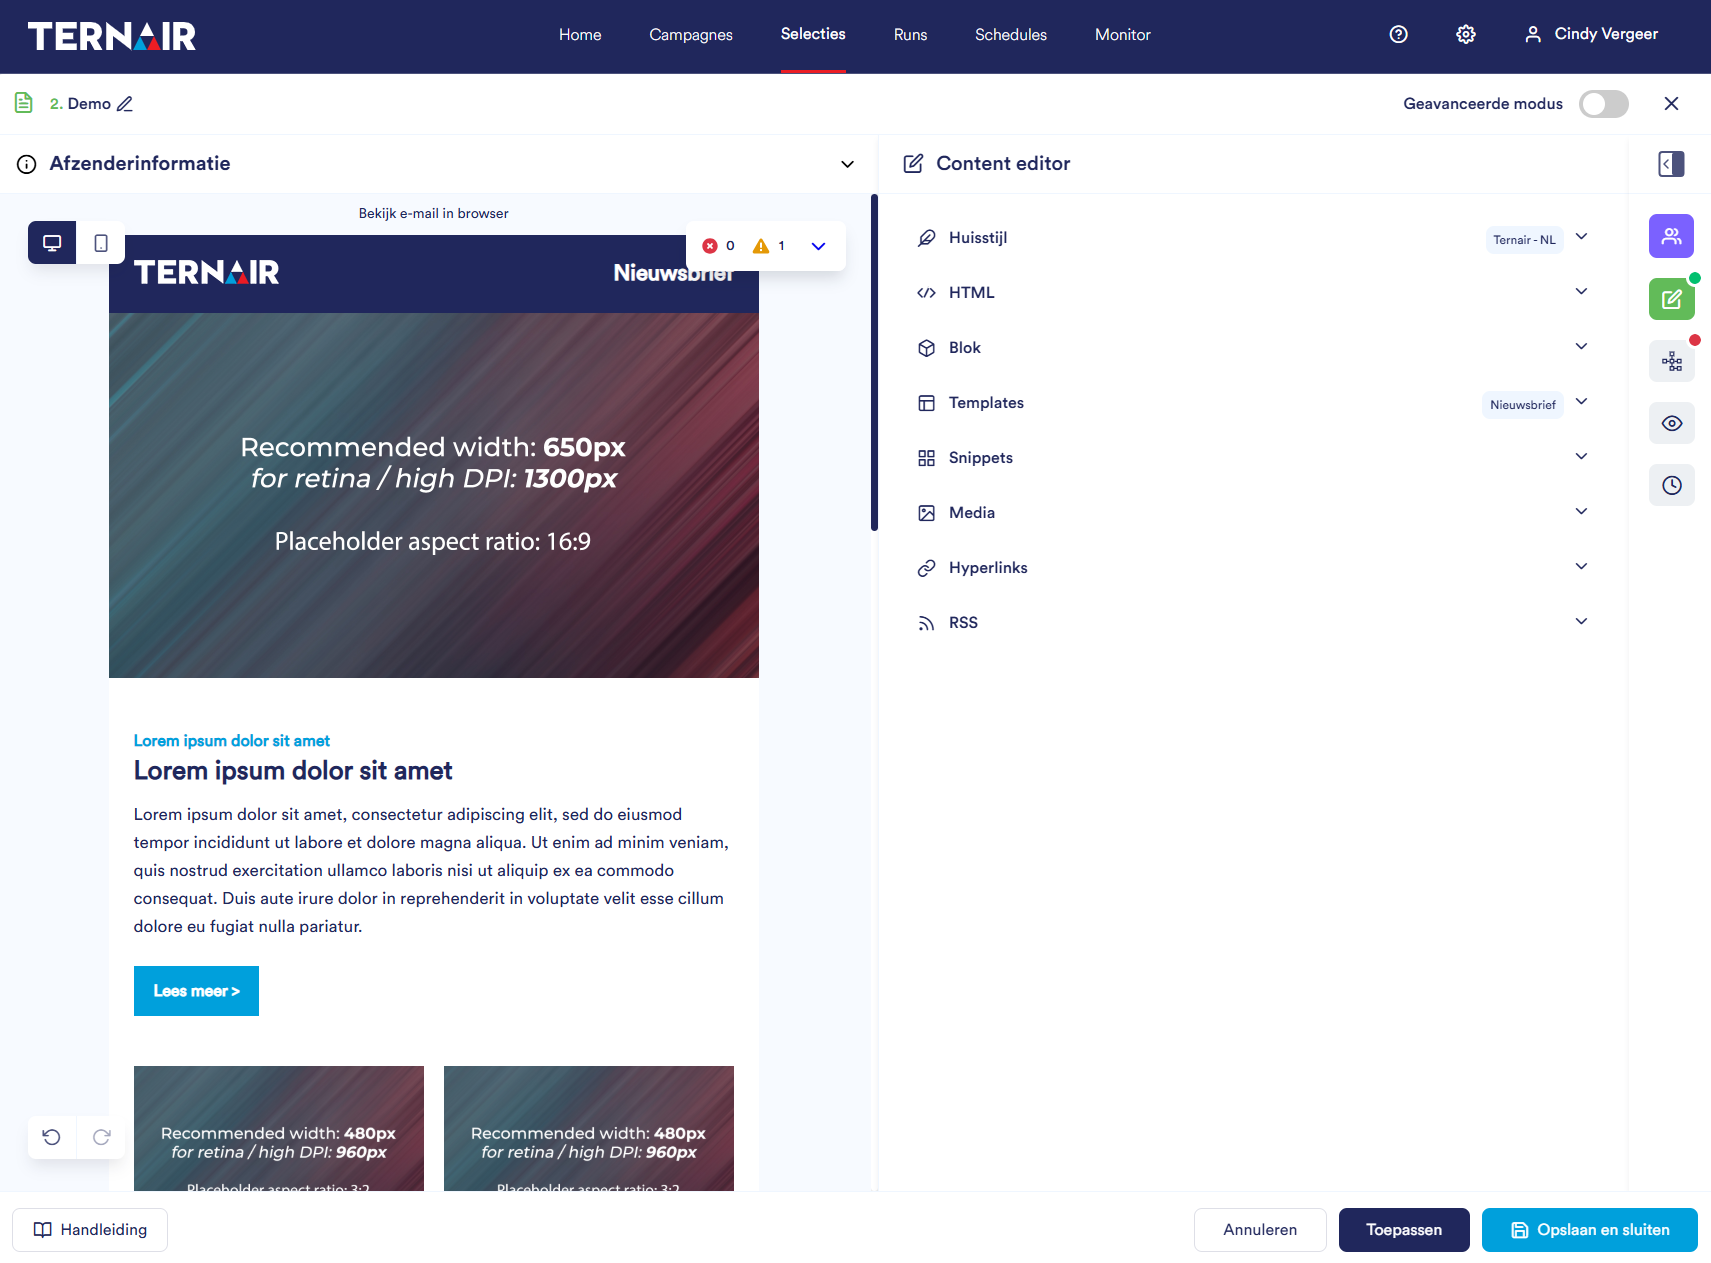
Newsletter overview
On the left (top to bottom):
Description
Optionally add a description.

Sender information
Displays the audience list, sender, subject, and optional preheader. This info can be edited here.
Sender info is collapsed by default.

Newsletter preview
Preview the newsletter. Click the ‘Desktop’ or ‘Mobile’ icon for respective views.
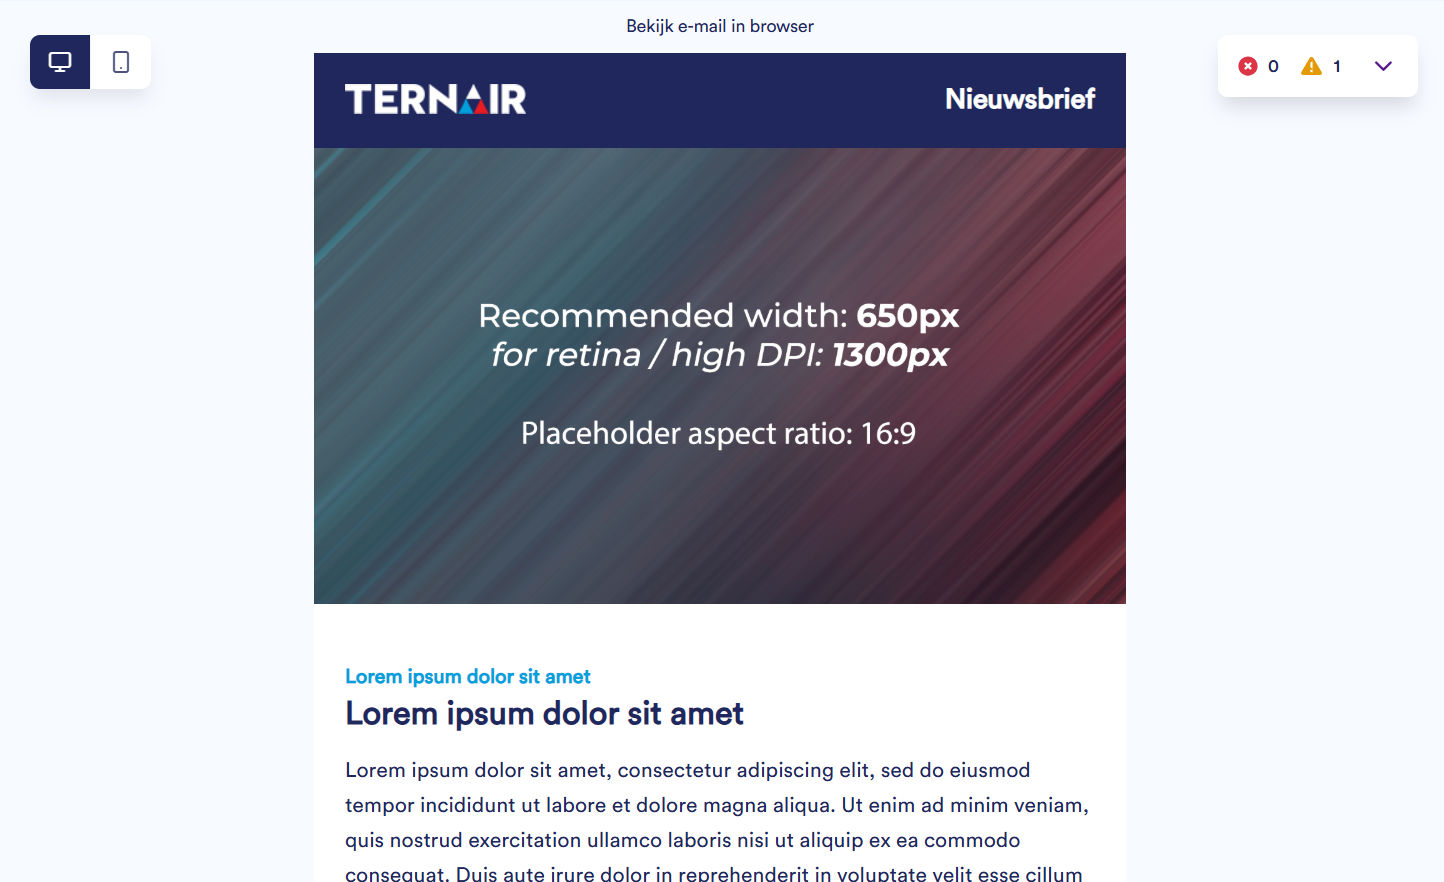
Errors & Warnings
In the center of the screen, two icons may appear:
-
Error: Missing hyperlinks – you cannot preview, test, or send.
-
Warning: Email can still be sent but contains issues.
Click the dropdown arrow to view details. Selecting a checkbox next to an error or warning takes you directly to it.
Settings
On the right side, you’ll see various icons. Each icon opens a settings tab:
| Icon | Option | Description |
 |
Choose recipients | Define/view recipient info (list, sender, subject, preheader) |
 |
Content editor | Design your newsletter |
 |
Mapping | Map fields to use in the newsletter |
 |
Preview and test | View and test your newsletter |
 |
Schedule and send | Schedule delivery by date and time |
By default, only icons are shown. Click the icon below to expand details.
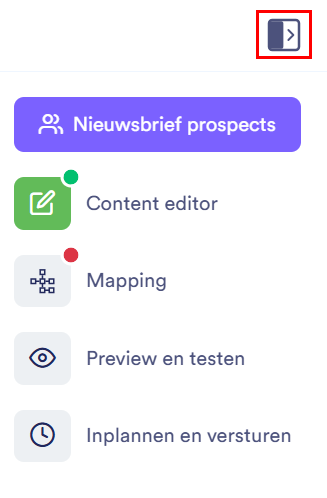
If you’re on a tab, its icon turns green. The audience icon is always purple.
The second and third icons show a red or green dot (if all fields are completed).
Red = action required. Green = all set.

If you tick ‘Advanced Mode’, you’ll get the option to save the newsletter block as a template.
Content editor
In the Content Editor, you design your newsletter.
You can:
- Use your own HTML
- Use an existing template
- Build a custom newsletter with snippets
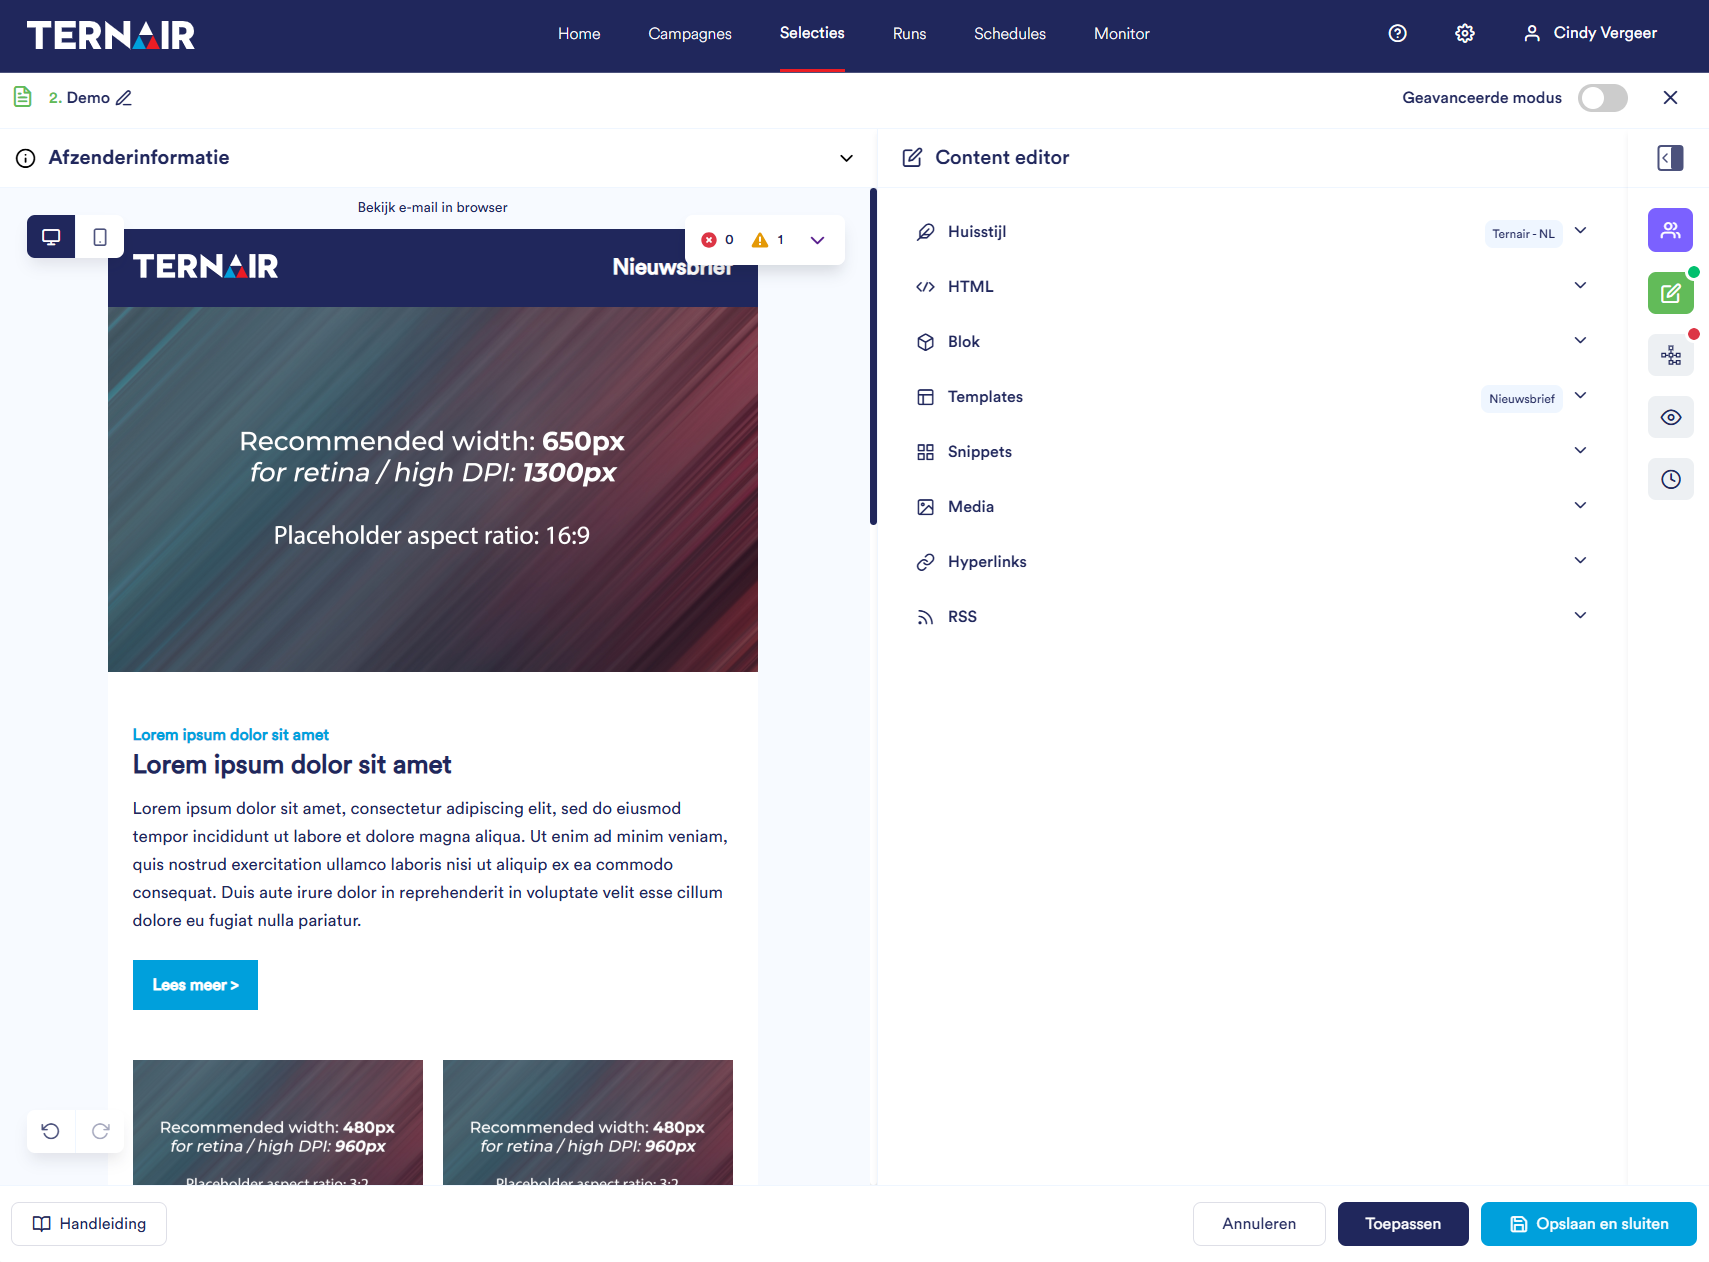
De Content editor bestaat uit verschillende onderdelen, namelijk:
| Icon | Option | Description |
 |
Theme | Displays selected theme. Empty if none selected. |
 |
HTML | View/edit newsletter HTML. |
 |
Block | Edit content. Click a block to edit. |
 |
Templates | Drag & drop a template to the canvas. Click the eye icon to preview. Search using the bar. Standard templates are marked with a globe icon. To switch, double-click a template to overwrite the current one. |
 |
Snippets | Build using drag & drop snippets. Preview with the eye icon. Standard snippets also marked with a globe icon. |
 |
Media | Manage media. View used images or upload new ones. |
 |
Hyperlinks | View all hyperlinks in the newsletter.
Tags & Trackers Wildcards |
 |
RSS |
You can include posts from an RSS feed if defined in the template or using RSS snippets.
|
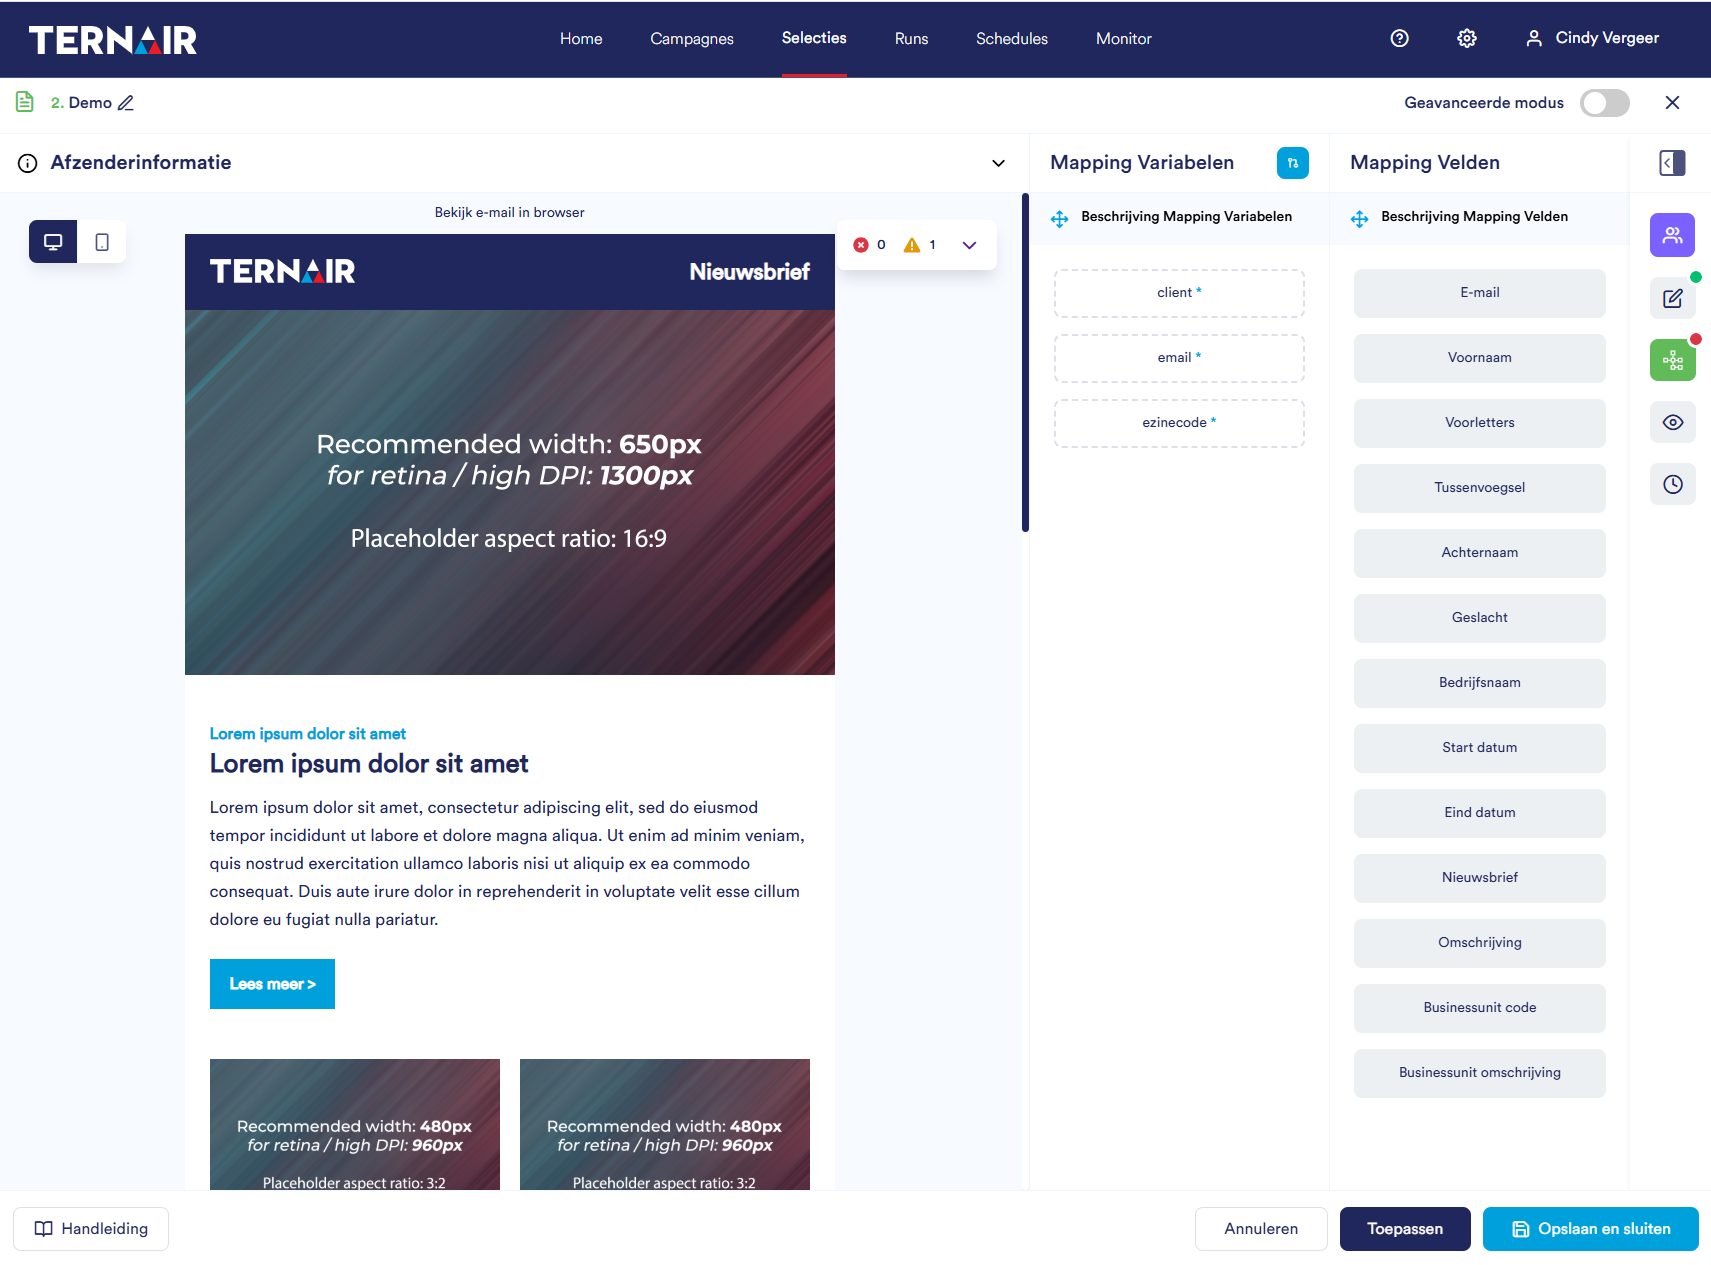
Mapping
All fields used in the newsletter must be mapped on the Mapping tab.
-
Left column: Mapping Variables – the fields to be mapped.
-
Right column: Mapping Fields – available fields to choose from.
Click the ‘Auto Mapping’ icon next to ‘Mapping Variables’ to map automatically.
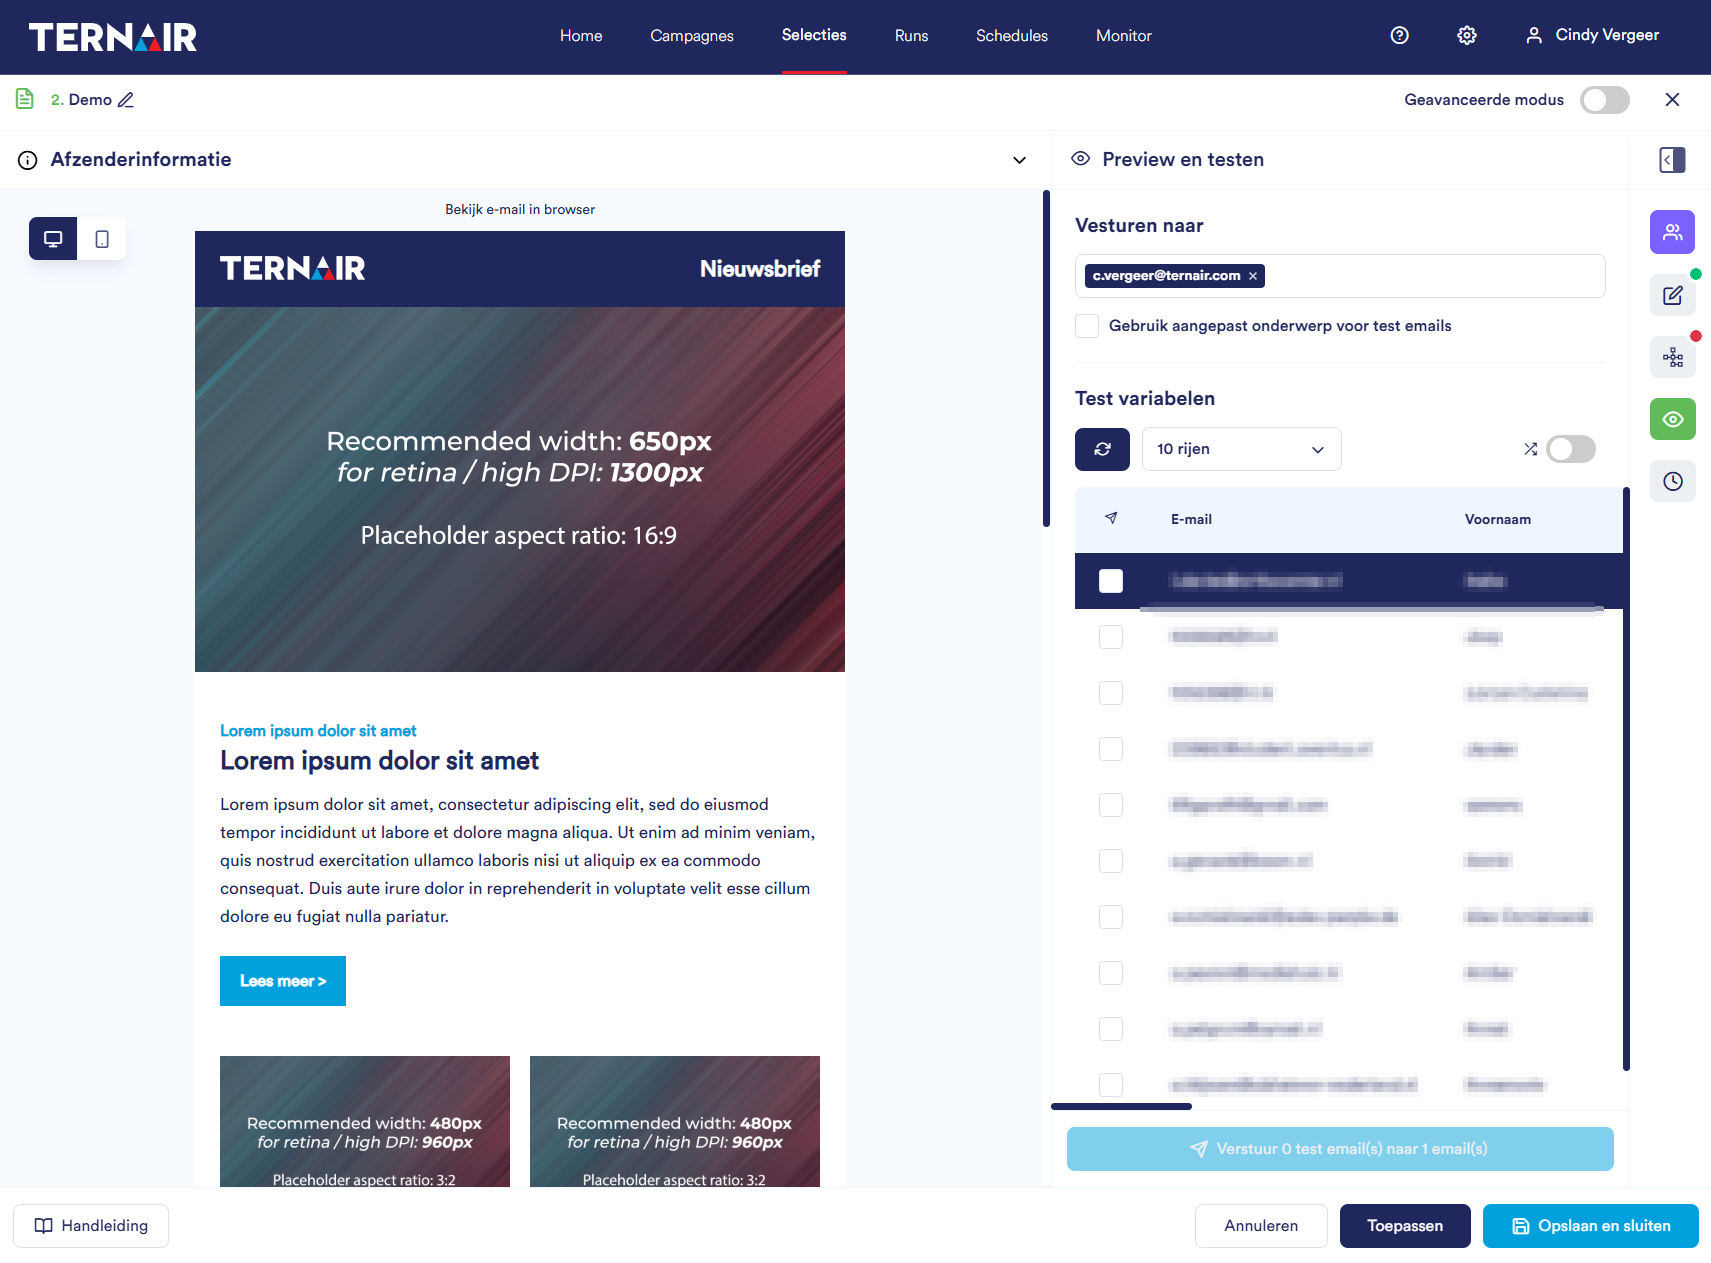
Preview and test
Under this tab, preview your newsletter and send test emails, optionally with a different subject line.
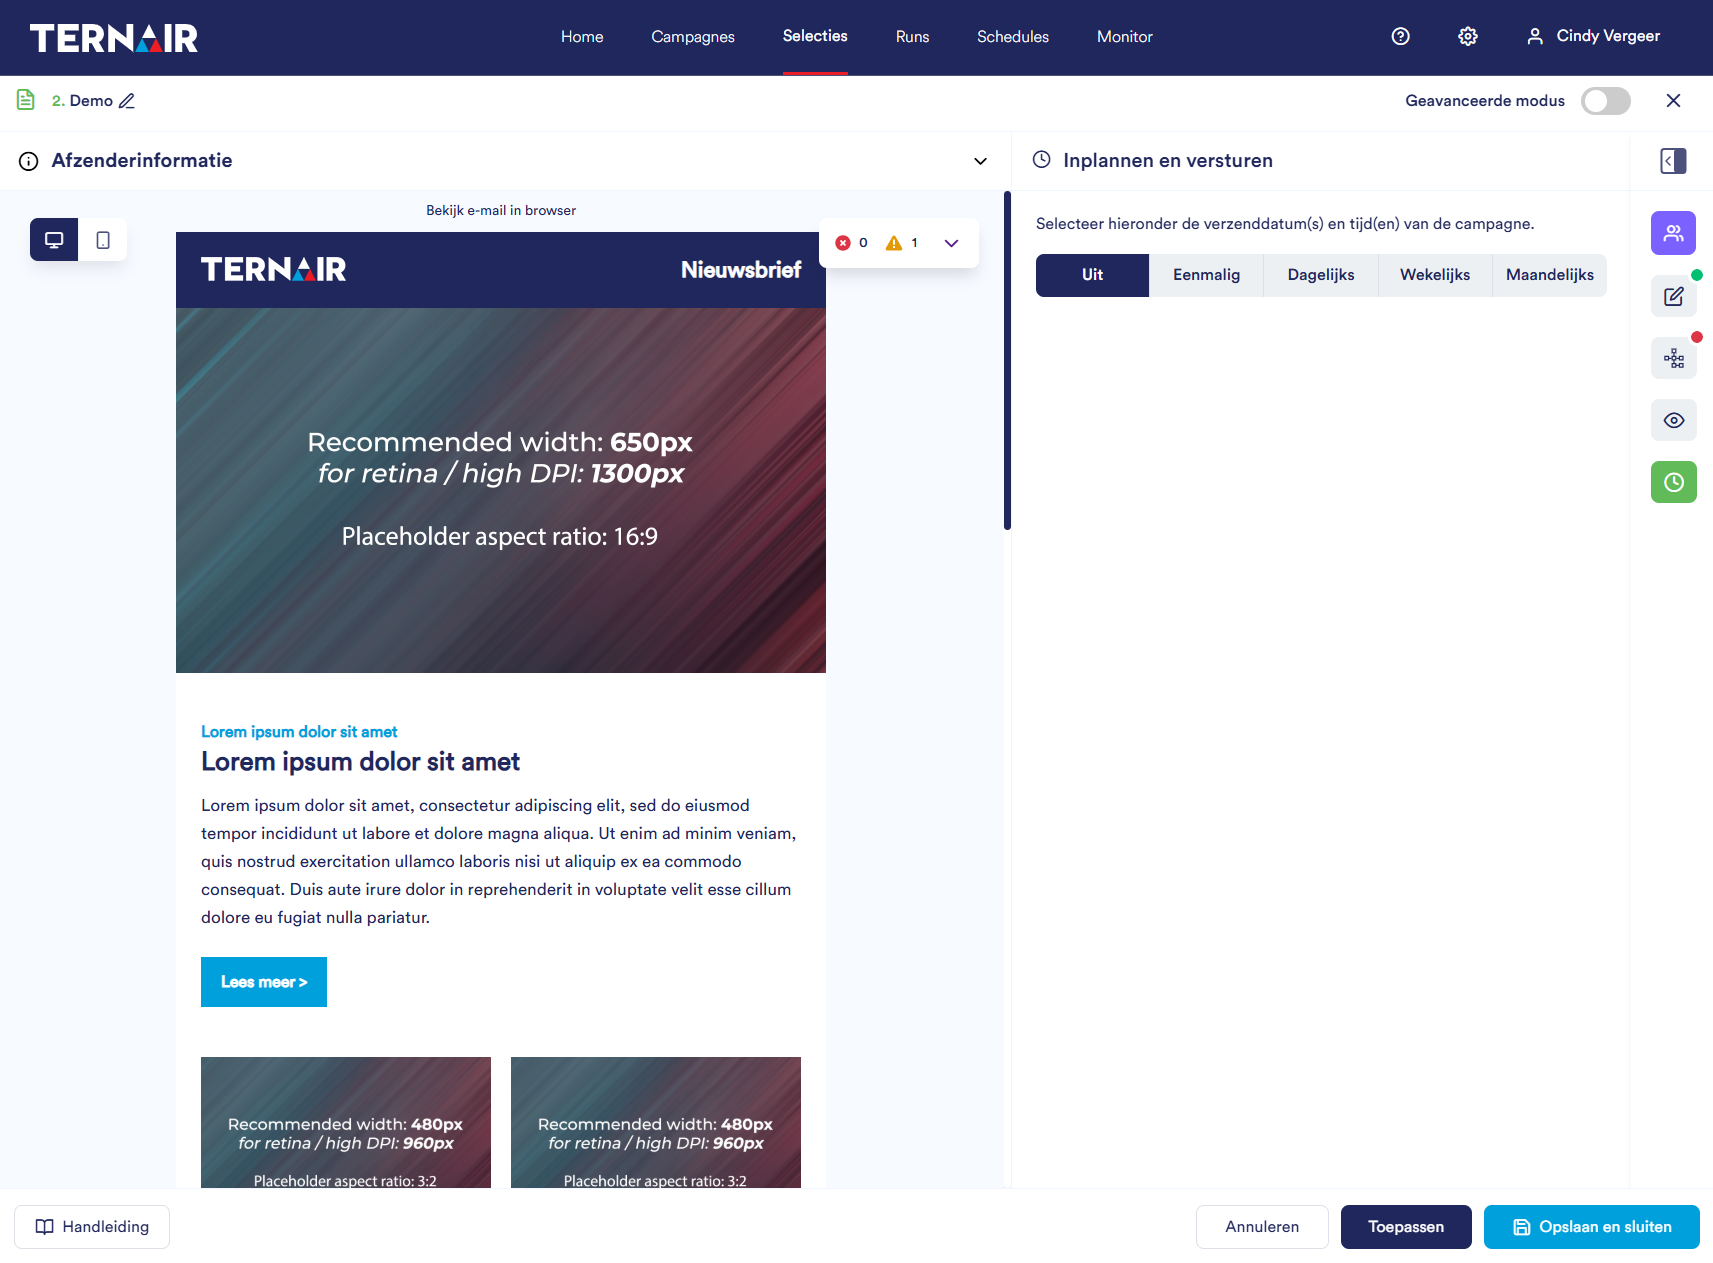
Schedule and send
Here, schedule (recurring or one-time) and send the newsletter at the desired date and time.
Select the desired schedule:
-
Off: Newsletter is not scheduled or sent
-
One-time: Sent once on a chosen date and time
-
Recurring: Sent on a schedule over a specific period
-
Multiple times per day
-
Daily
-
Weekly
-
Monthly
-
Note: For recurring sends, define the exact pattern.
Use template
If you select ‘Use a template’, a window will appear to choose a template.
After clicking the blue ‘Use this template’ button, the Newsletter Editor opens so you can edit the content.

Selection overview
In the selection overview, you can identify the type of selection by its icon.
The triangle icon indicates an existing selection.
The other icon represents a selection created via the newsletter wizard.