With the output function ‘Export’ the contents of a file can be drawn up and exported.
Drag an export block onto the worksheet. Connect the export block to one or more selection blocks.
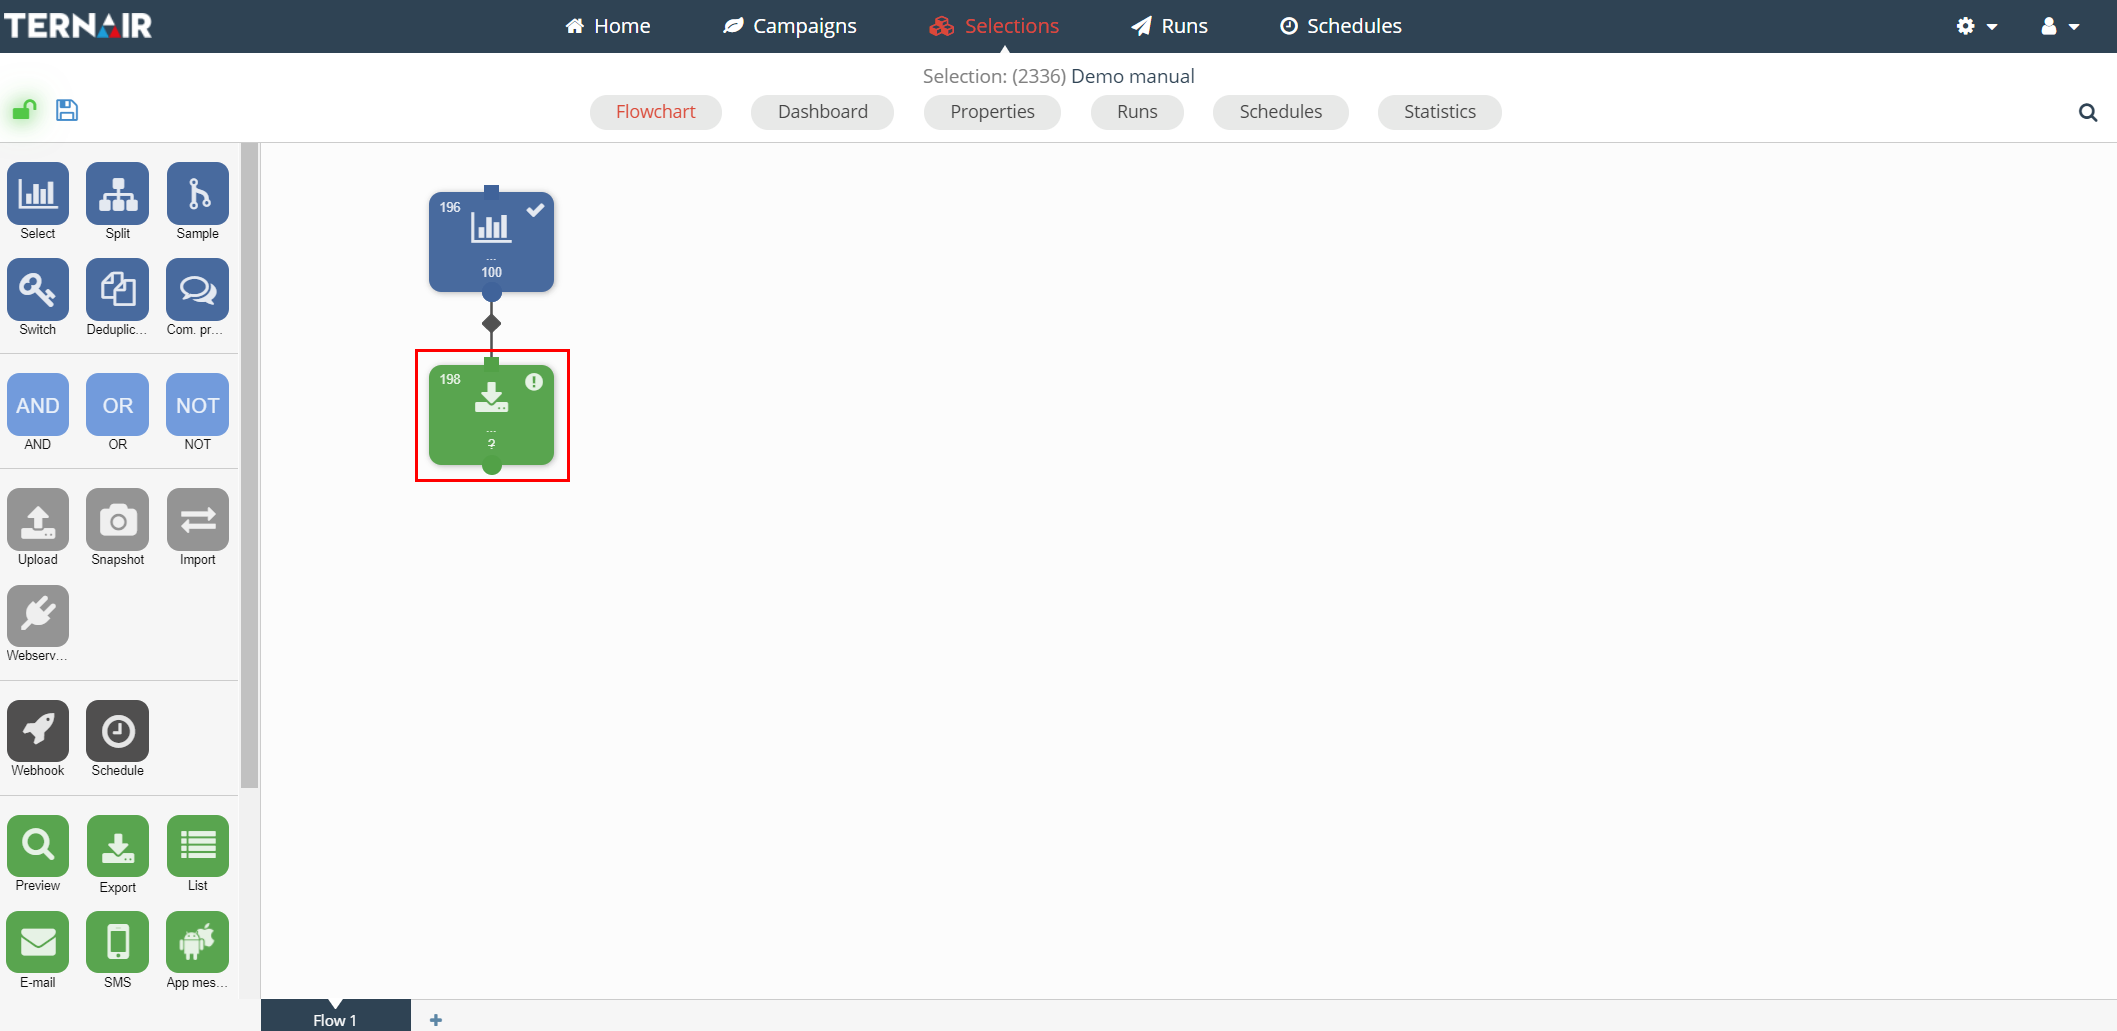
An export can only be made when a selection is saved.
Double click the export block to open the setting screen.
On the left hand side the preview of the export is displayed. On the right hand side the settings can be found.
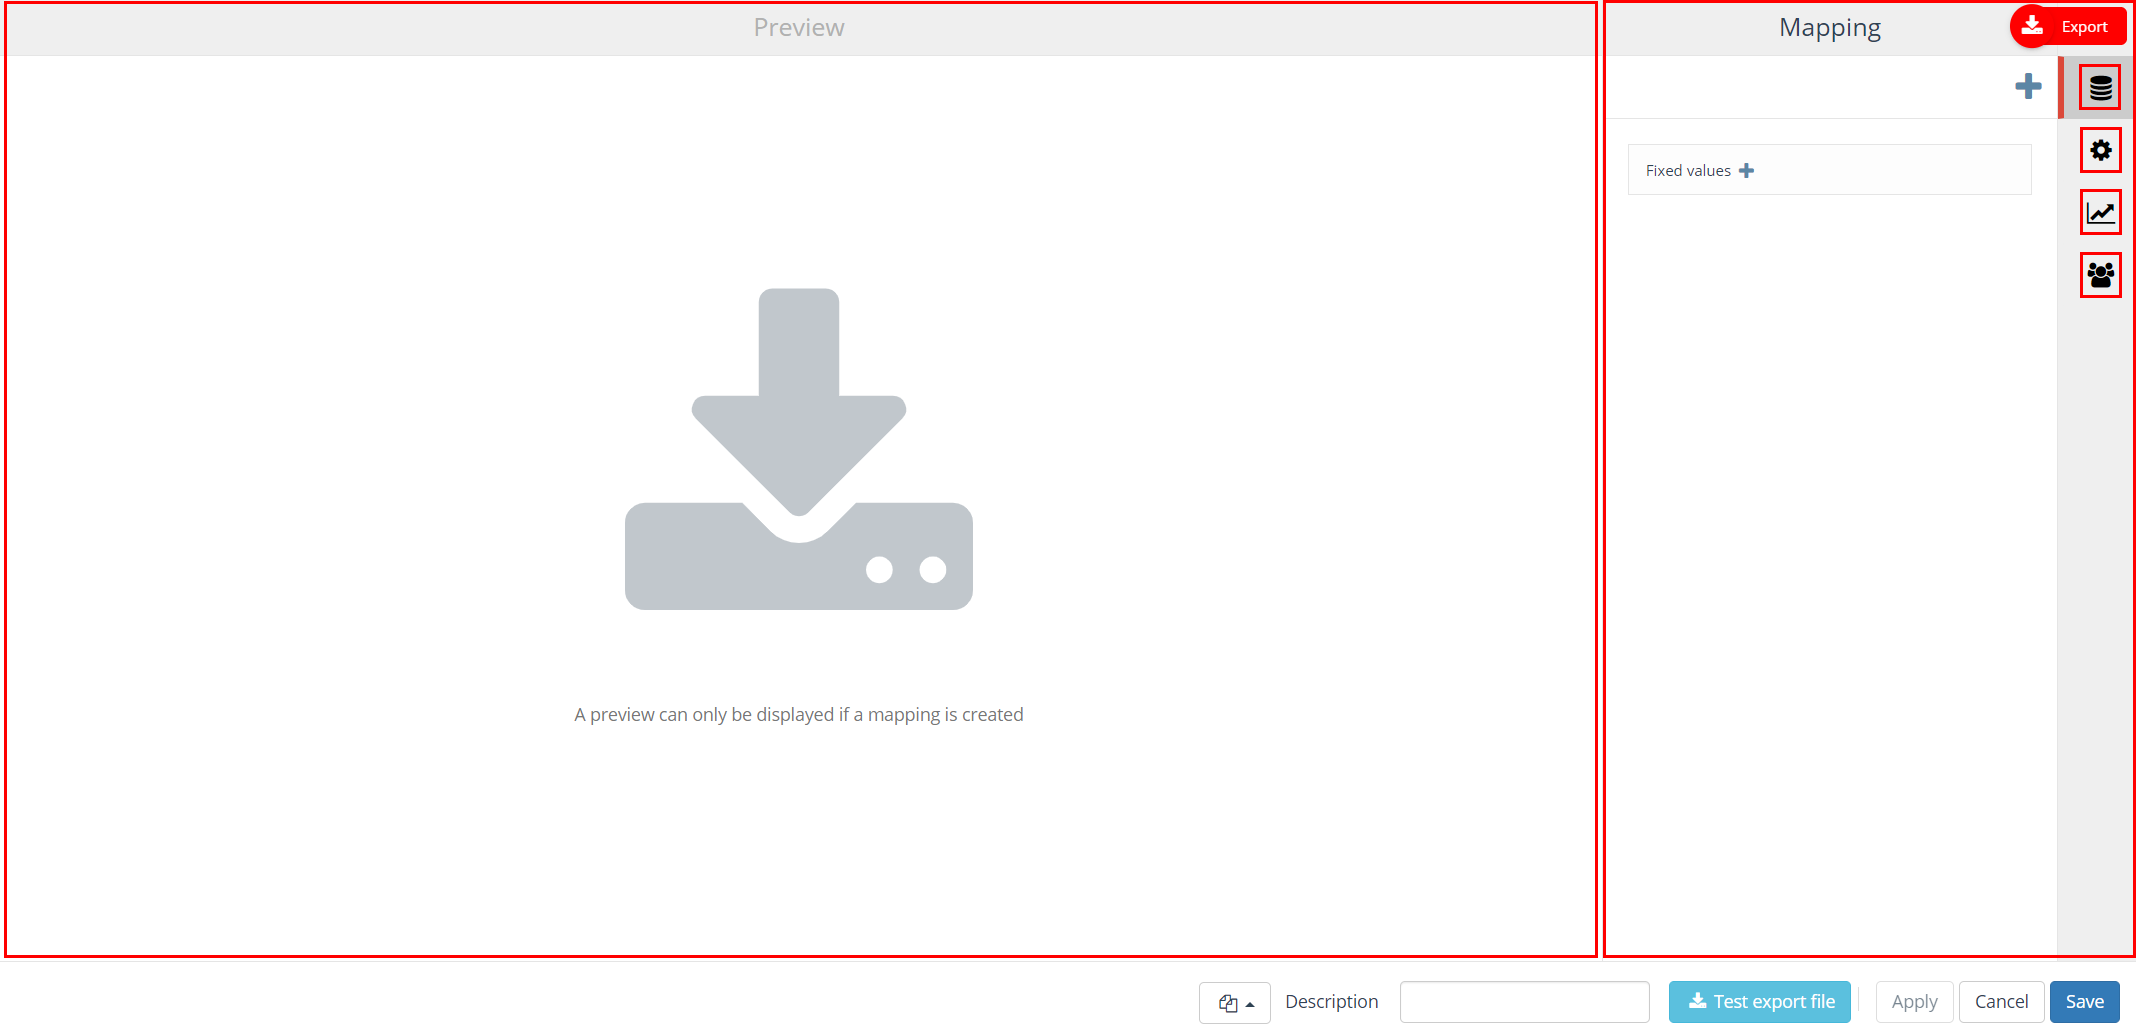
This section focuses on the following topics; each topic consists of a tab in the settings (right hand side) of an export block.
| Icon | Tab | Description |
| Mapping | What data is included in the export and in which order is it shown | |
| Settings | Define where the output should be exported to | |
| Distribution | Select the required export method | |
| Contacts | Create contacts of the records in the export |
Filling out the mapping, settings and distribution tabs is mandatory, creating contacts is optional.
Apart from these topics the Preview (left hand side of the screen) is available on all tabs. See Preview for more information.
Mapping
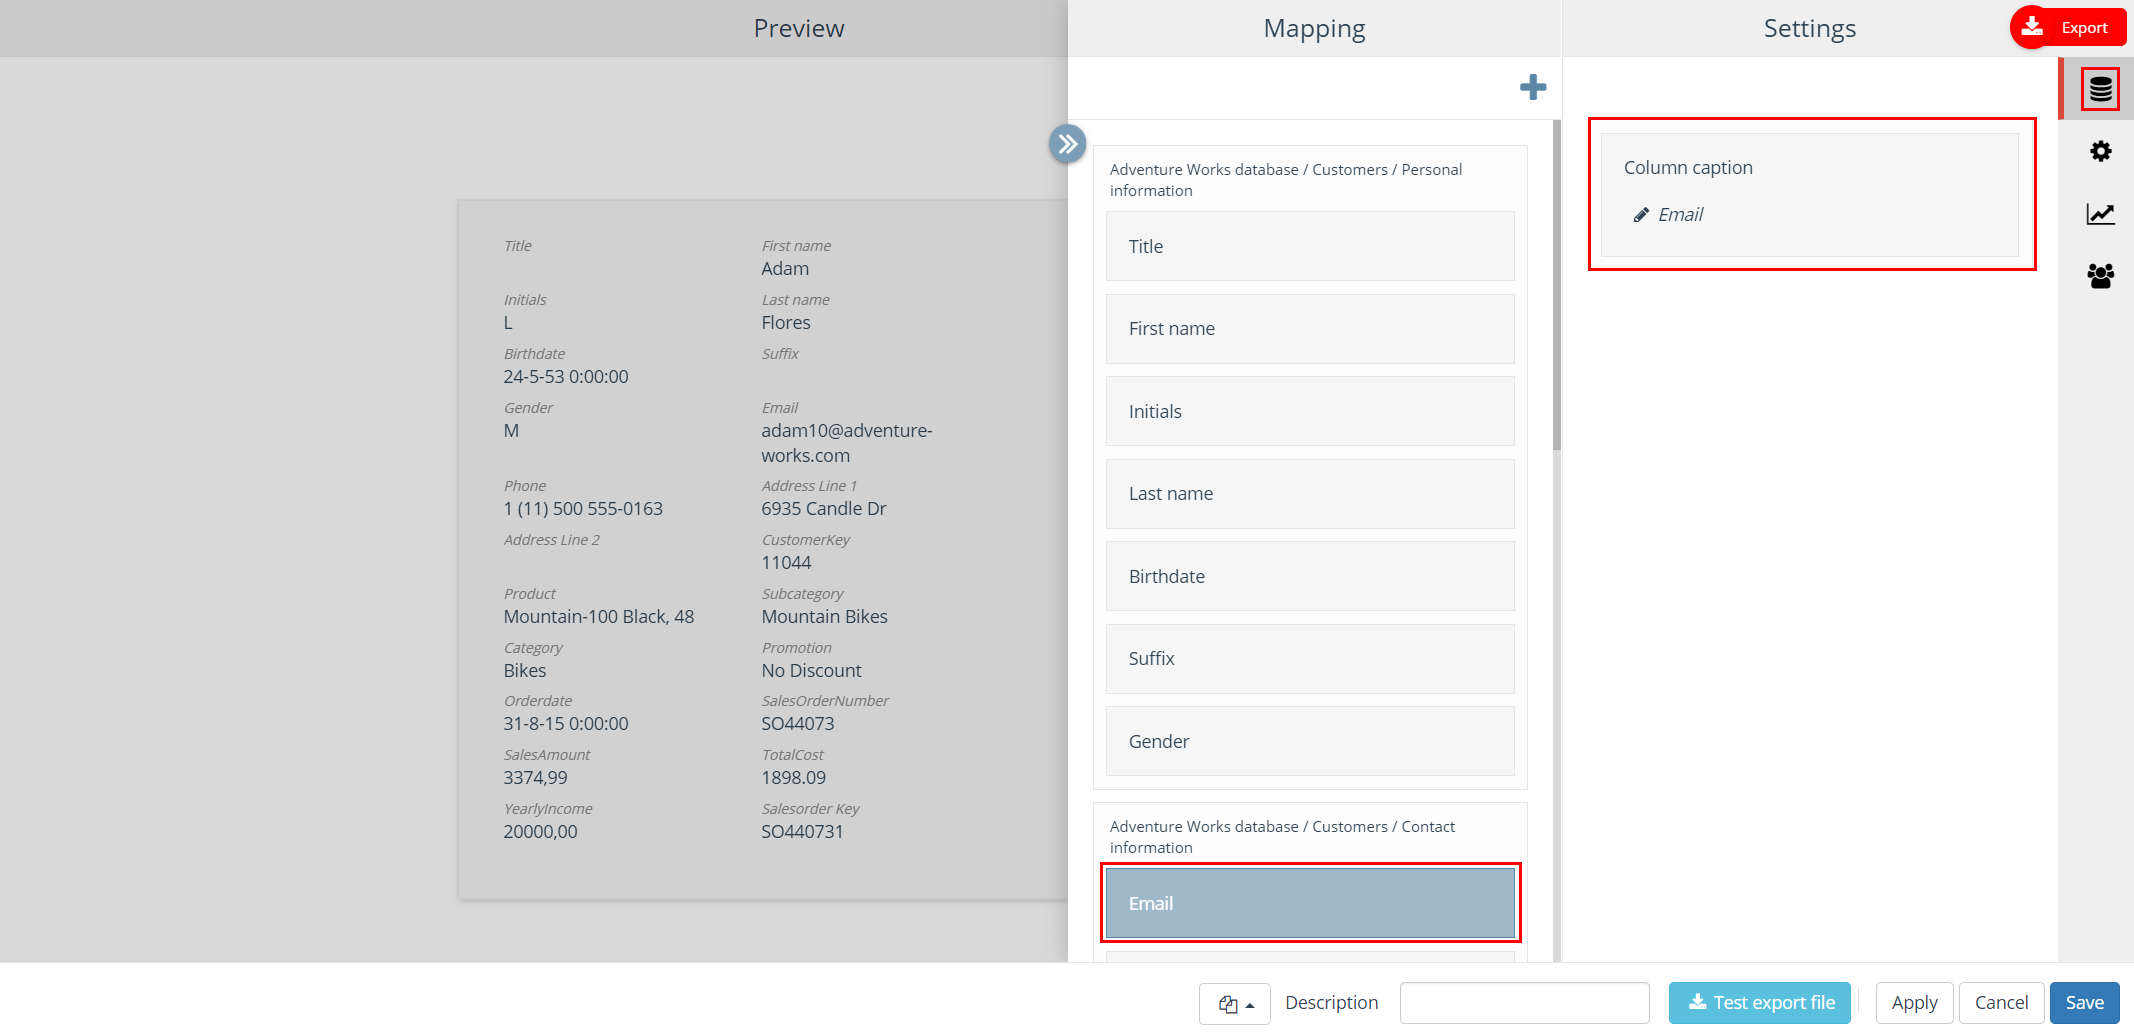
Creating an export starts with mapping the required data.
On the ‘+’ icon you will find an overview of all the available entities and, under coding, a standard set of data relating to the campaign/selection (for example TID, selection code, campaign code, run date, etc.).
Apart from the available database fields it is possible to include fields with a fixed text value. Click on the ‘Fixed values +’ field in order to add a fixed value text field. Both the header as well as the value of the field needs to be provided.
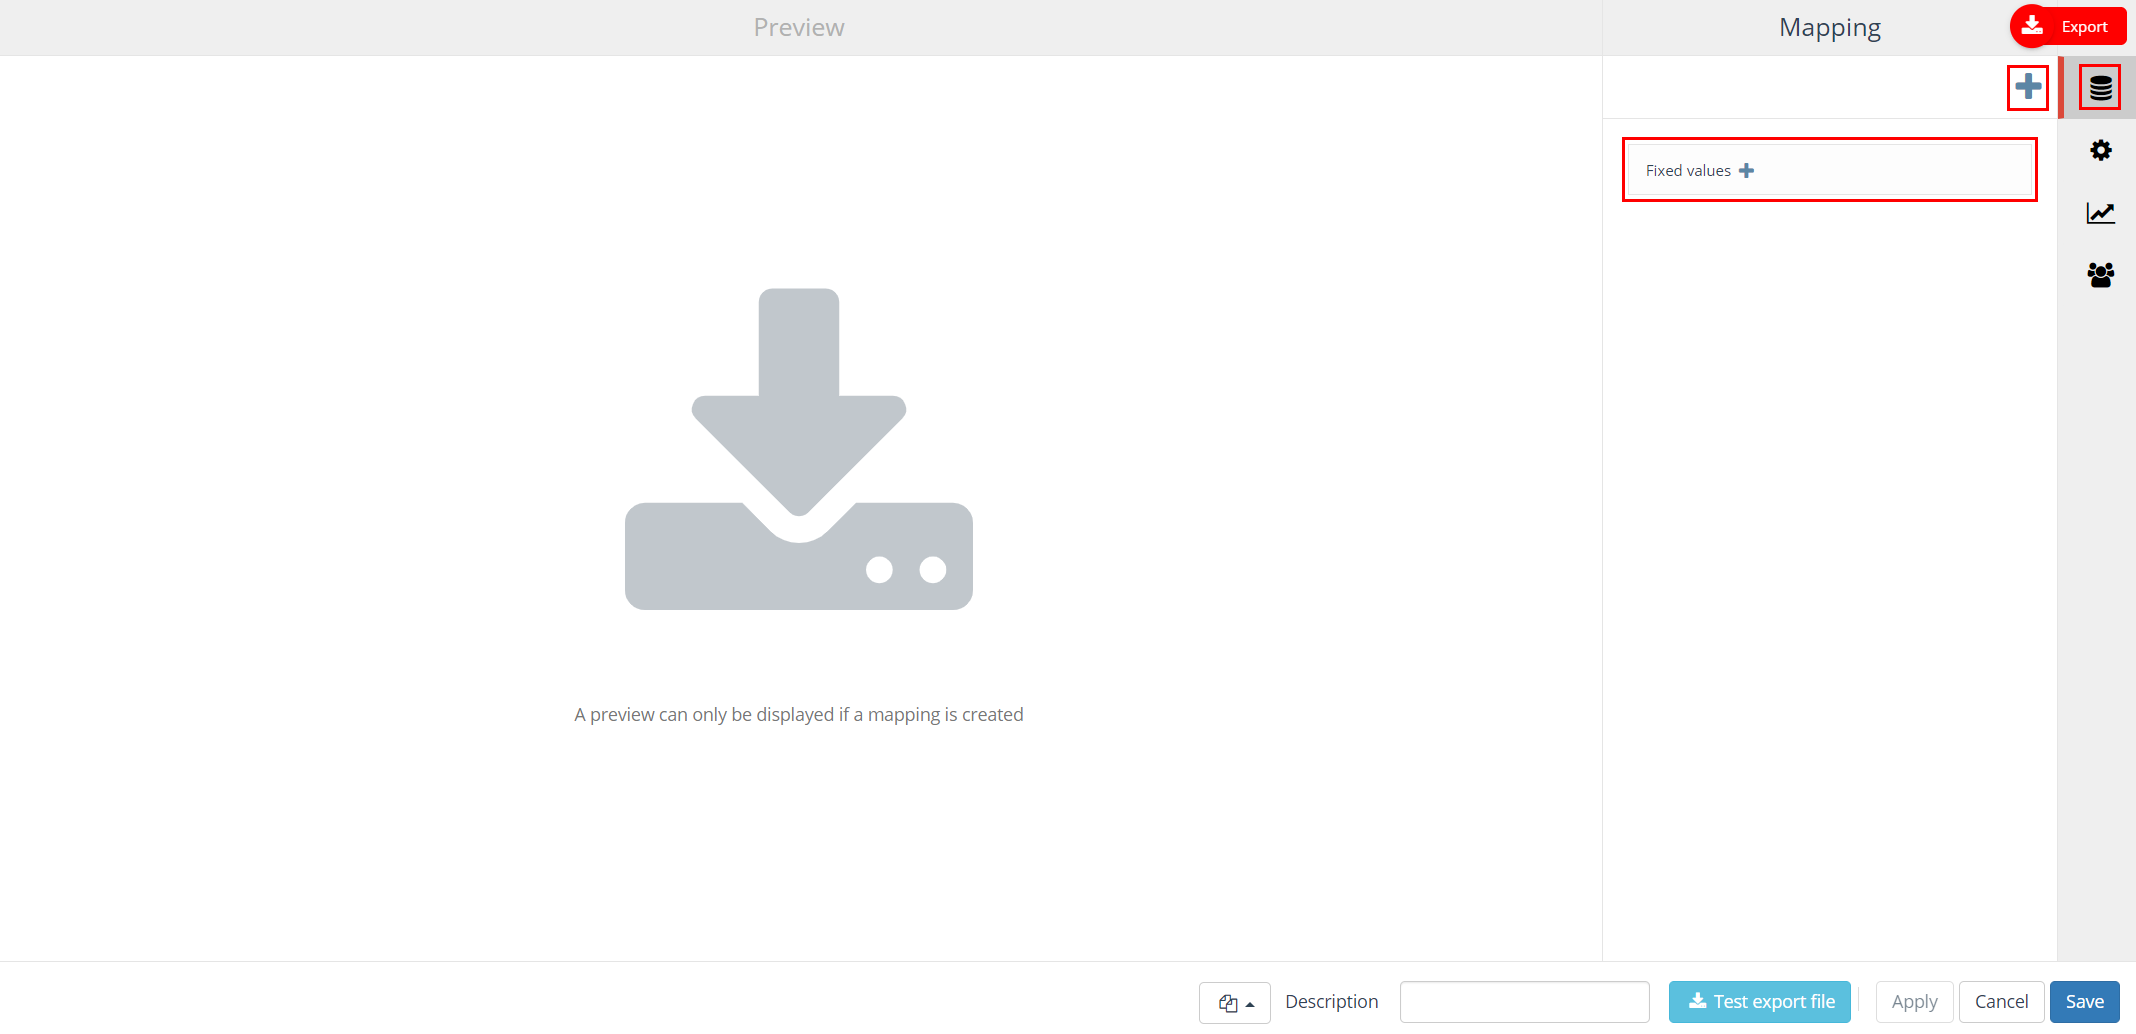
Select an item to move it to the preview on the left.
N.B.: By selecting an entity type in the search screen all (underlying) entities will be selected at once (max 25 fields at once).
In very specific cases, it is possible that there are two email address fields in one entity. In case one of those is called email and you want to use the other one, the field email needs to be renamed.
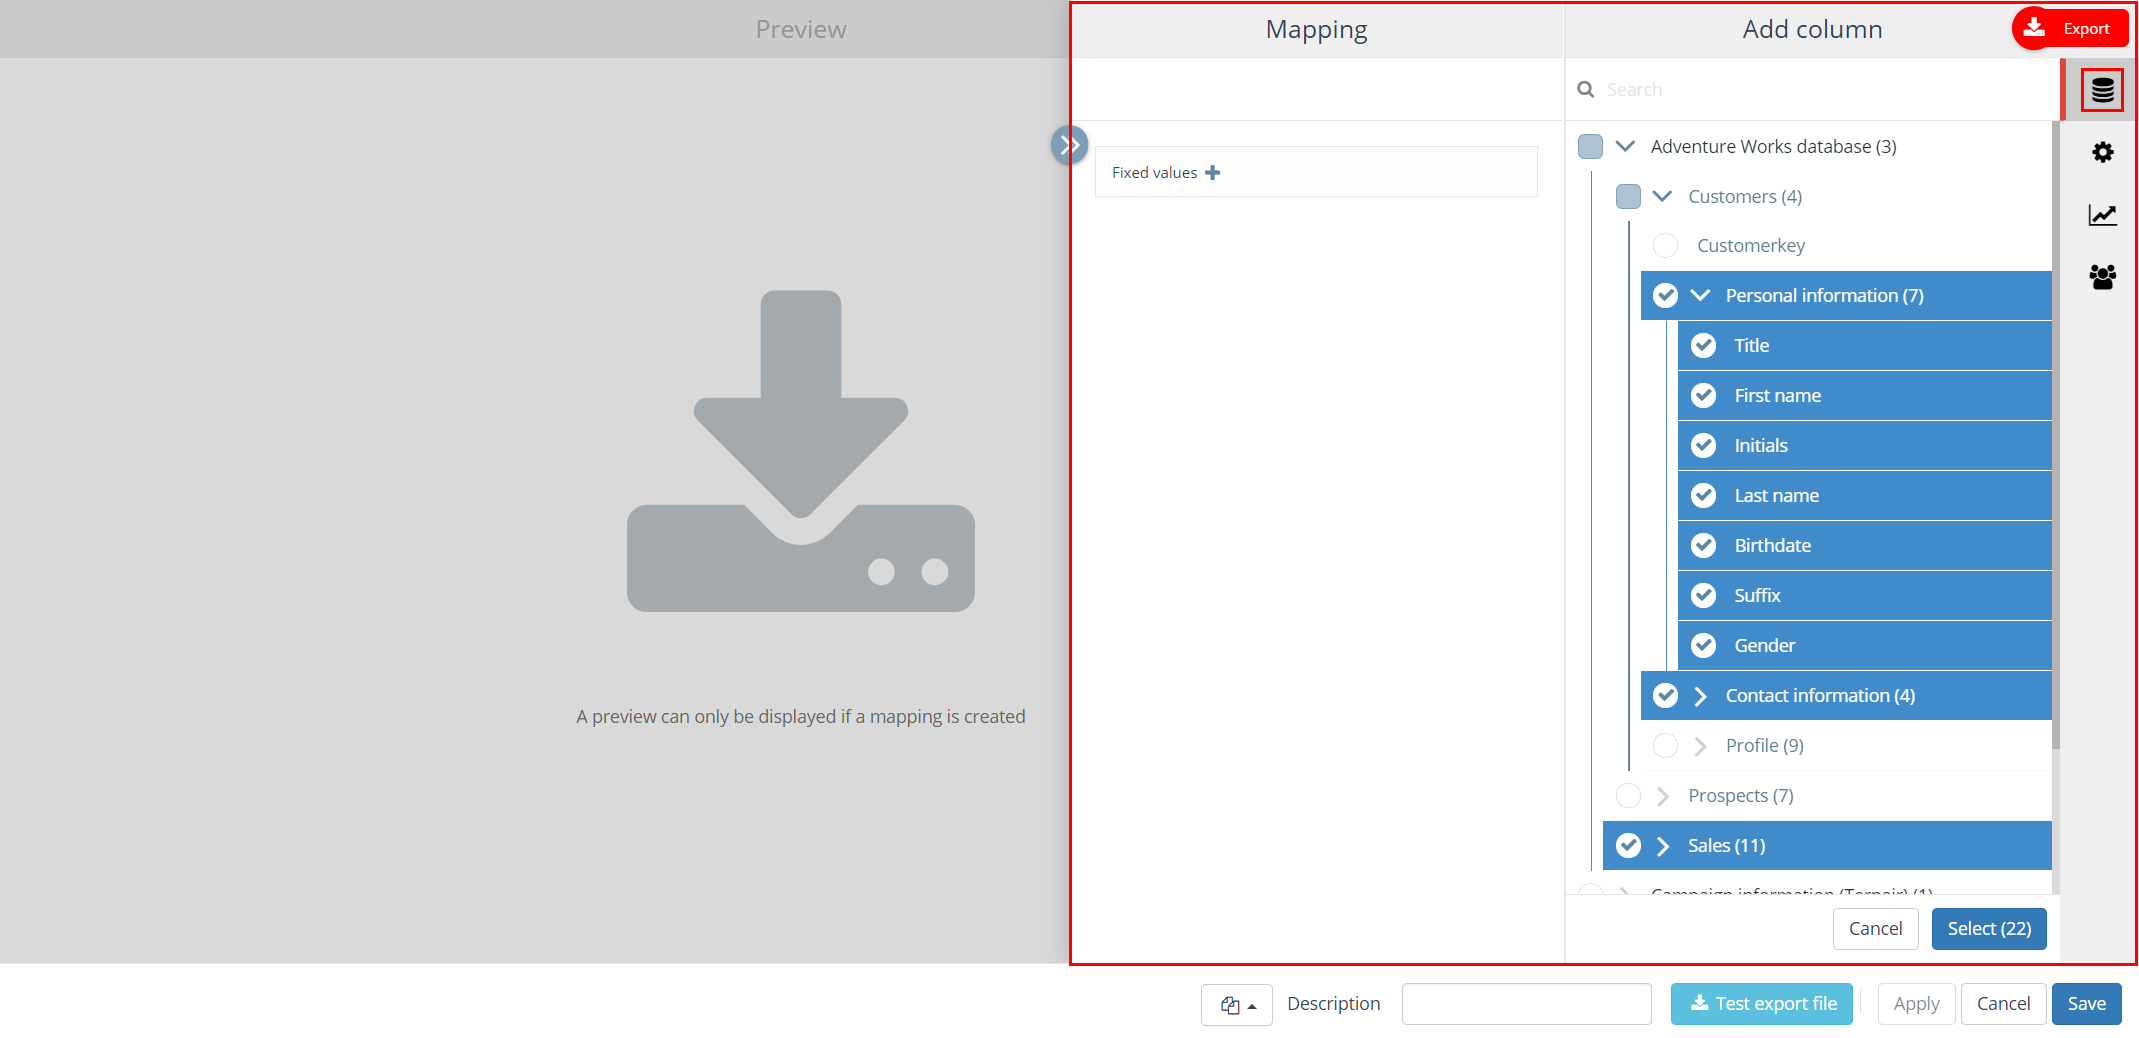
Adding / renaming columns
After adding an item it is possible to edit the column header in the export. The name of the columns can be changed by clicking on an item.
Settings
On the ‘Settings’ tab the user can define all general (non field dependent) export options.
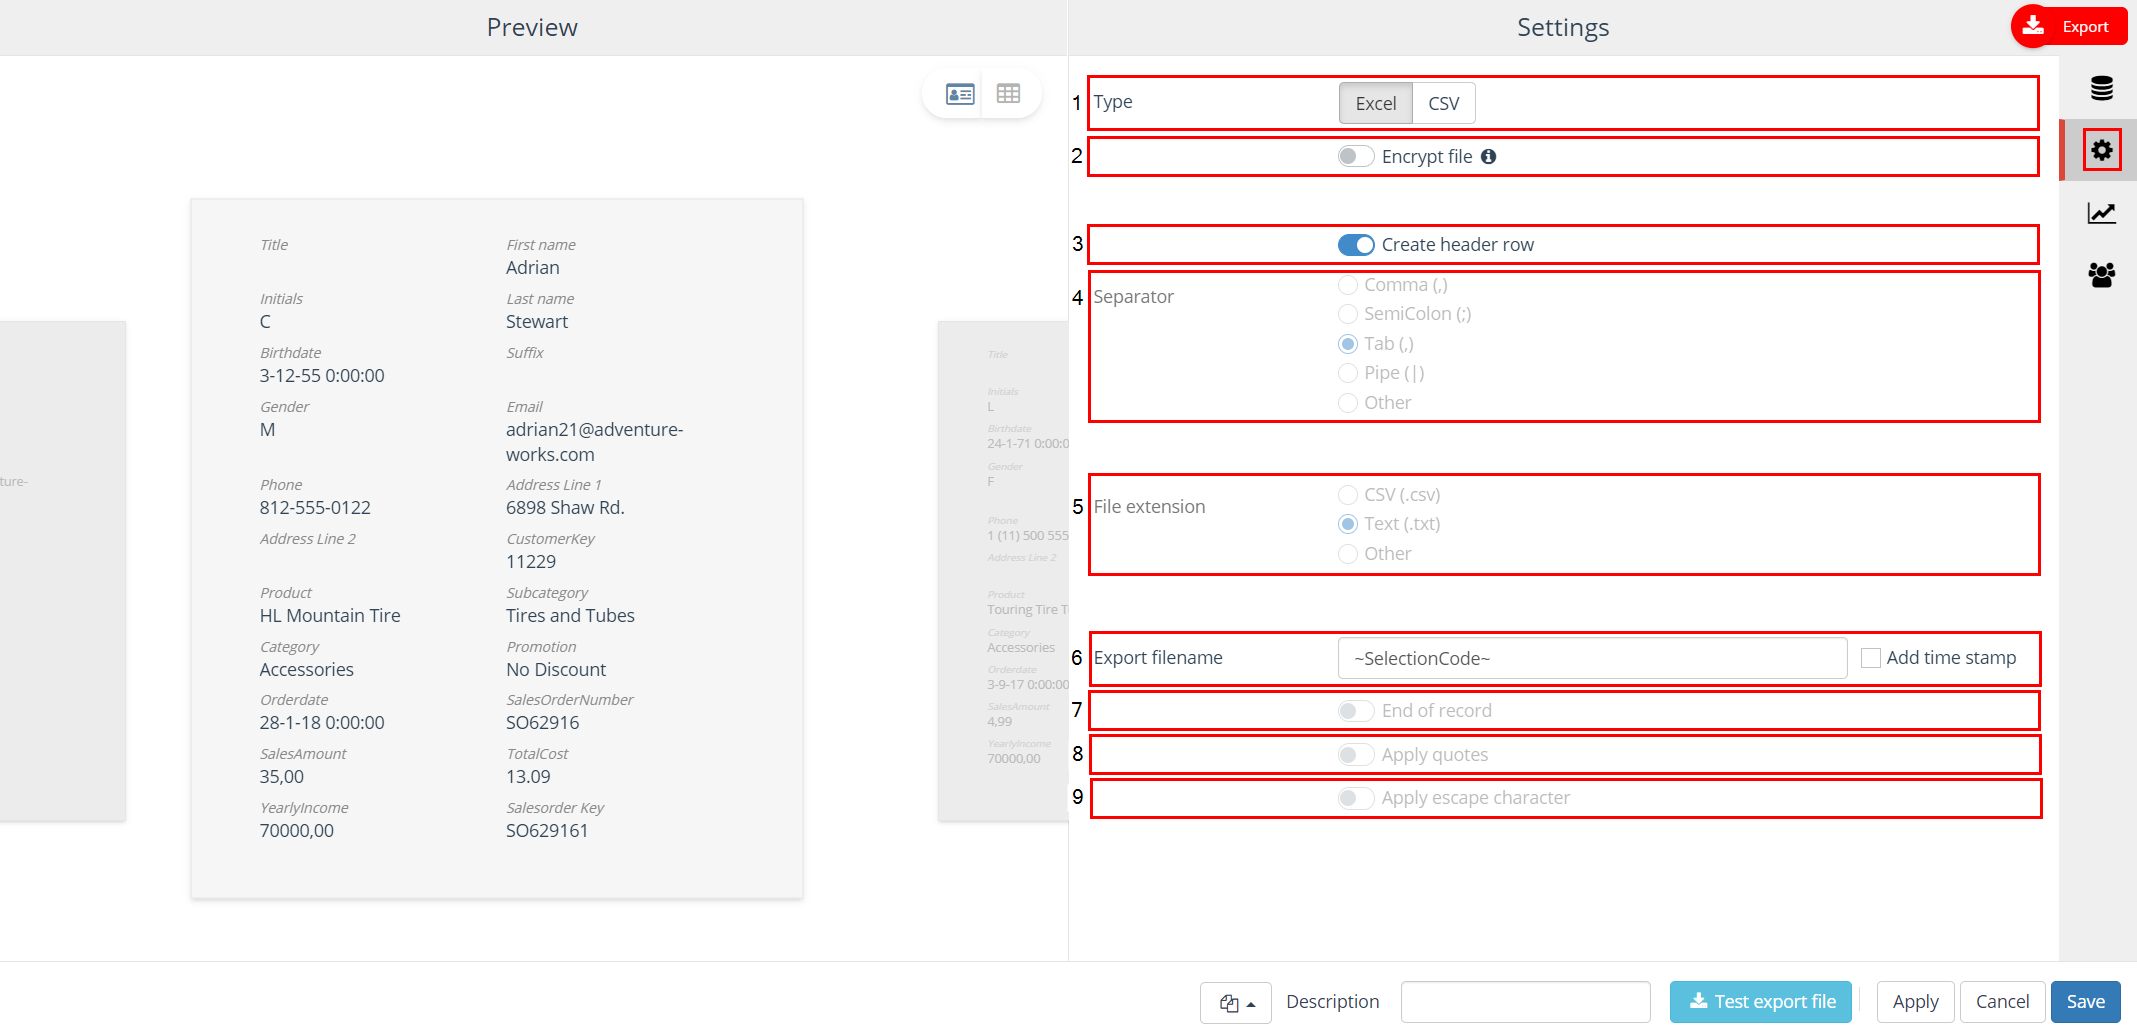
In the following table a short explanation for each of the settings is provided. Depending upon the choice for Excel or CSV settings are available/unavailable.
| Nr. | Settings | Description |
| 1 | Type | Indicate whether you want to make your export an Excel (.xlsx) or CSV file. |
| 2 | Encrypt file | When exporting a file to .xlsx (Excel) you have the option to encrypt the file. Check this option and enter a password in the Password line that appears when activating this option. |
| 3 | Create header row | Whether or not a header row should be created. |
| 4 | Separator | The separator that is used to separate fields in the export file (comma, semi colon, tab or pipe). Or enter your own separator by ‘Other’. This should be a character (for example: #) or a string (for example: ~#~#~#). |
| 5 | File extension | The file extension of the export file (.csv or .txt). |
| 6 | Export file name | Free text field for providing a file name. By default, this field is filled with the ‘Selection code’. It is possible to add a date/time to the file name by ticking the checkbox ‘Add Time Stamp’. |
| 7 | End of record (Header) (Value) |
Indicator indicating whether it is an end of record. This is an optional field. When in use an end of record string is placed at the end of each record. The value of this string can be entered in the ‘Value’ field. The field name can be entered in the ‘Header’ field. Both fields are mandatory, else the column will not be added to the export. |
| 8 | Apply quotes | |
| 9 | Text indicator (Quote escape character) |
Indicates the start and end of a field value. This setting is non-mandatory. Applying it will surround all field values and field names with double quotes (“”). In some situations it might be necessary to use an escape character. When the field value itself, for instance, contains quotes, surrounding this quotes with quotes might corrupt the field value. This can be solved by using an escape character. By default this is a backslash (\). Example without escape character: “this is an example” of the use of a text indicator. Example with escape character: “this is an example\” of the use of a text indicator. |
Distribution
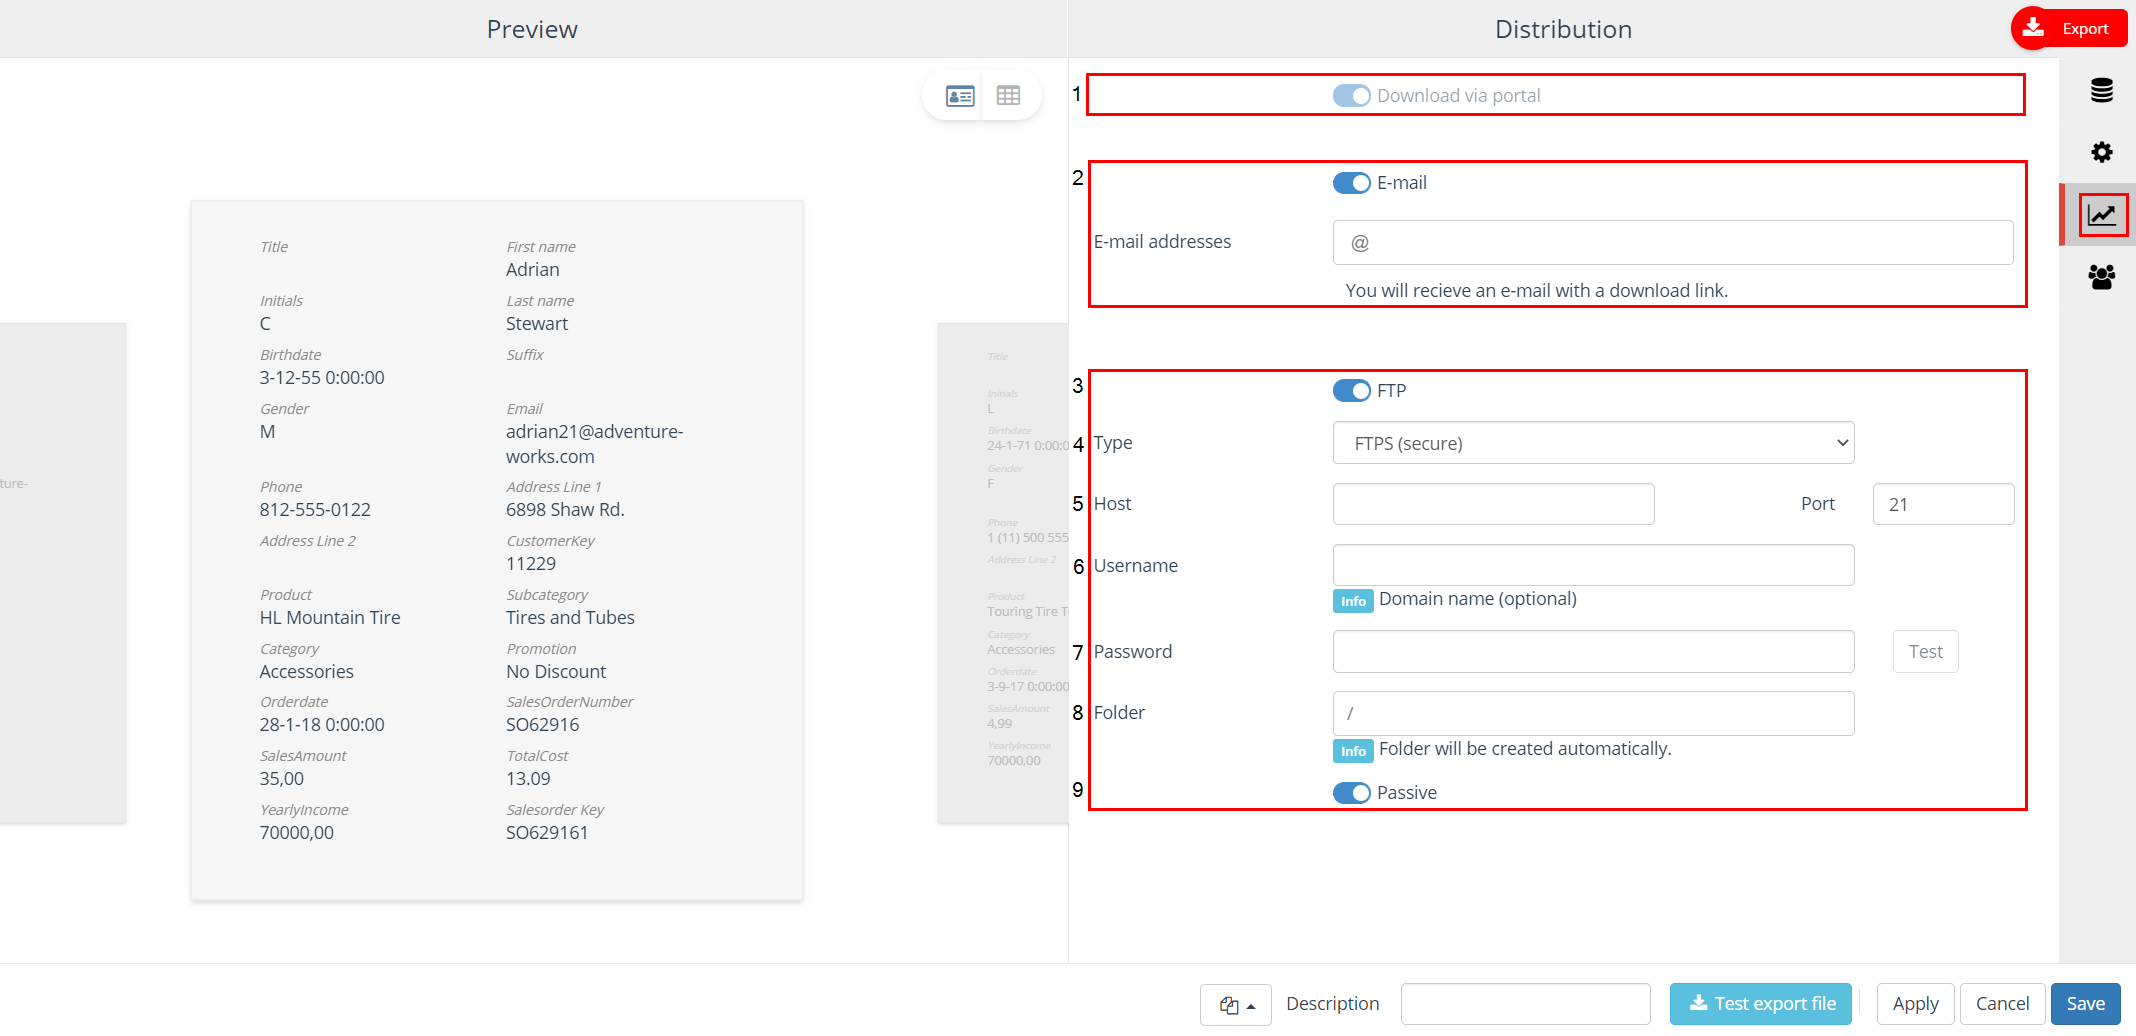
On the ‘Distribution’ tab the required export method can be selected.
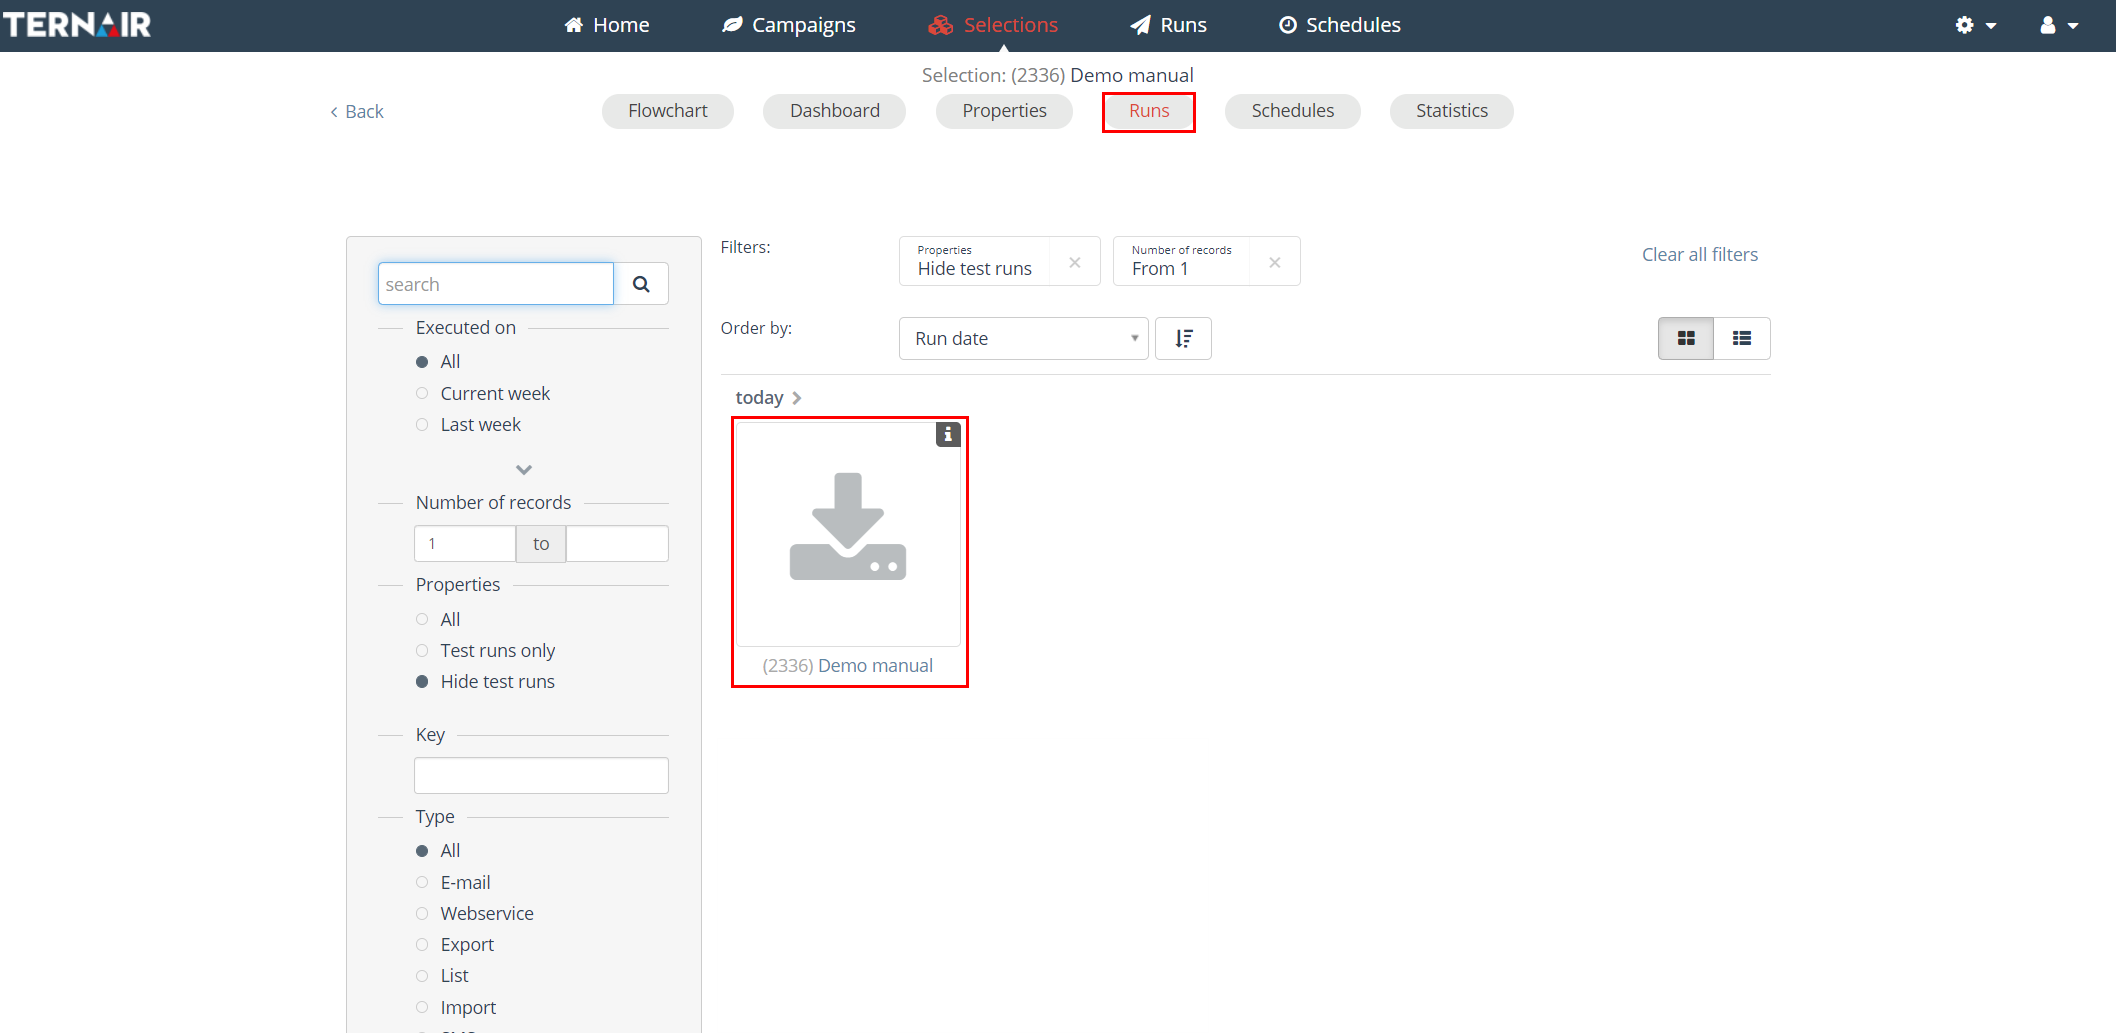
When an export is created it can be downloaded again via the ‘Runs’ screen in the Portal. See Execute for more details.
Indicate whether the export should be sent to an email address or to an FTP location by selecting one, or both, of these options.
Then enter the required information for each option; a valid email address for exporting to an email address or the FTP server settings when uploading the file to an FTP server.
| Nr. | Options | Description |
| 1 | Download via portal | When an export is created it can be downloaded again via the Runs screen in the Portal. |
| 2 | When exporting a file to email an email notification is sent to the provided email address. Via the link and pin code sent to you by email the export file can be downloaded. When there are multiple email adresses to notify the should be separated by a semicolon. | |
| 3 | FTP-location | When exporting the file is sent to the provided (external) FTP-location. |
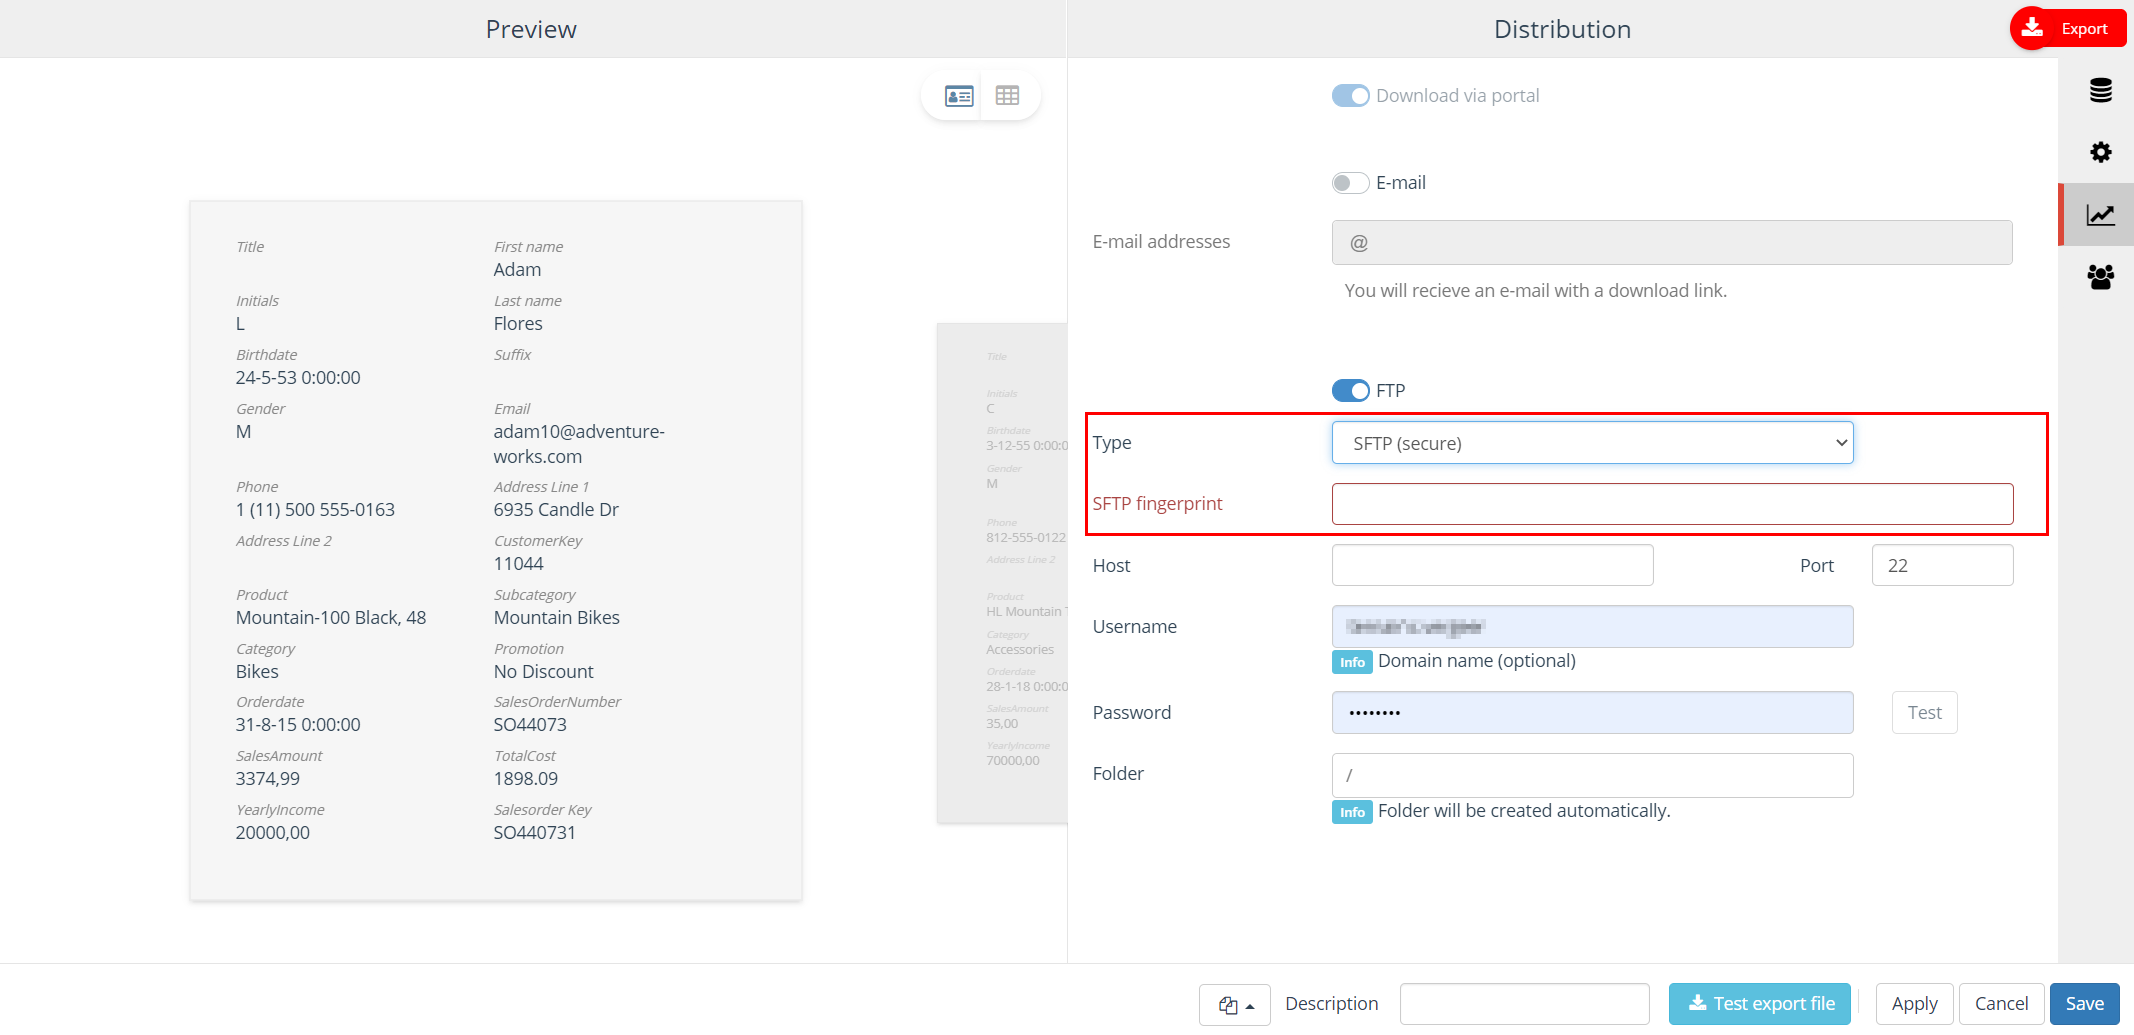
| 4 | – Type | Select the FTP type you use; FTPS (secure), FTPS (secure, legacy) FTP (unsecure) or SFTP* (secure). The default value is FTPS(secured). |
| 5 | – Host | Host name of the FTP. |
| 6 | – Gate | Port number that is connected to the FTP location; port number 21 is used by default.
|
| 7 | – Username and password | Your username and password for the FTP-location. |
| 8 | – Folder | The folder in which the file is to be saved. If the specified folder does not already exist, it is automatically created. When setting up the use of an FTP location you are able to provide a directory as folder name. The FTP folder name can be a path, hence multiple folders. |
| 9 | – Passive | In active mode, the client establishes the command channel but the server is responsible for establishing the data channel. In passive mode, the client establishes both channels. |
*SFTP fingerprint
Fill out the SFTP fingerprint that is created by the receiving side (SFTP fingerprint only).
Contacts
On the ‘Contacts’ tab contacts can be created for the selected records (= optional).
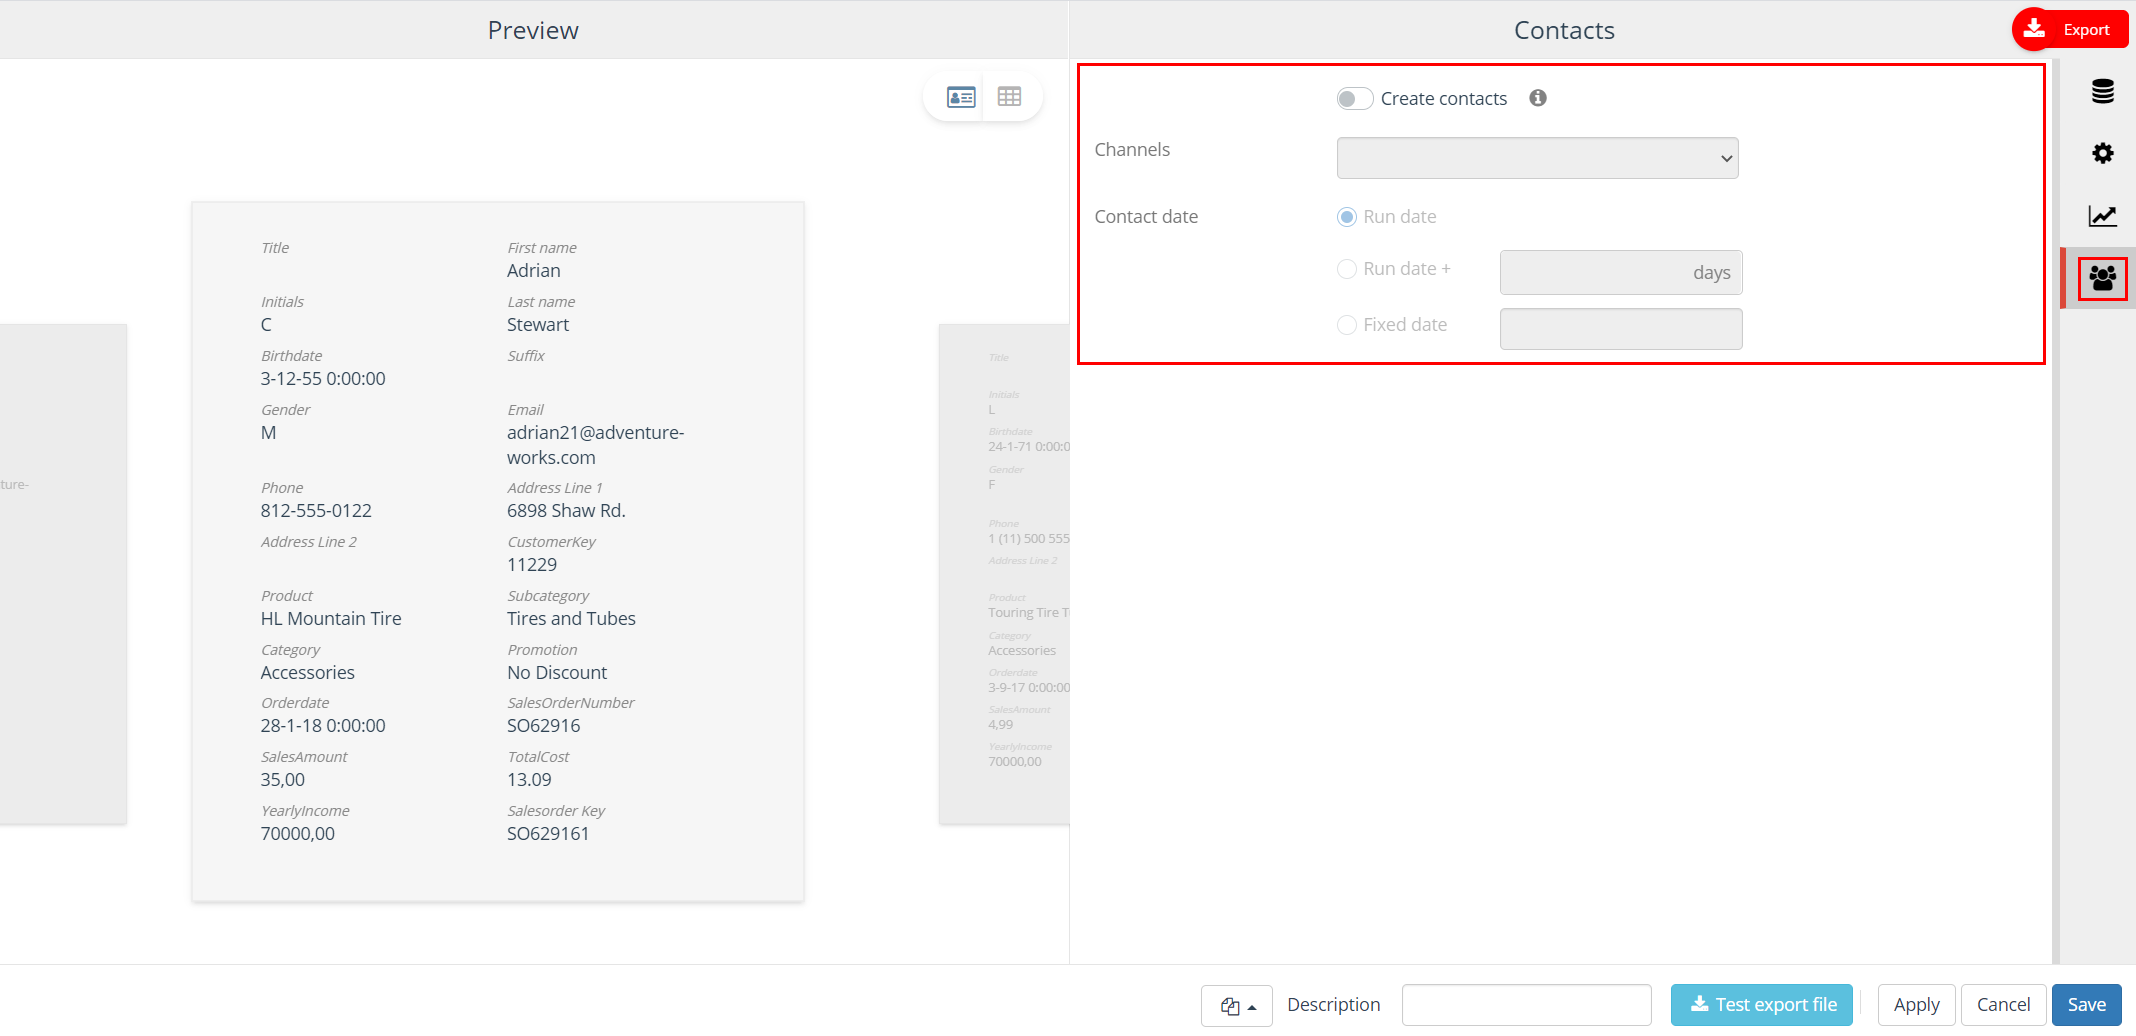 Check the ‘Create contacts’ checkbox.
Then select one channel.
Finally, select the correct contact date:
- Run date = date when the selection is executed
- Run date + X days = run date + number of days; for example run date + 2 days
- Fixed date = select a fixed date from the calendar
By creating contacts the contact history will be recorded for two years in Ternair Marketing Cloud.
For every relation (account) in the selection a contact is registered. When a contact is registered the following data is recorded: Campaign, Selection, Channel, Date.
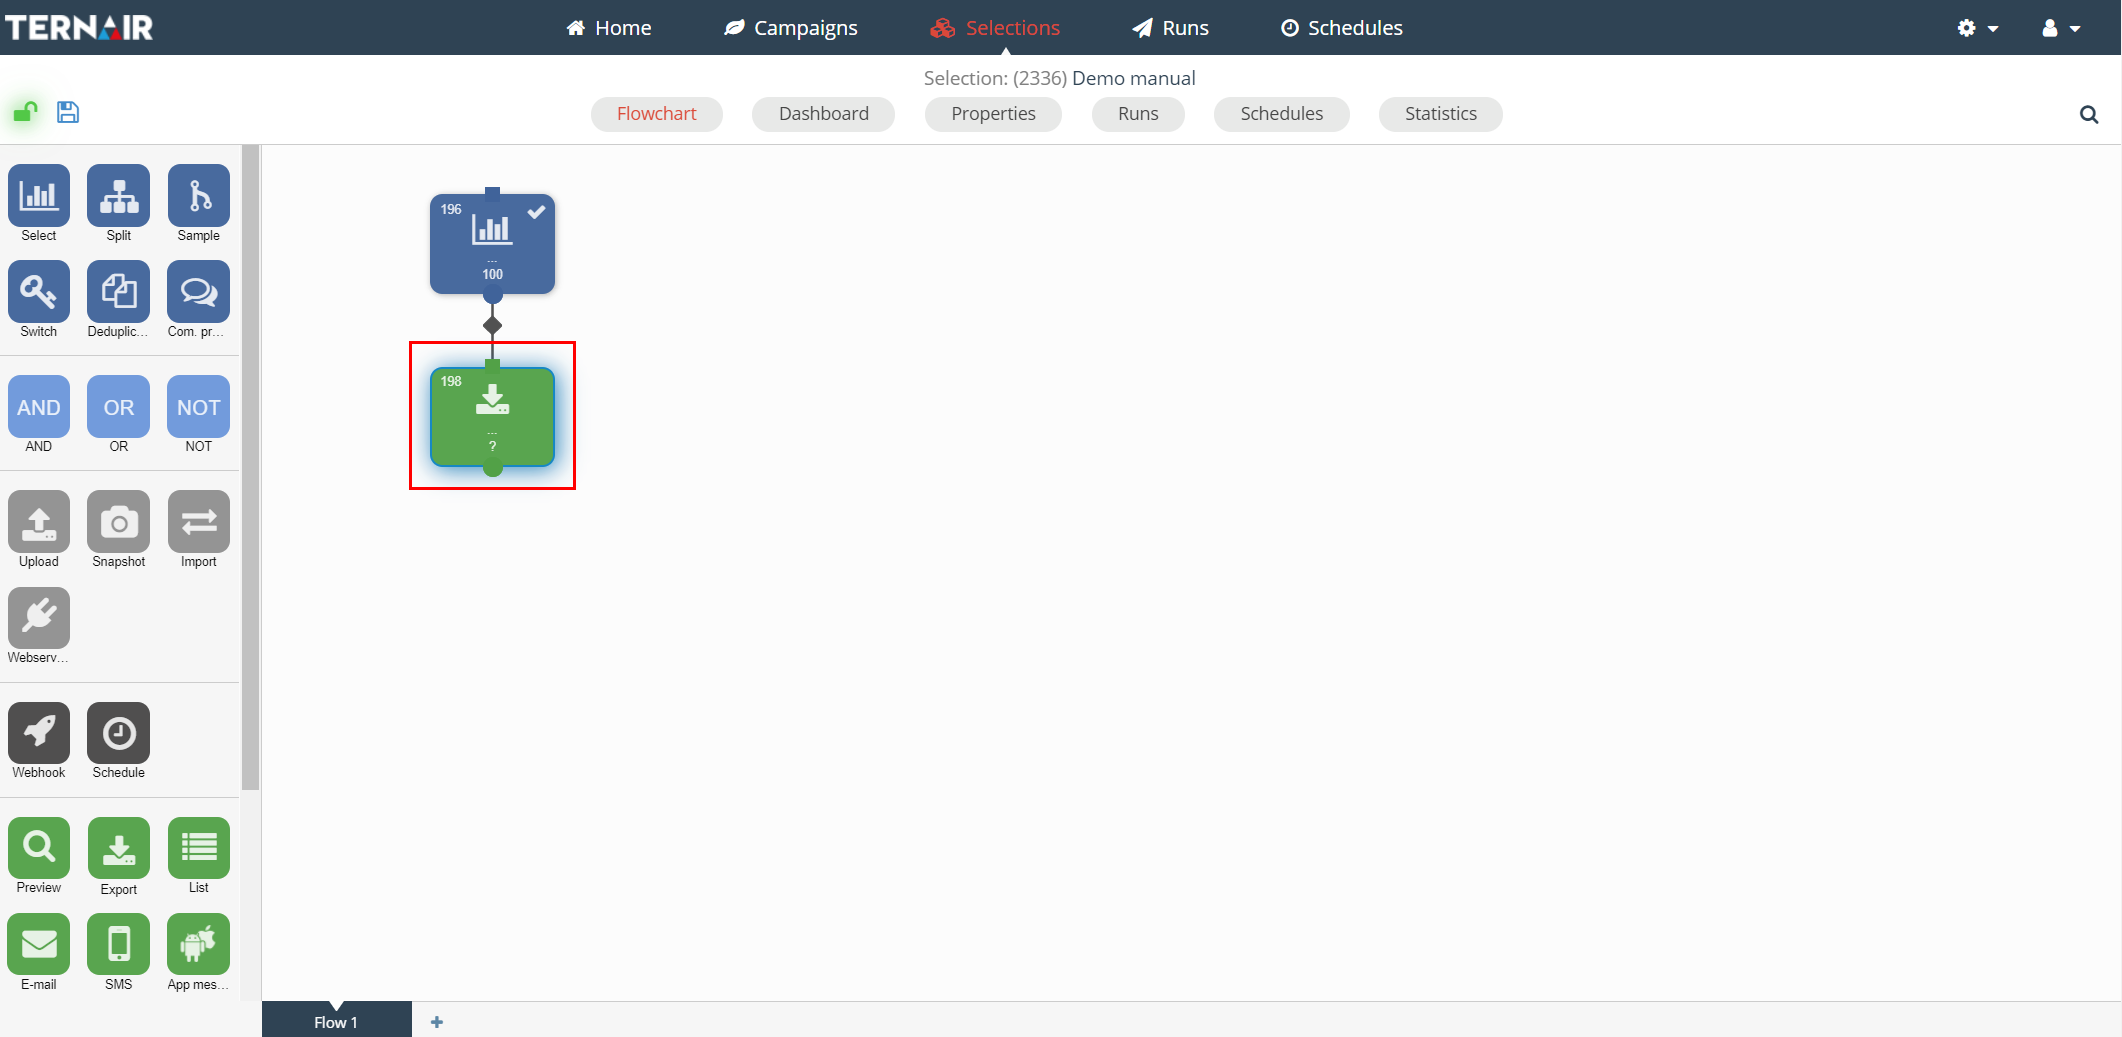
When the option ‘Create contacts’ is selected this can be inferred from the selection flowchart by the ‘blue shading’ around the output block.
General settings
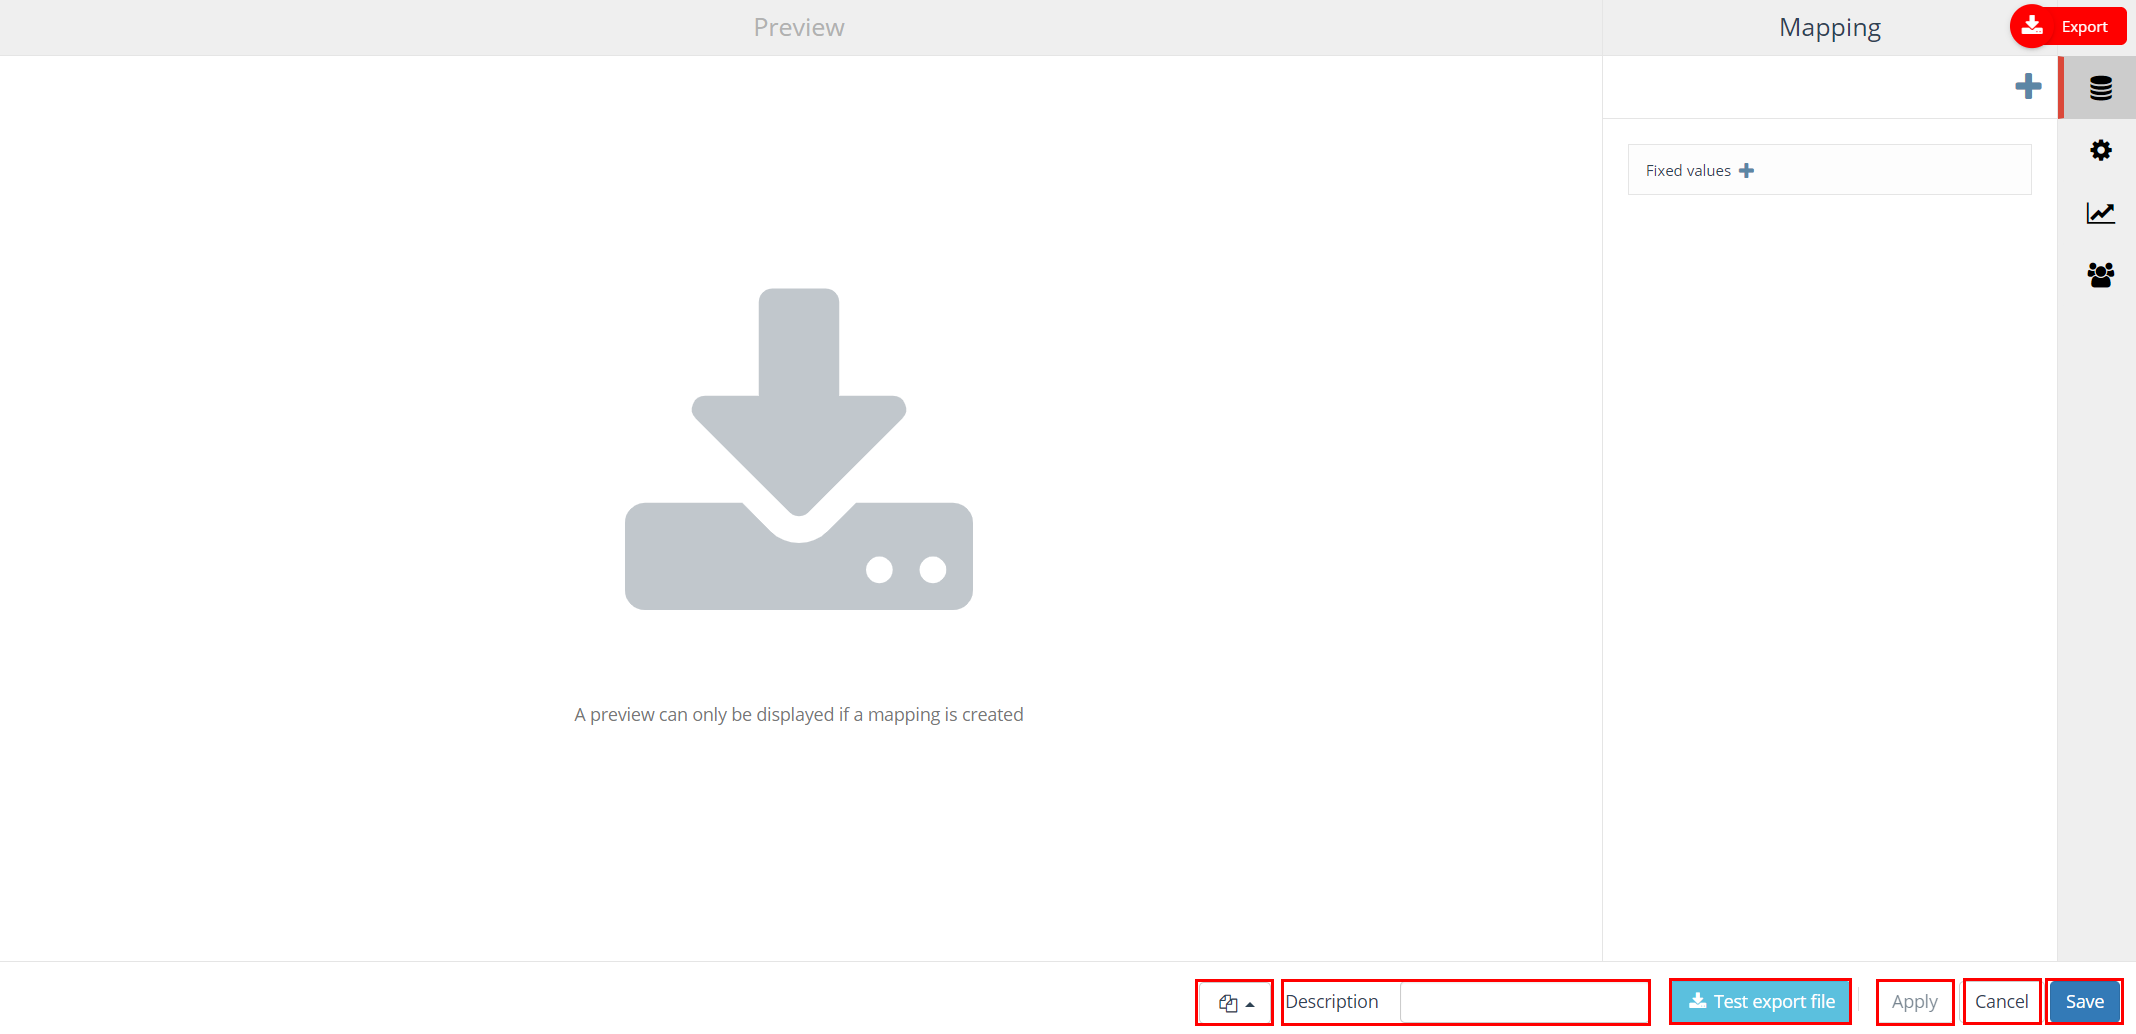
| Options | Description |
| Block template | Each export block can be saved as a template. After saving a export block as a template it is available as template for other export blocks. A block template can be re-used by clicking ‘Open block template’ in the bottom left corner of a export block and selecting the template from the list. |
| Description | You can define a description for a export block. The description field is intended to provide a logical description for the block. As a result, the content of the output block is easy to recognize in the selection flowchart. |
| Test Export file | Click ‘Test export file’ to open a preview file of your export (10 rows). |
| Apply | Clicking the ‘Apply’ button will save the provisional selection block settings. |
| Cancel | Use the ‘Cancel’ button to undo your changes. |
| Save | The ‘Save’ button can be used to save your changes without (re-)calculating the block. |
Execute
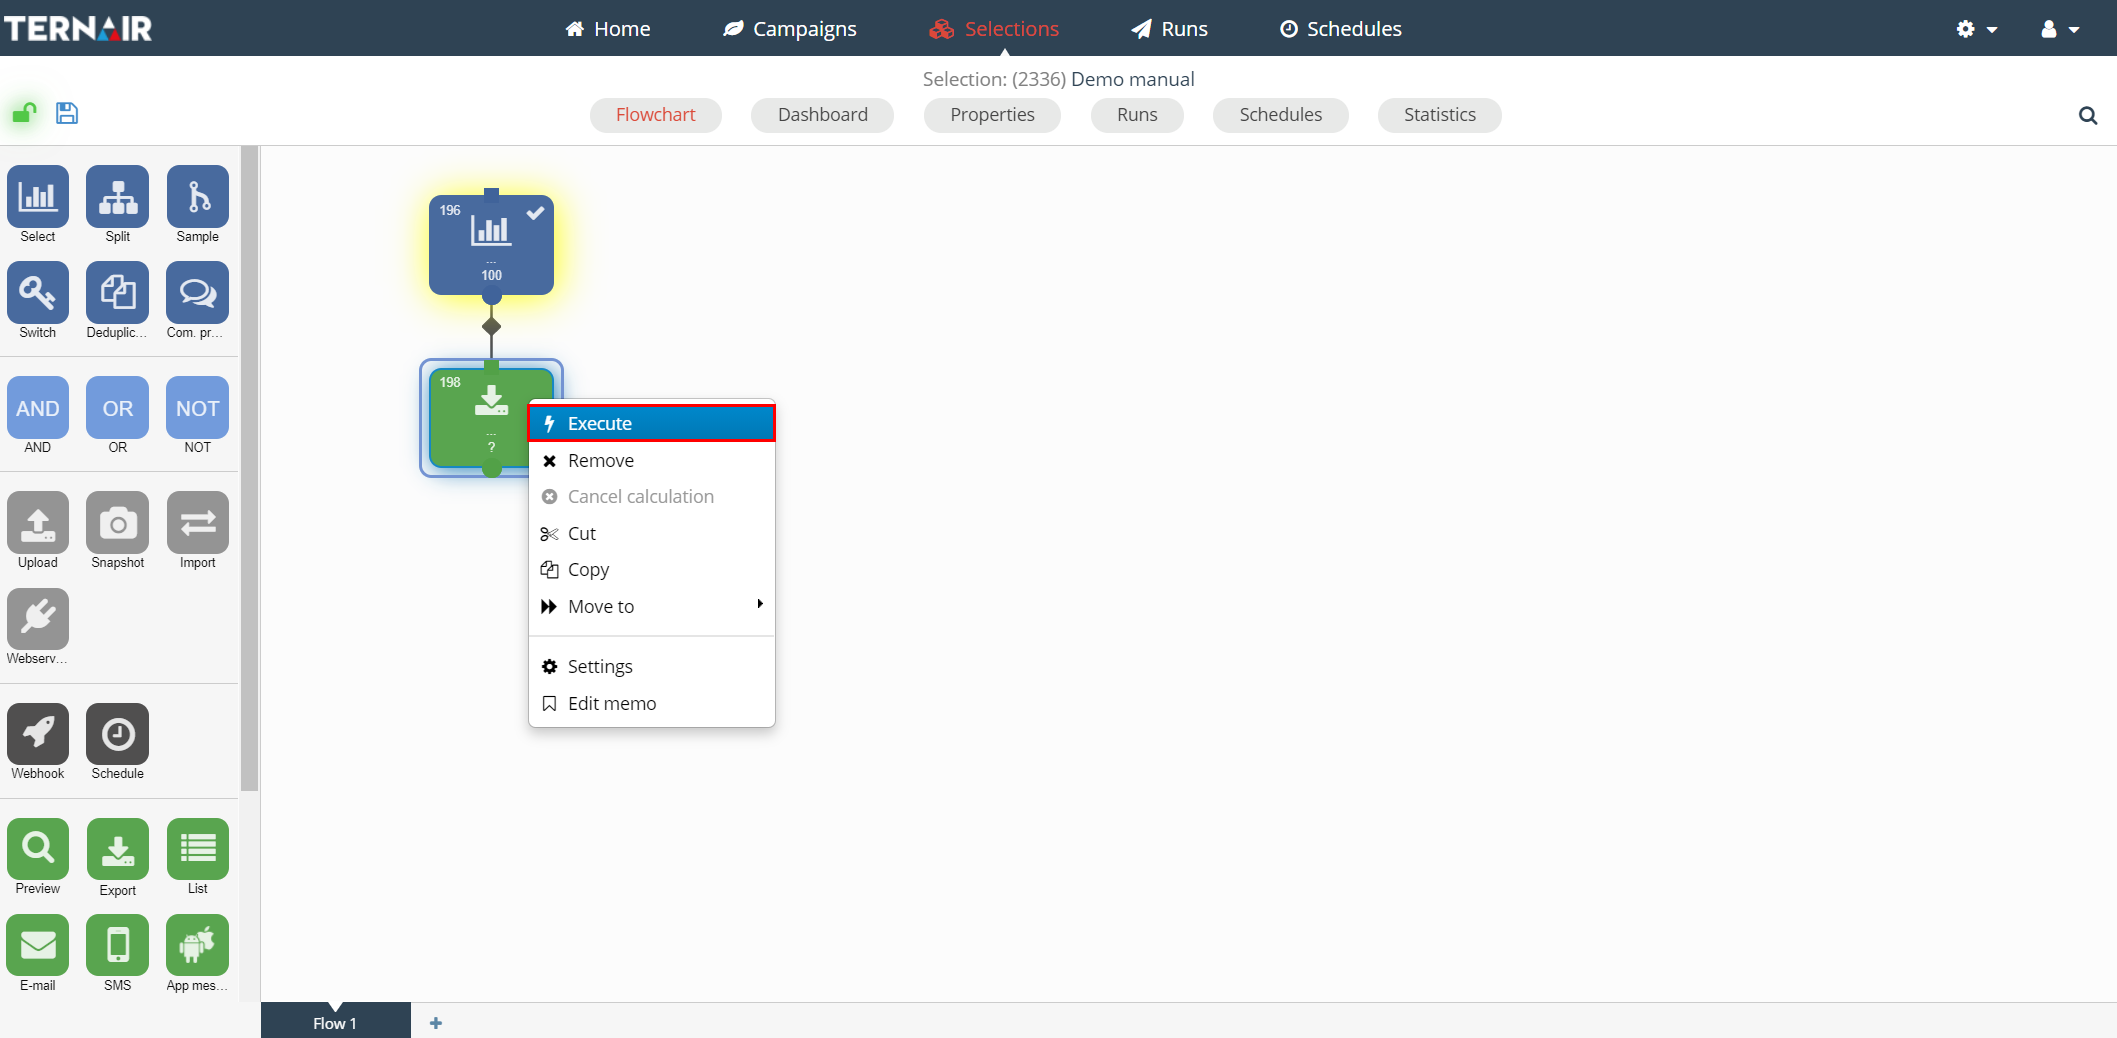
As a final step, the export must be executed. Select the export block, click on the right mouse button and click on ‘execute’.
When an export is created it can be downloaded again via the Runs screen in the Portal.
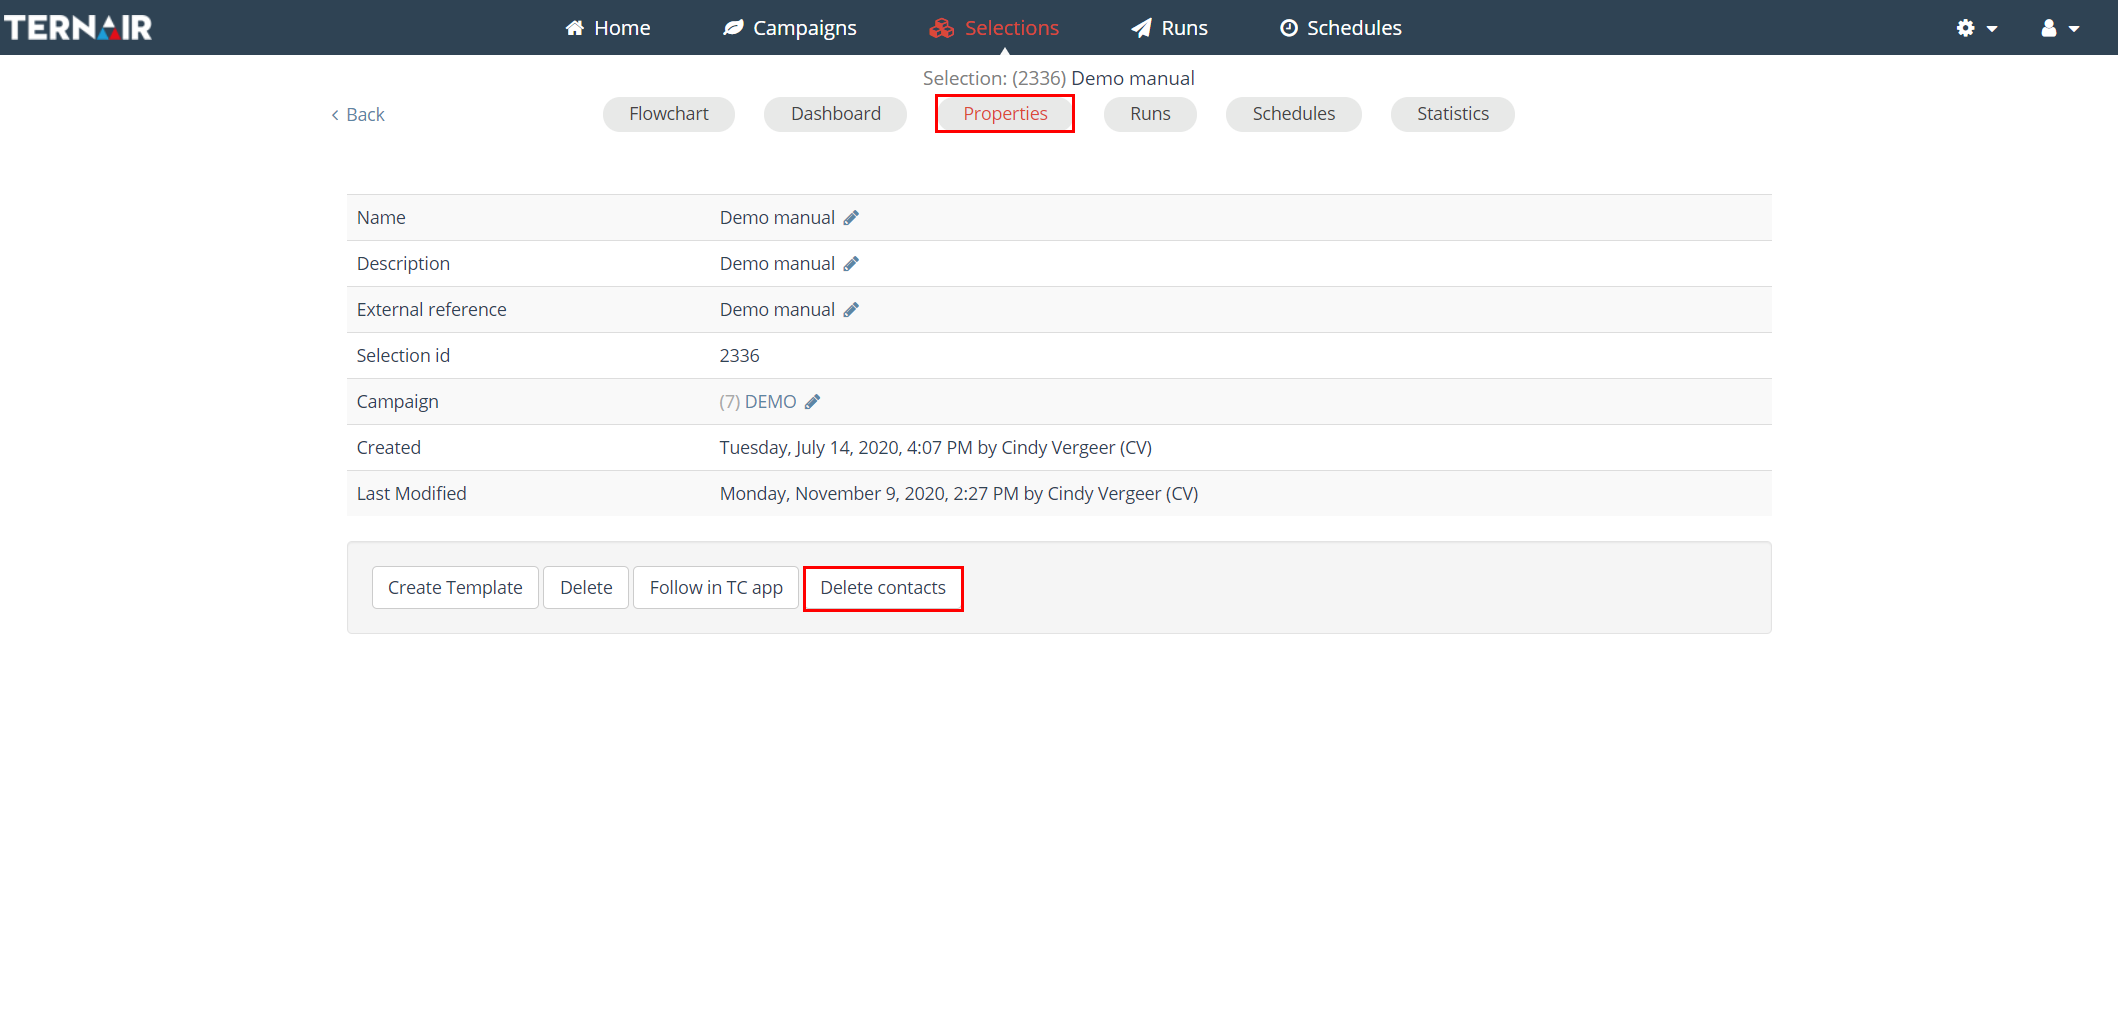
Delete contacts
Contacts registered when executing an output block can be deleted on selection level. Contacts can be deleted in the selection settings. All contacts that have been registered for the corresponding selection will be deleted.
Housekeeping
To maintain performance, export files is deleted after 365 days. When the block is re-calculated new files created.
