Target group: landing page template builders
In Ternair Marketing Cloud various functionalities can be defined via the HTML-code of a landing page. These functionalities guide the user in filling out the data capture form that is used in a landing page.
Use function keys Ctrl-F to search the HTML-code.
Default data capture fields
The data collected via data capture forms is divided into default values and other values.
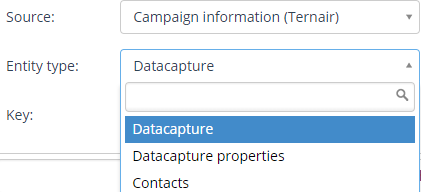
All default values that are collected are stored in the entity ‘Data capture’ and all other values are stored in the entity ‘Data capture properties’ under the source ‘Campaign Information (Ternair)’.

Default values
The following default profile data are stored in the entity ‘Data capture’:
| EN | NL |
| lastname | achternaam |
| surname | voornaam |
| initials | voorletters |
| prefix | tussenvoegsel |
| gender | geslacht |
| phone, phonenumber | telefoon |
| mobile, mobilenumber | mobiel |
| street | straat |
| number, housenumber | huisnummer |
| addition | toevoeging |
| postalcode, zipcode | postcode |
| city | plaats |
| ddgeboorte, birthdate | geboortedatum |
All values not corresponding to one of the default values mentioned above are stored in the entity ‘Data capture properties’.
The following meta data is added to data capture records in Ternair Marketing Cloud:
- date
- selection_id
- run_id
- block_id
Form attributes
The following form attributes can be used in a datacapture form.
data-capture-form
Attribute to recognize the form. Can be placed on a form or div element.
data-capture-validate-summary
Errors are shown under the text box by default. This attribute groups all errors above the form.
data-capture-ignore-labels
Validation labels are nog ignored using this attribute (when summary is active).
data-capture-submit
Save button. This attributes can only be used when <form> tag is not used. When the <form> tag is used the default submit can be used: <button type=”submit”>.
data-capture-success
This attribute replaces the “data-capture-form” content after it has been submitted successfully. This element is placed both on the form as well as on the success-content. On the form level this attribute has a value matching the id of the success element.
action
Attribute with value. Can only be used when using a <form> tag. This indicates a second landing page which is shown after successfully submitting the form.
| Example |
| Form including success page
|
| Example |
|
After saving data show a second landing page
|
Input elements
The following input elements can be used in a data capture form.
data-capture
This values is saved in the database.
data-capture-required
Fields is validated / required.
data-capture-int
Numerical field (integer). Only numeric values can be entered.
data-capture-email
This field contains an email address. Value must contain an @.
data-capture-custom-message
Attribute with value. Values is shown in case input is invalid. Use in combination with data-capture-email.
data-capture-validate-message
Attribute with value. Value is shown in case field is empty. This attribute is placed once on list elements (Radio button, check box, drop-down).
value
Attribute with value. Values are used for prefilling text boxes.
| Example | |
| Text box lastname | <input data-capture data-capture-required value="[Achternaam]" data-capture-validate-message="Achternaam is mandatory"/> |
| Text box email | <input data-capture name="email" data-capture-email data-capture-required value="[email]" placeholder="email" data-capture-validate- message="email address is mandatory" data-capture-custom-message="email address is invalid"/> |
| Text box shoe size | <input data-capture class="form-control" name="shoe size" data-capture-int placeholder="shoe size" /> |
Radio buttons, check boxes and drop-down elements
data-capture-value
Attribute with value. When value matches data-capture-value the value is selected.
| Example |
| Radio button (:radio)
|
| Drop-down (select)
|
Dividing the form in steps
data-capture-step
Container attribute of the step (part of the form). Must contain a value. First step is 1, unlimited number of steps allowed.
| Example |
| Text box achternaam
|
data-capture-step-next
Button attribute to go to the next step. Next step is determined automatically (ascending).
data-capture-step-prev
Button attribute to go the next step. Next step is determined automatically (descending).
data-capture-step-goto
Button attribute with value. Button to go to jump to specified step.
data-capture-ignore-validate
Button attribute to ignore validation. For example return button.
| Example |
<div data-capture-form data-capture-validate-summary data-capture-success="successForm"><div data-capture-step="1"><div><label>voornaam</label><input data-capture value="[voornaam]" placeholder="voornaam"/></div><div><label>email address</label><input data-capture value="[email]" placeholder="email"/></div> <button data-capture-step-next>Next</button></div> <div data-capture-step="2"><div><div><label>woonplaats</label><input data-capture value="[woonplaats]" placeholder="woonplaats"/></div><input data-capture type="checkbox" name="isthiscorrect">My data is correct</div> <button data-capture-ignore-validate data-capture-step-prev>Previous</button><button data-capture-submit>Save</button></div></div> |
Auto complete
By using default auto completion attributes users are helped when filling out the form. When an auto complete attribute is recognized by a browser these fields are filled out automatically.
N.B. auto completion is not (yet) supported by all browsers.
| Example |
<input type="email" name="email" autocomplete="email">
|
Additional notes
Functional
The check box ‘Data capture’ needs to be checked in the landing page template settings. This will generate the scripting that is required for the data capture functionalities in the landing page.
Furthermore multiple forms can be placed in one landing page. Use “data-capture-success” when saving the form(s) using different values.
Technical
jQuery does not have to be loaded in a landing page, this will be done by default.
Scripts should be placed on top of the page in order to prevent conflicts.
