In order to keep the selection flowchart organized, it is possible to place multiple blocks in a group, then the group can be collapsed, so there is more free space available on the worksheet.
Create group
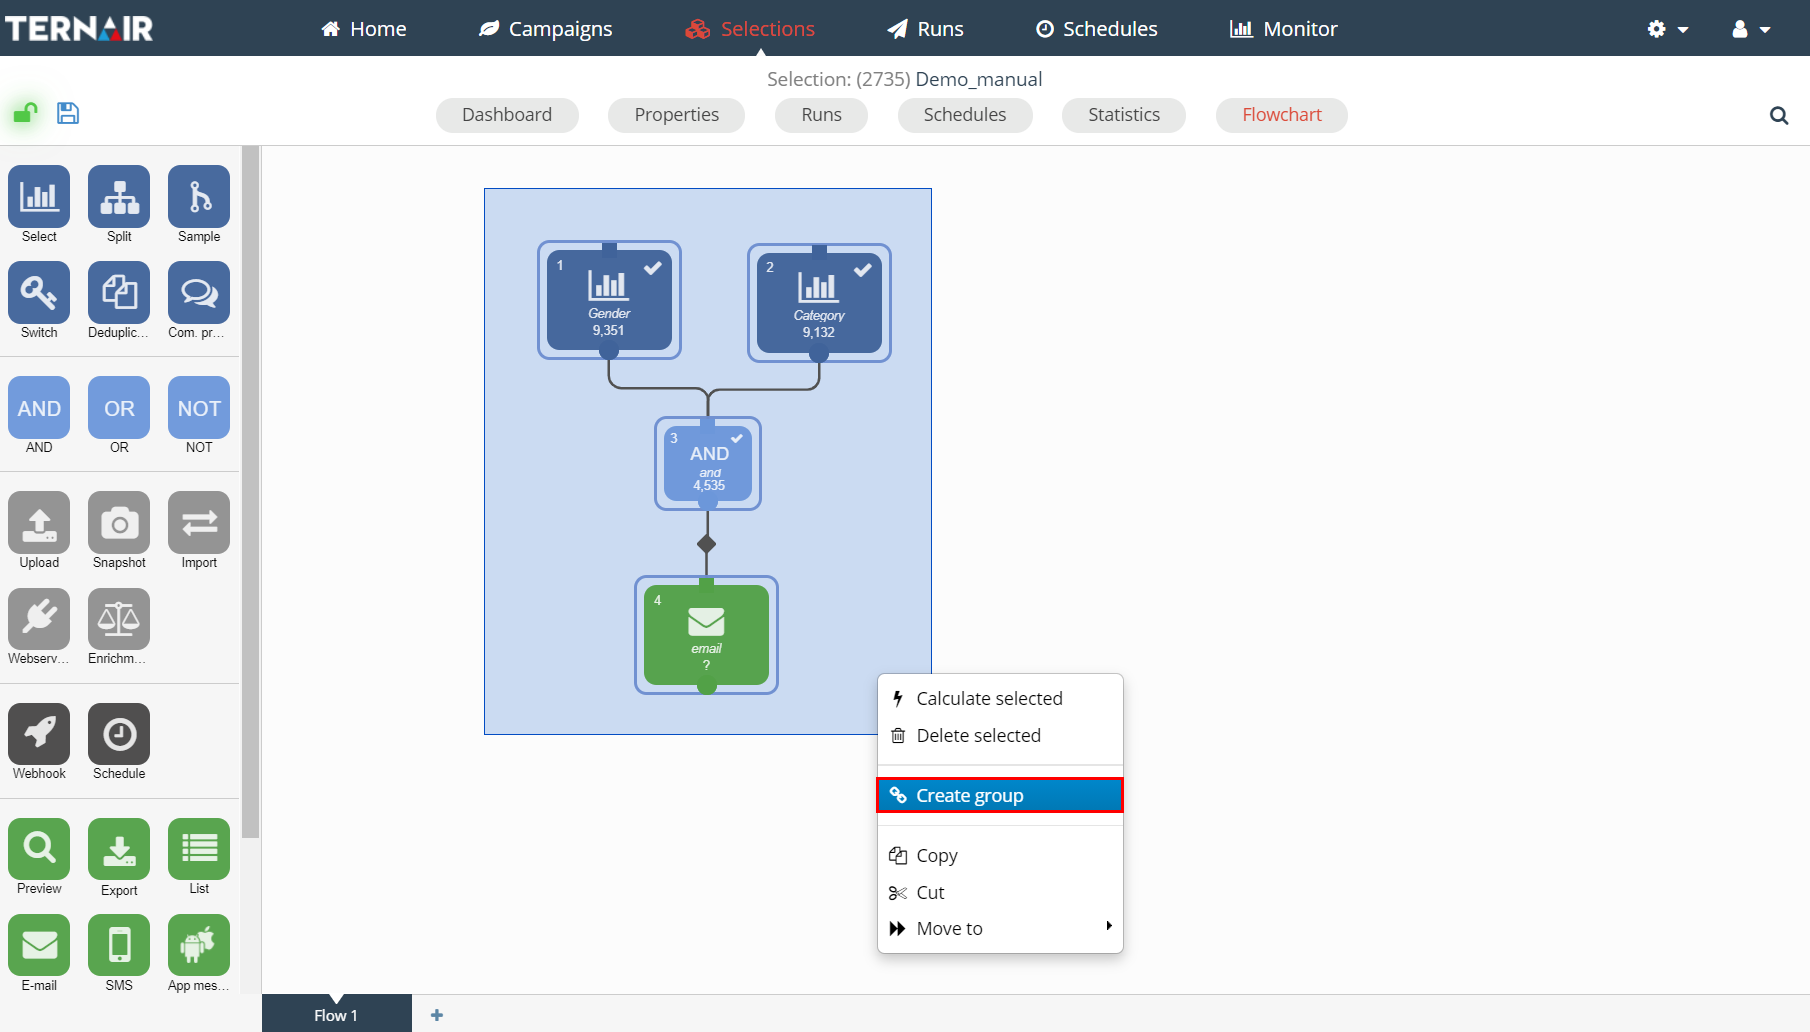
Drag, while holding down the left mouse button, a rectangle around the blocks that you want to place in a group. Once you release the left mouse button a (light) blue area appears around the selected blocks. Right click in the blue area and select ‘Create group’ in order to create a group.
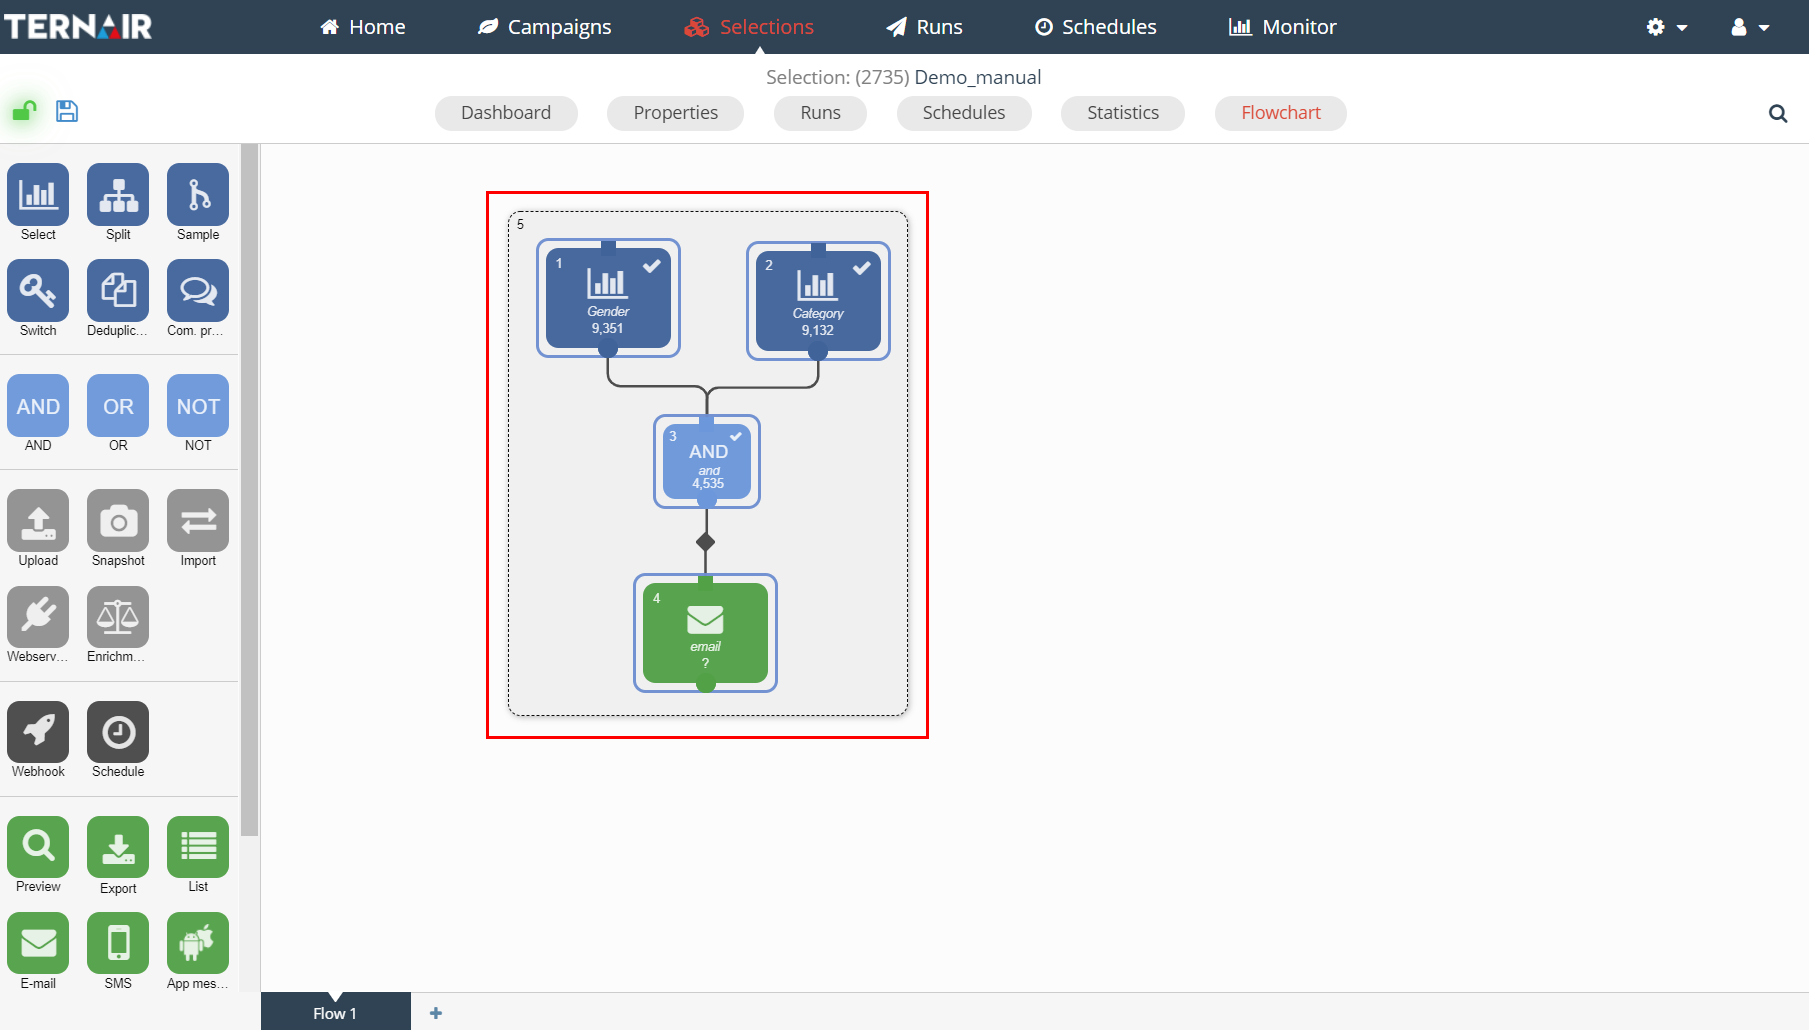
 A group looks like this:
Group settings
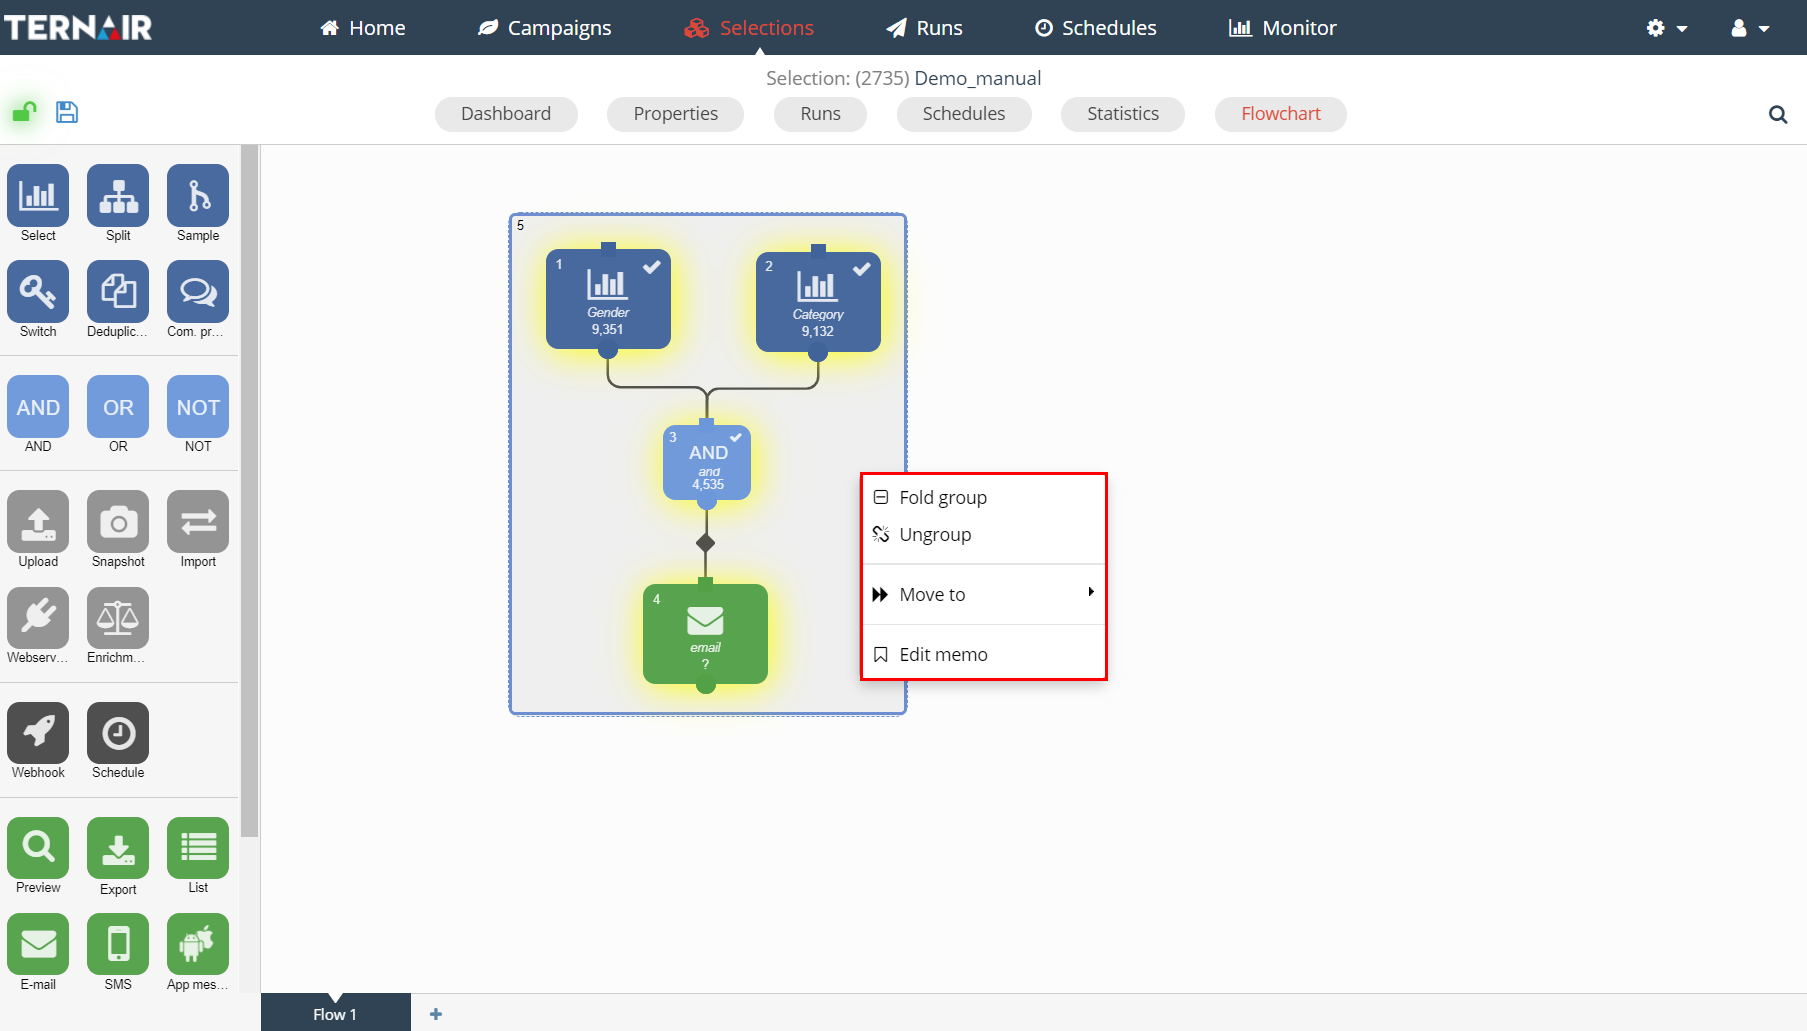
Using the context menu (right click) the group can be collapsed (fold group), removed (ungroup), moved (move to) or a memo can be added to the group (edit memo). See Add memo for more information about adding a memo.
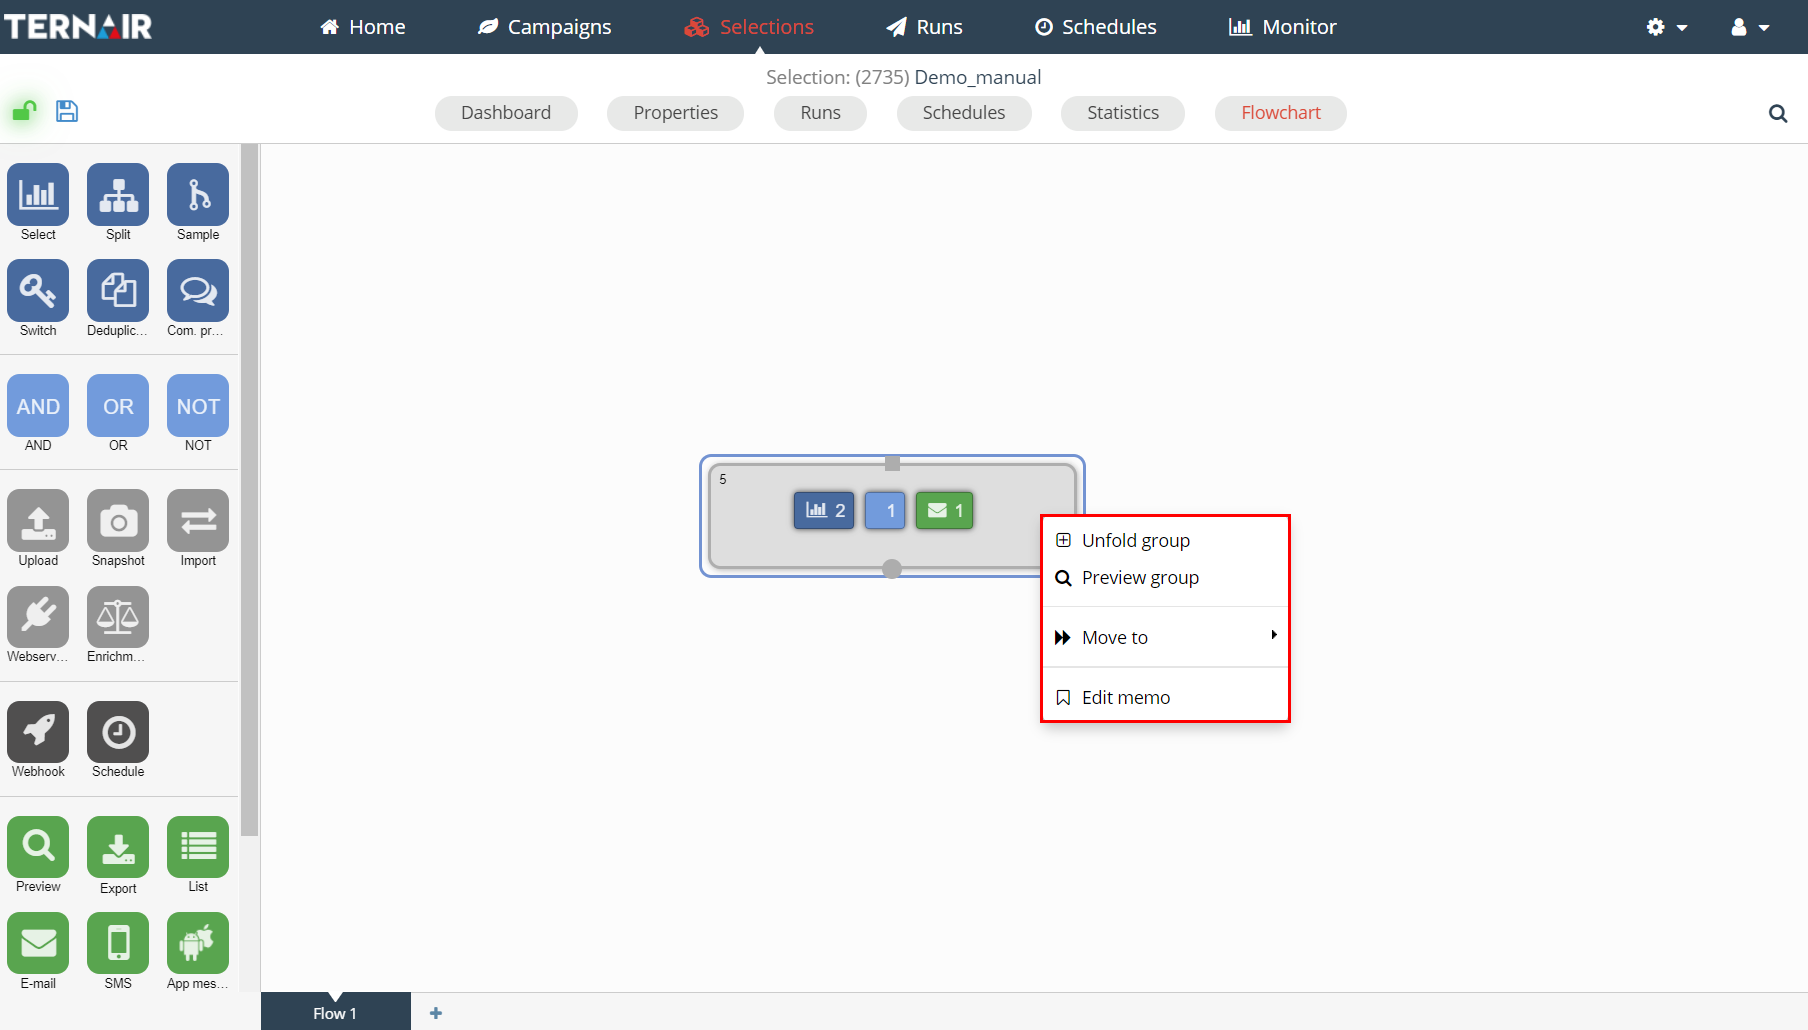
A collapsed group looks like this:
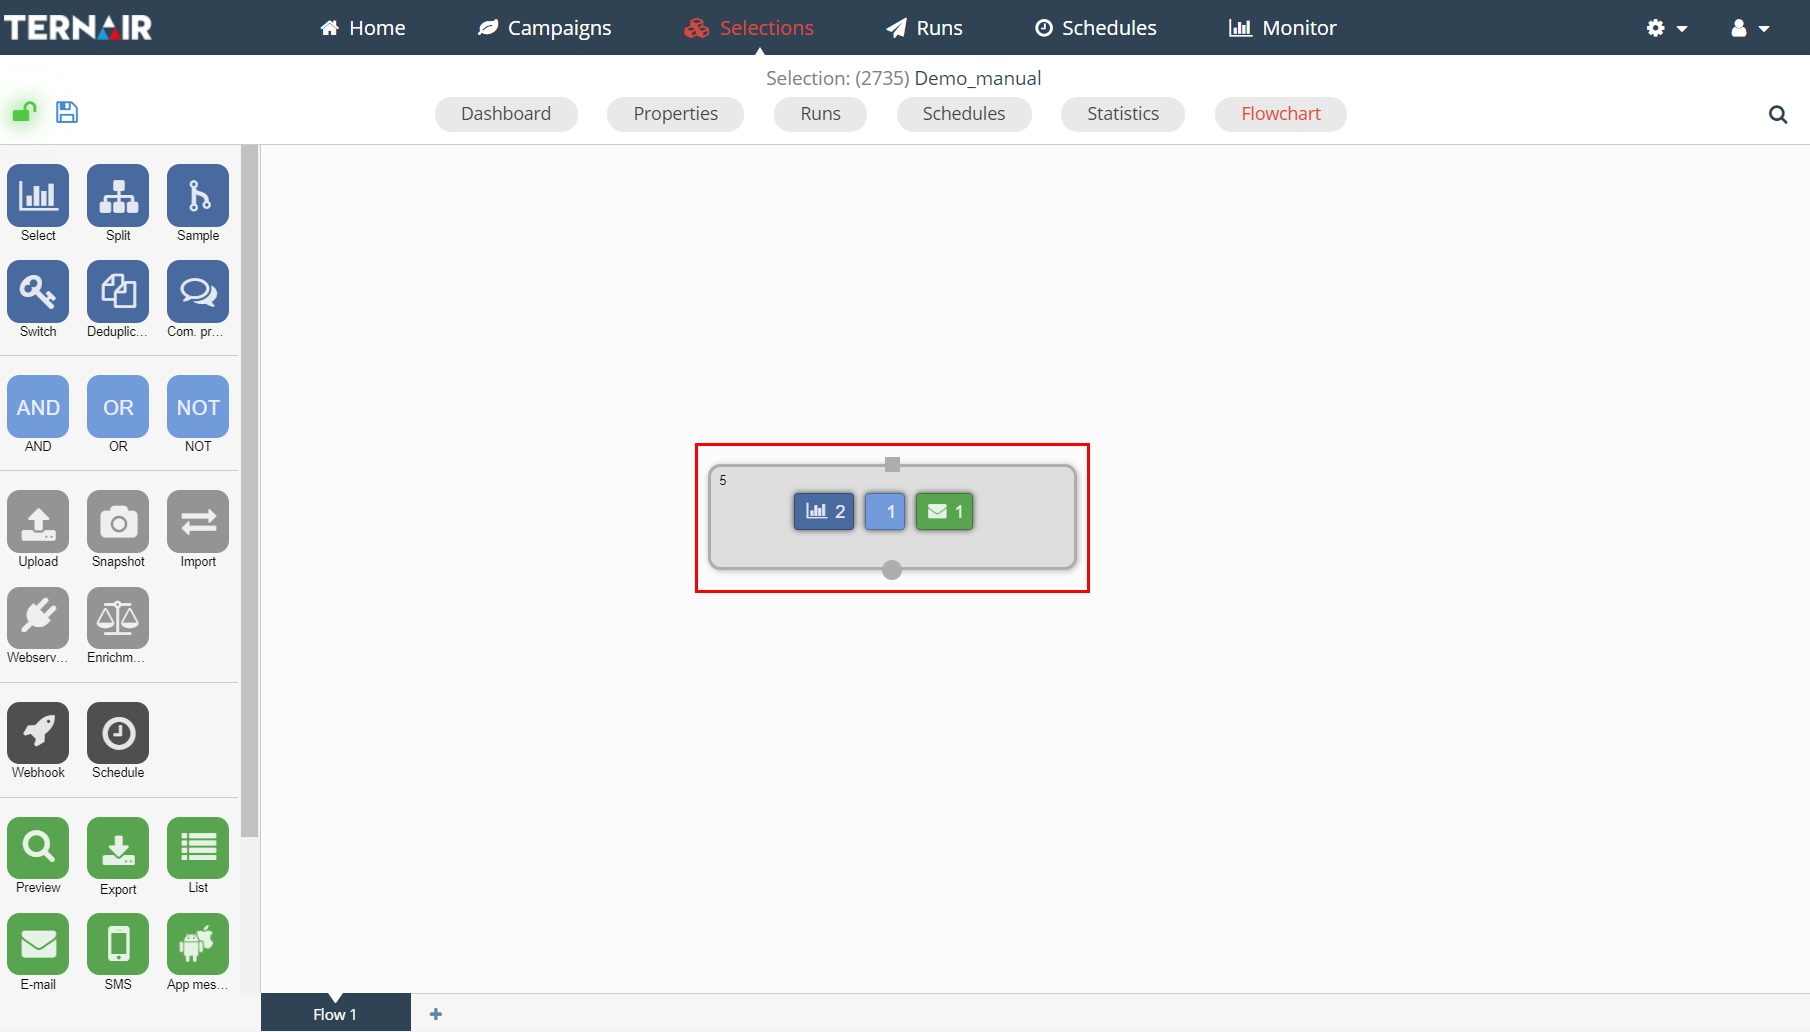
The icons in the group indicate what type of block(s) are included in the group and the number of blocks per type. In the example above the group contains one selection block, one connect block and one e-mail block.
By right clicking on a collapsed group, using the context menu, it can be expanded (unfold group), viewed (preview group), moved (move to) or a memo for the group can be edited (edit memo).
An existing group can be removed using ‘Ungroup’. This function is only available when a group is expanded.
