Embedded forms in Ternair Campaign allow you to easily create and manage forms. Use forms to generate subscriptions to your newsletter, event registrations or as a request method for brochures and/ or white papers. But also as a means to collect data from your target audience so you can apply personalization in your messages and on your website.
Forms Overview
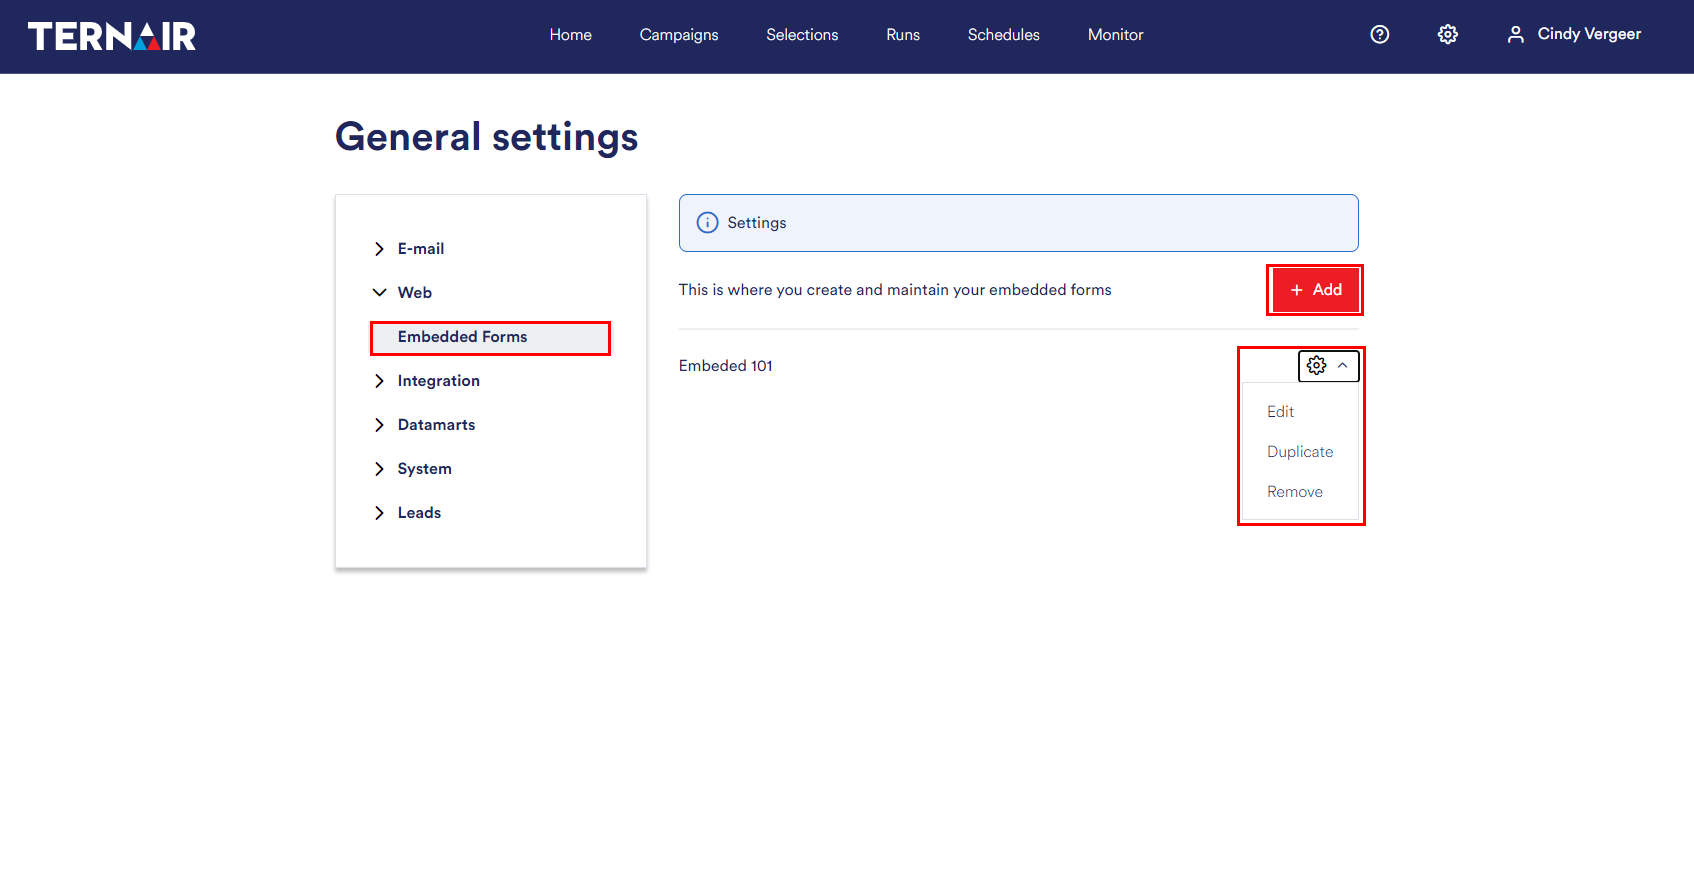
In the global settings, you can view, create, edit and delete Embedded Forms.
Via the ‘Add’ button a new form can be added.
Forms previously added are displayed on this tab. The forms can be edited, duplicated and removed by clicking the gear icon.
The Overview tab looks like this::
New form
After you have clicked the red button Add, you can start a step-by-step plan for creating a form.

The step-by-step plan consists of the following four steps:
- Step 1: Settings
- Step 2: Form builder
- Step 3: Options & properties
- Step 4: Place form
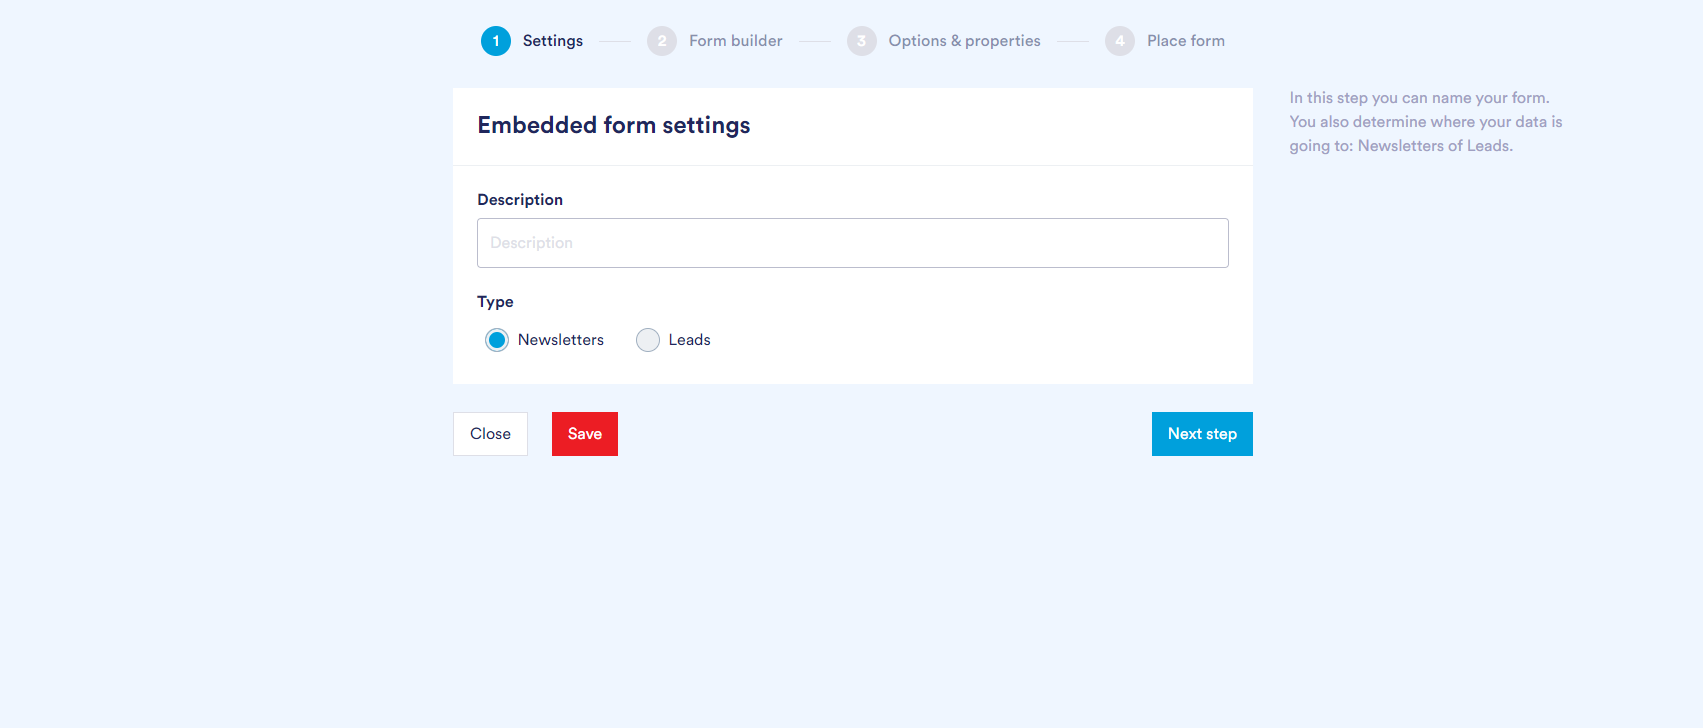
Step 1: Settings
In the first step, you can specify the properties of your form.
- Give a unique Description which describes its intent. The description of your form is for internal use only.
- For Type, indicate which type of form this will be. You can choose from two types of forms:
Note: Embedded forms are only available if you are using the latest version of Ezines and Leads.
Step 2: Form builder
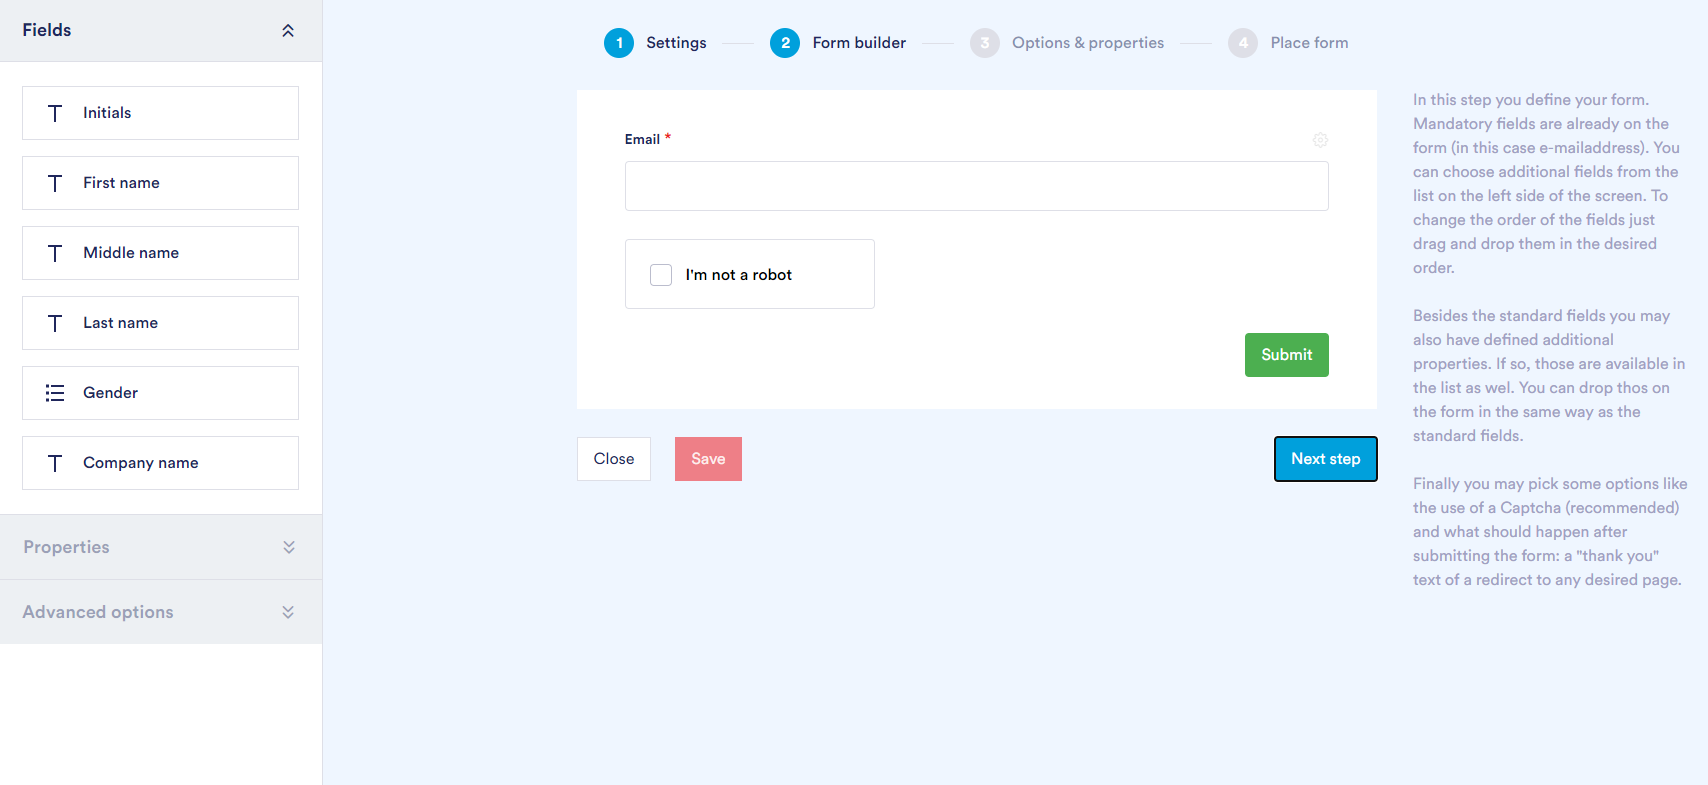
In the second step, you define your form. Mandatory fields are already on the form (in this case email address). In the center of the screen you will see the canvas of the form. On the left side of the screen, you can see the properties of the form.
The screen looks like this:
Fields
You can choose additional fields by dragging them from the available list on the form. To change the order of the fields just drag and drop them in the desired order (drag and drop editor).
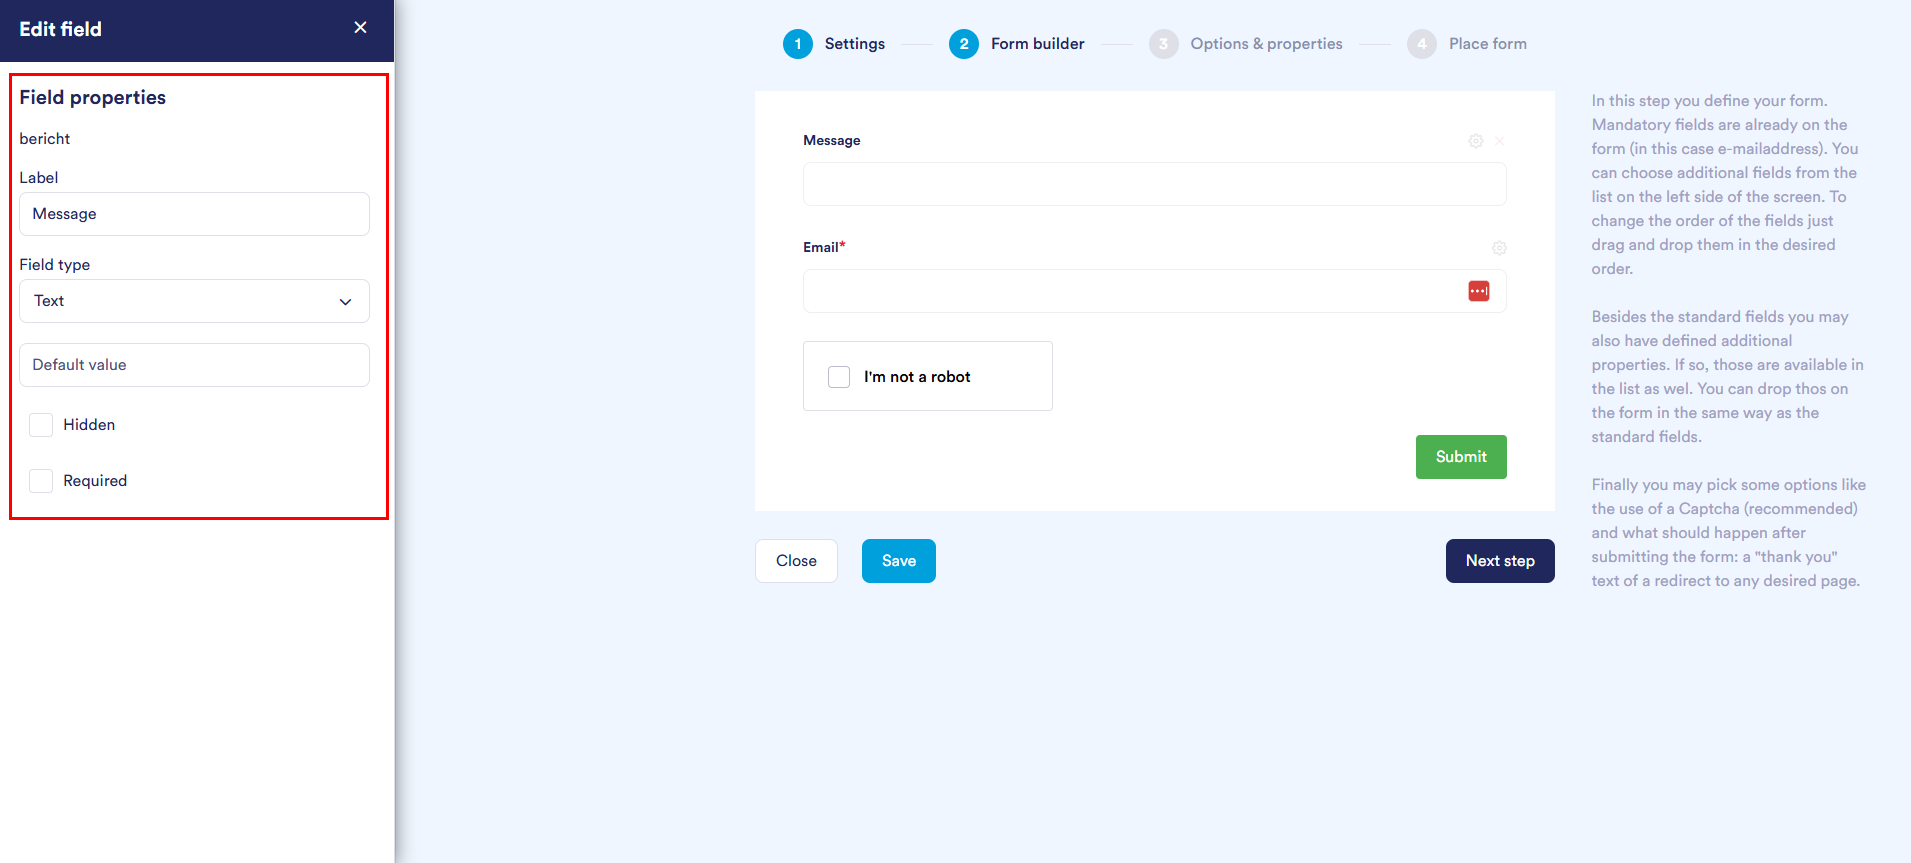
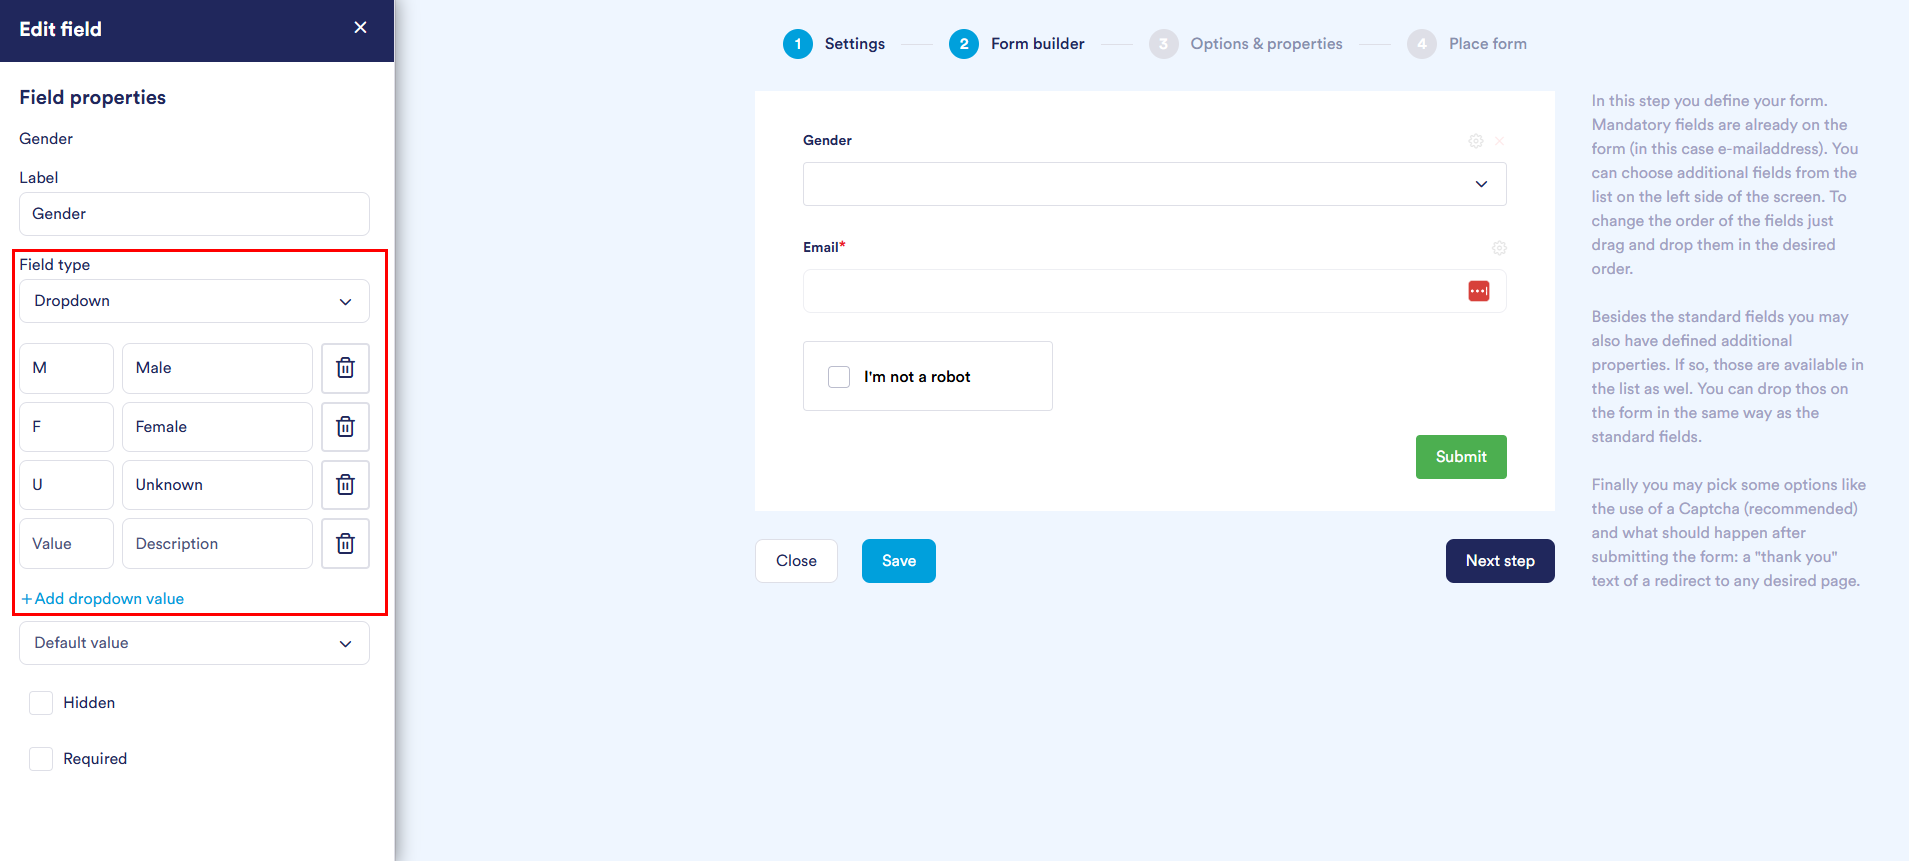
Click the gear icon to edit a field. Each field has the following options:
- With Label, you can edit the name of the field.
- Under Field type you can choose the type of answer field, text or dropdown.
- With Default value, you can assign a default value to the field.
- The Hidden function is used to store a value in the report of your form without the respondent seeing it.
- With the function Required you make a question mandatory. An asterisk (*) will appear behind the question.
Dropdown
When you choose a dropdown, you can define the values available for selection yourself. Using the ‘+ Add value’ button, you can easily add an answer option. For each option, you specify an internal value (which is stored in the database) and a label that is visible to the user when filling out the form.
Properties
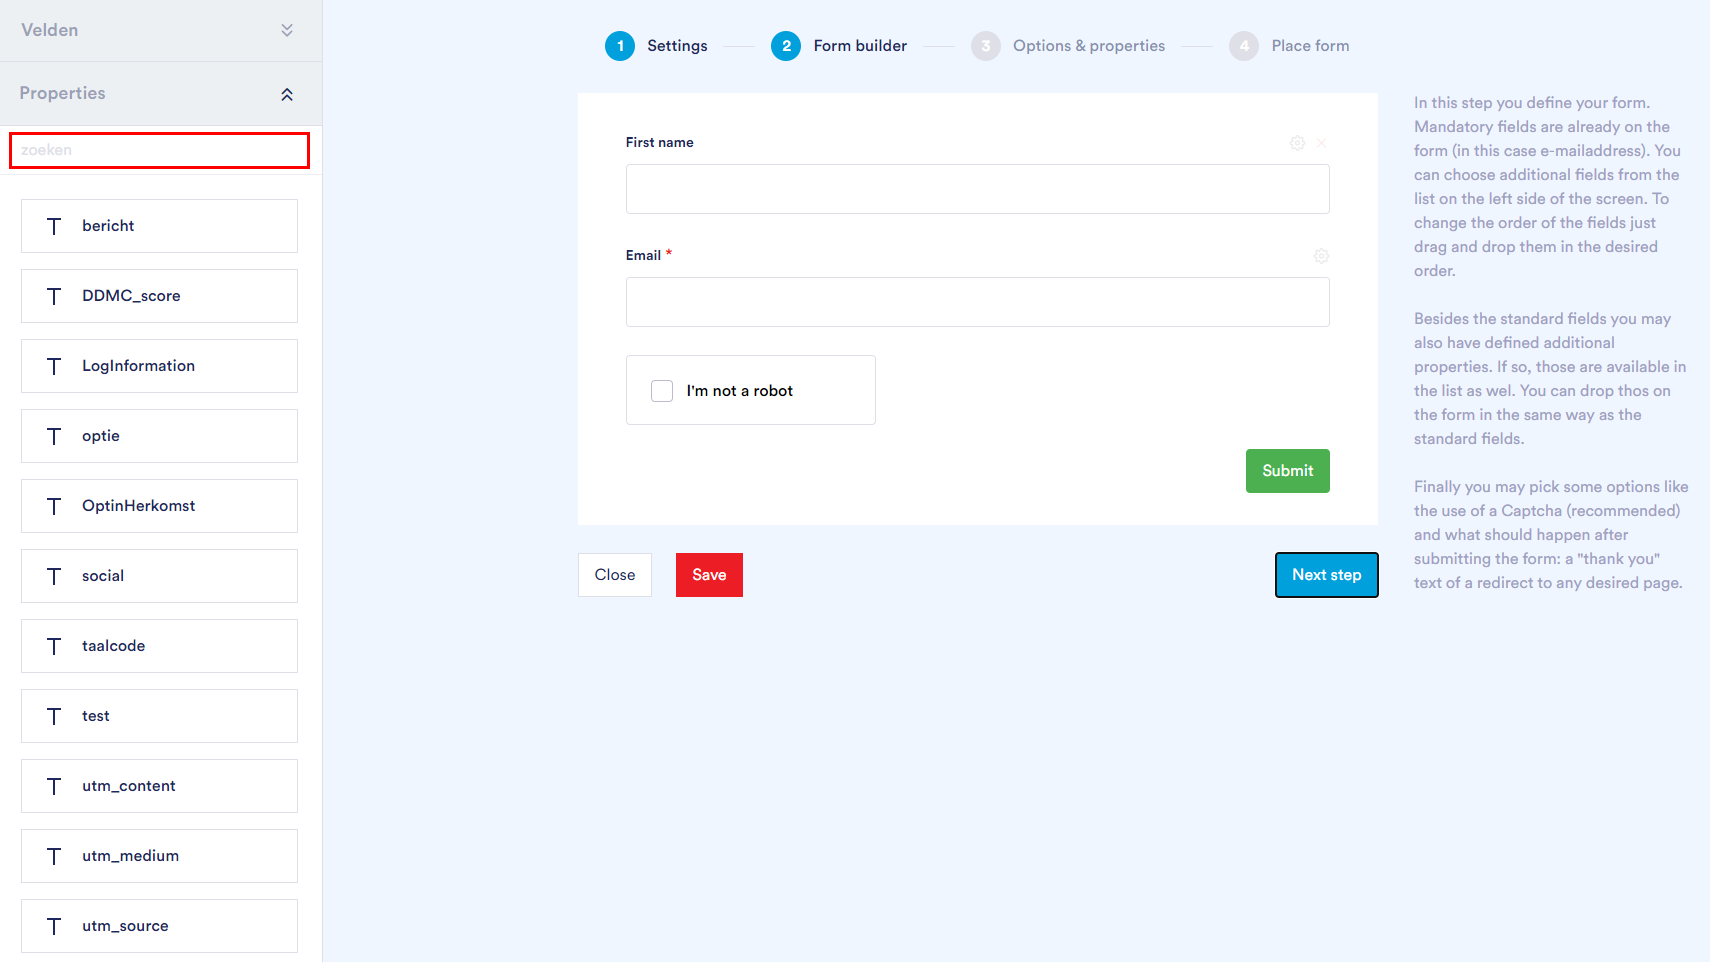
Besides the standard fields you may also have defined additional properties. If so, those are available in the list as wel. You can drop thos on the form in the same way as the standard fields.
Use the search box on the top left to search the available fields.
You can manage the Properties fields in Ternair Ezines or Leads (depending on the selected type).
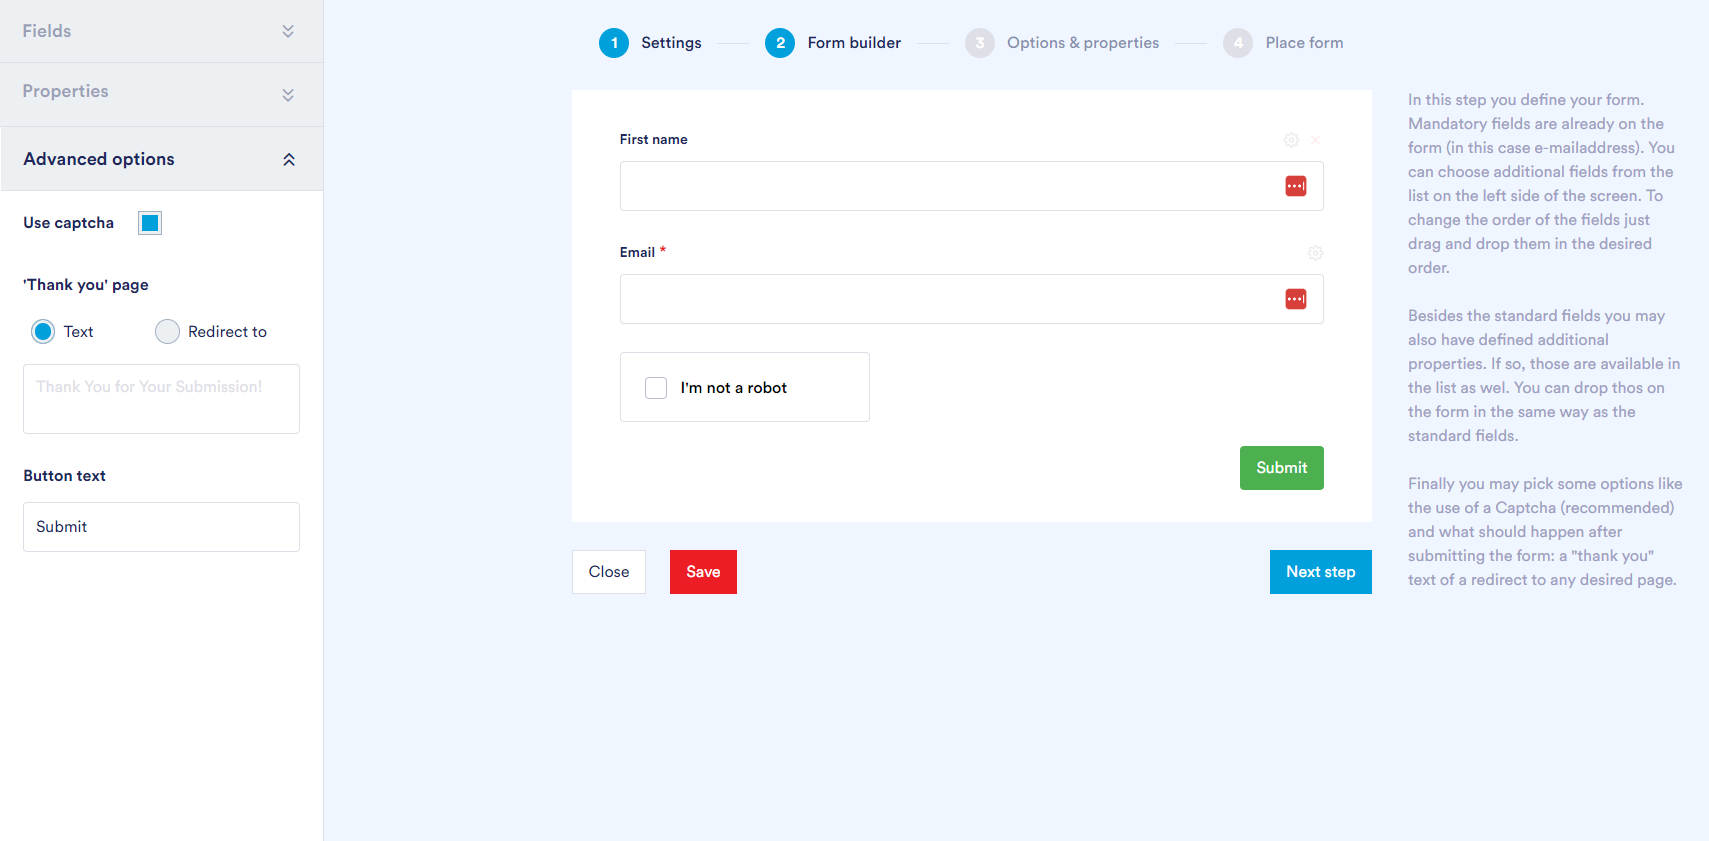
Finally you may pick some options like the use of a Captcha (recommended) and what should happen after submitting the form: a “thank you” text of a redirect to any desired page.
Advanced Options
With Advanced Options you can add additional options to the form:
- With Use Captcha, you can specify whether to add a captcha to the form (recommended).
- With ‘Thank You’ page, you can manage what should happen after the form is submitted. There are two options for setting up a thank you page: place a thank you text in the form or navigate to an external thank you page of your choice.
- With Button text you can customize the button text.
Step 3 Options & properties
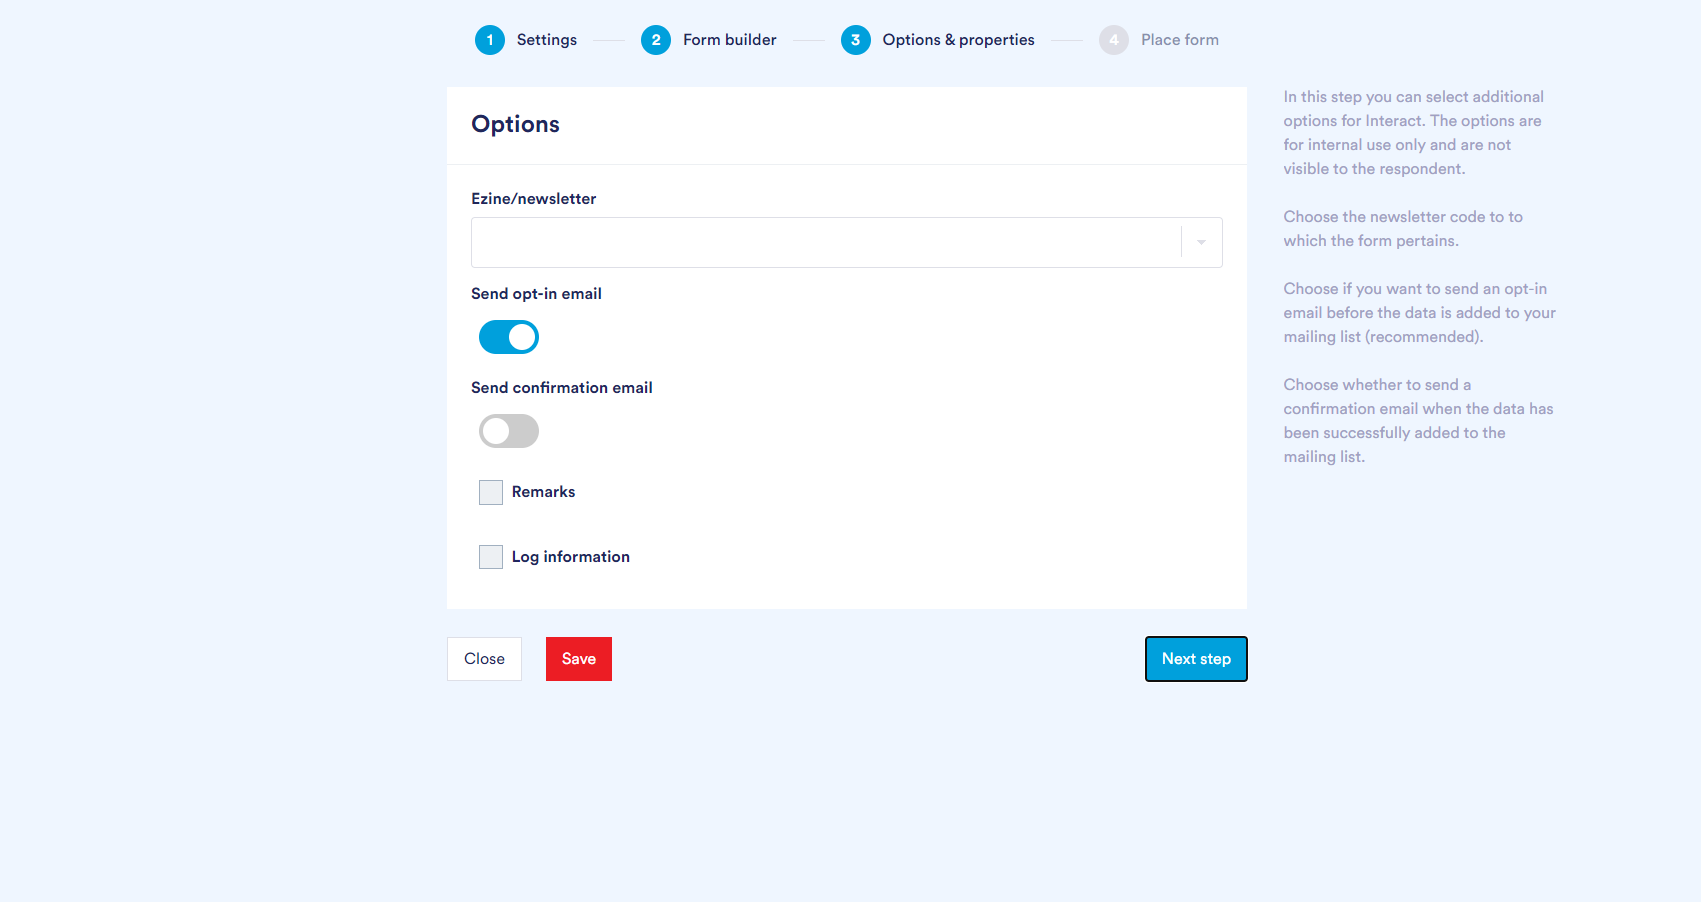
In the third step, depending on the type of form (Ezines or Leads), you can include additional form options for Ternair Ezines or Ternair Leads. The options are for internal use only and are not visible to the respondent.
The form Type Newsletters provides the following options:
- Choose the Ezine/ newsletter code for this form, selected form a list of predefined values.
- Use the Send opt-in email* option if you want to send an opt-in email before the data is added to your mailing list (recommended).
- Use the Send confirmation email* wheter to send a confirmation email when the data has been successfully added to the mailing list.
- With Remarks, you can include additional information that will be stored under the newsletter submission. For example, you can use this field for log information surrounding the notification.
- Log information is volatile information.
*Note: The opt-in email and confirmation email options are only available after a wehbook has been configured and specified in Ternair Ezines.
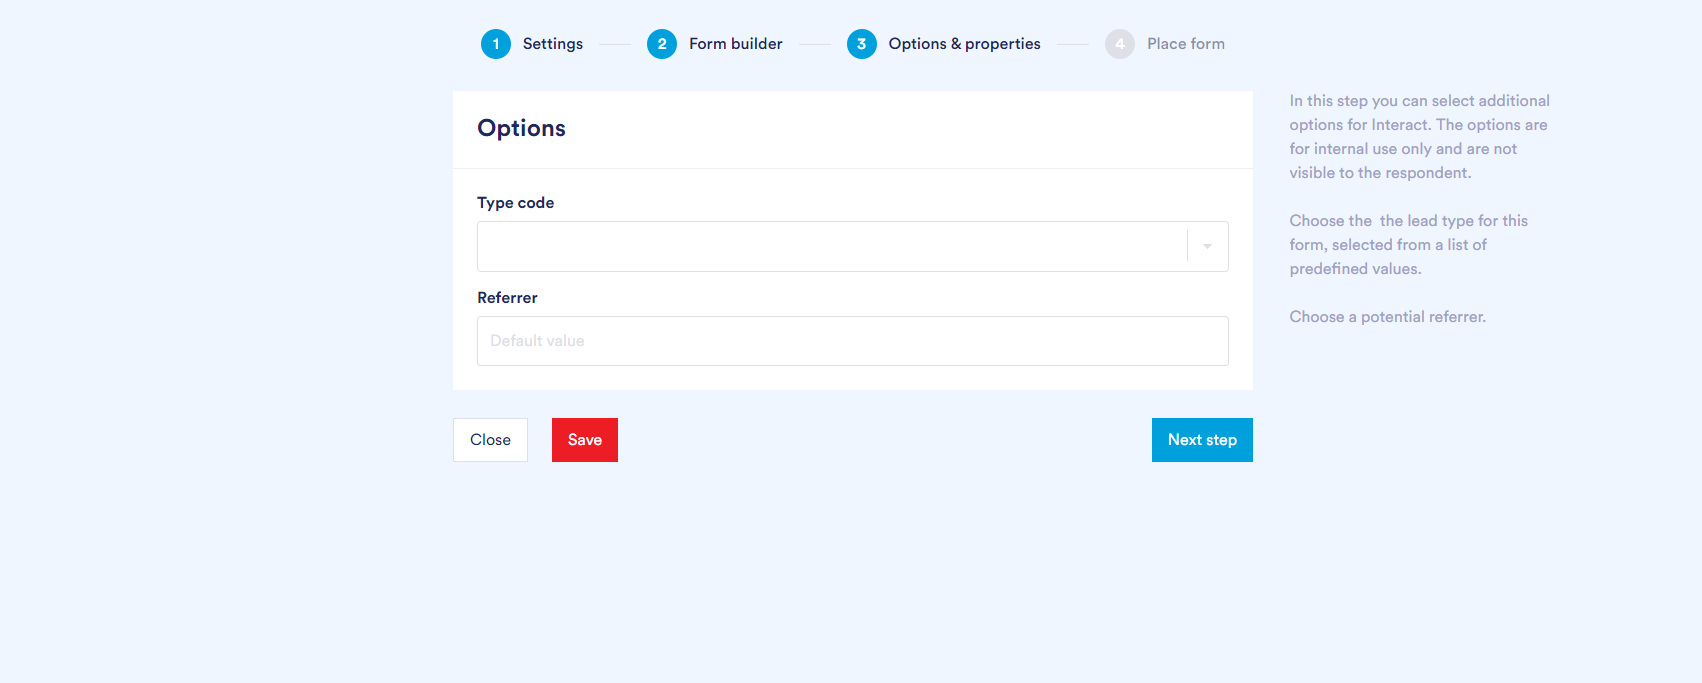
The Type Leads form provides the following options:
- Choose the Type code for this form, selected form a list of predefined values.
- In the Referrer field, you can include an optional referral.
Step 4 Place form
Once you have created the form, you can use the script on your website to render this form*. With the Include UI styling (CSS) checkbox, Ternair’s styling will be included in the script.
You can copy a piece of HMTL and Javascript code from Campaign and paste it into (the HTML of) the page of your CMS system. This script ensures that the form is retrieved from Ternair the moment a visitor lands on this page.
It is possible to place multiple forms on one web page. However, it is then not possible to use a Captcha twice.
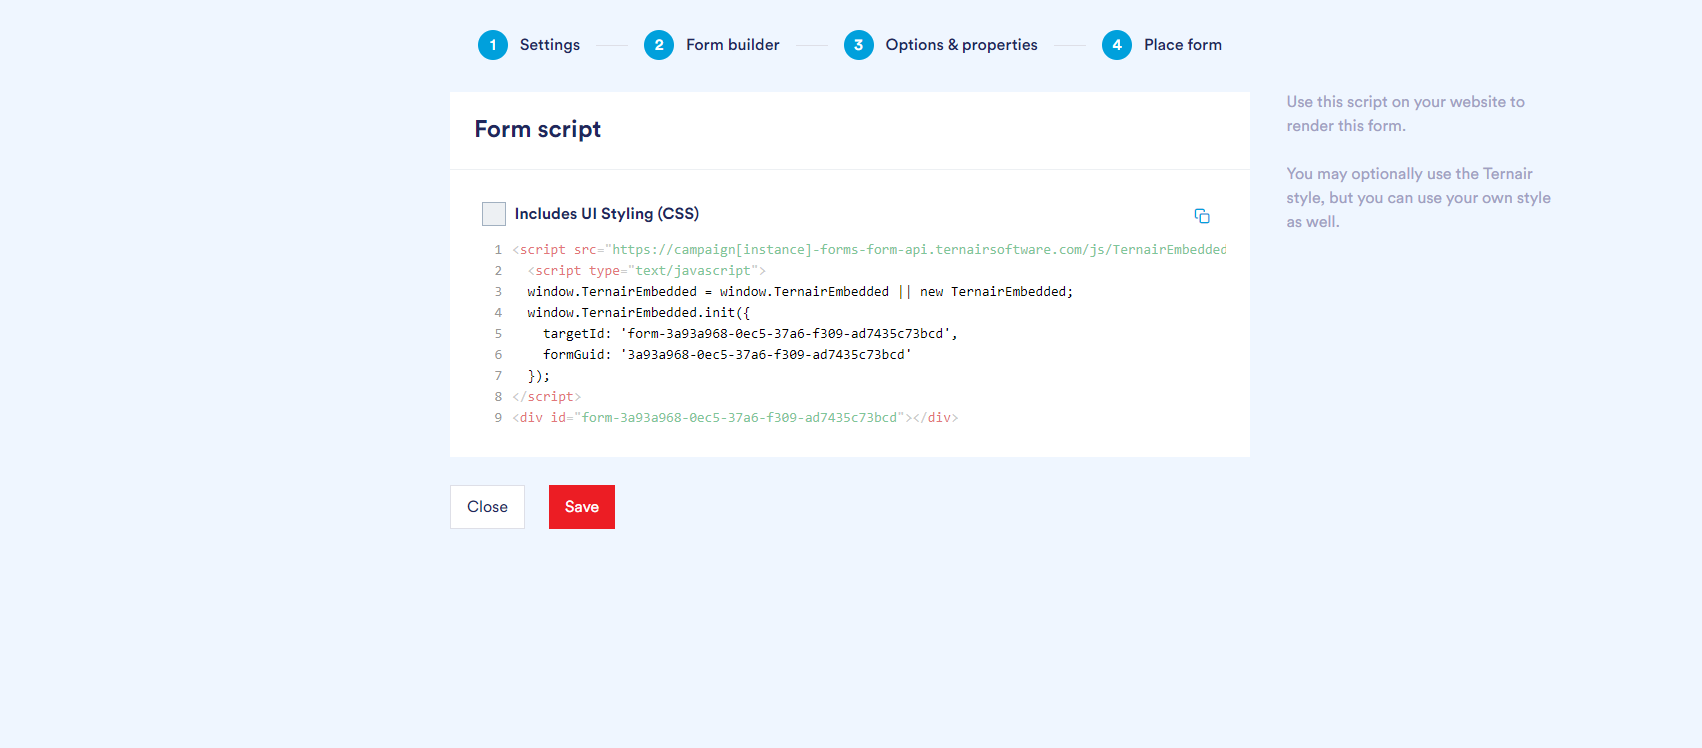
*By default, the form is loaded when the window.onload event fires from the web page in which the script is defined.
If you want to load the script at a later time (for example, because you want to receive user consent first), you use the property ‘immediate’. This property, with value true, ensures that the form is displayed as soon as the script is loaded on the web page and is therefore no longer dependent on the window.onload event.
